

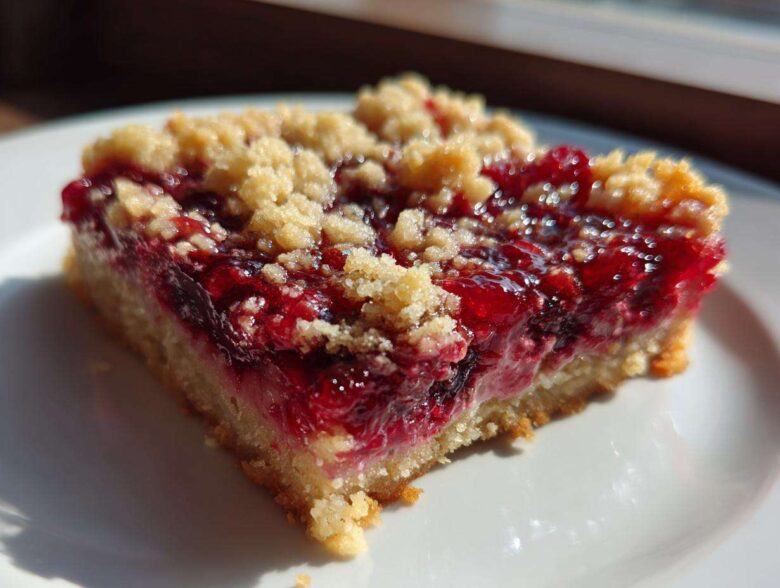
You know those days when you just *need* a dessert that tastes like sunshine? That perfect mix of tart lemon and sweet, bursty summer berries? I totally get it. For years, finding a truly satisfying, reliable dessert bar that was completely gluten-free felt like a quest. Most GF shortbread crumbles turn out sandy or just plain dry. Not these! Trust me when I say I spent way too much time perfecting this recipe because I wanted a good, sturdy base that wouldn’t fall apart when you picked it up. These Gluten-Free Lemon Berry Crumble Bars are the answer! We nailed the shortbread base so it’s perfectly tender but holds up beautifully under that glorious, crunchy streusel topping. Get ready for your new favorite summer treat.
Why You Will Love These Gluten-Free Lemon Berry Crumble Bars
Honestly, these bars check every single box a good dessert should check. It’s the kind of recipe I bring to every picnic and gathering because I know everyone, gluten-free or not, will be reaching for seconds.
- The Perfect GF Texture Combo: You get a buttery, slightly chewy crust married perfectly to that light, crisp crumble topping. No grit, no sand—just pure satisfaction.
- Bright, Zesty Flavor: That lemon filling really sings! It cuts through the sweetness of the butter and berries so nicely. It’s the ultimate summer dessert bar flavor profile.
- Foolproof Gluten-Free Baking: I use a specific blend of GF flour and almond flour, and I promise this combination makes baking with substitutes genuinely easy. I’ve done the testing so you don’t have to!
- They Hold Up! Unlike some fragile gluten-free desserts, these bars are sturdy enough to pack for a lunch or take on a road trip. They also look beautiful when you cut them!
Ingredients Needed for Perfect Gluten-Free Lemon Berry Crumble Bars
Okay, let’s talk ingredients! This is where the magic of making a truly *great* gluten-free dessert happens. You can’t just swap out the flour; you have to build a structurally sound base that still tastes decadent. The key here is the duo flour situation: we’re using a good commercial gluten-free all-purpose flour blend that already has xanthan gum in it—that’s vital for structure—plus some almond flour for richness. Do not skip the cold butter; that’s what creates those flaky pockets in the shortbread!
Pay close attention to the measurements for the crust versus the topping. We use slightly different sugars in each section to enhance the final texture and flavor profile. And for the berries? You want them cold, even if they are frozen! This keeps the filling from getting too runny during those initial bake times. It sounds fussy, but these little details turn good bars into the best bars!
For the Crust and Crumble Topping
This covers the dry and wet components needed for both the shortbread base (which uses most of this mixture) and the reserved portion for the topping.
- 1 1/2 cups gluten-free all-purpose flour blend (must include xanthan gum!)
- 1/2 cup almond flour (for that nutty depth)
- 1/2 cup granulated sugar
- 1/4 teaspoon salt
- 1/2 cup (which is one whole stick) cold unsalted butter, cut into small cubes
- 1 large egg yolk (this helps bind the crust beautifully)
- 1 teaspoon vanilla extract
- *For the Topping:*
- 1/2 cup reserved gluten-free all-purpose flour blend
- 1/4 cup packed light brown sugar (for chewiness in the topping)
- 1/4 cup almond flour
- 1/4 teaspoon salt
- 1/4 cup cold unsalted butter, cut into tiny pieces (kept very cold!)
For the Bright Lemon Berry Filling
This is the bright, zesty heart of our crumble bars. Fresh lemon juice is non-negotiable here—it makes such a difference compared to bottled juice!
- 1 1/2 cups mixed berries (fresh or frozen, and seriously, do not thaw them first!)
- 1/2 cup granulated sugar
- 2 tablespoons cornstarch or arrowroot powder (this thickens the juices perfectly)
- 1/4 cup fresh lemon juice
- 1 tablespoon lemon zest (get all that bright yellow oil!)
Step-by-Step Instructions for Gluten-Free Lemon Berry Crumble Bars
Alright, get your apron on! This is where we turn those beautiful ingredients into something magical. I know there are a few steps, but honestly, once you get the hang of this easy gluten-free baking rhythm, it flies by. The key is managing the heat and making sure everything stays cold when it needs to be cold. Don’t stress about precise timing, just watch for the visual cues, like the bubbling filling!
Assembling the Perfect Gluten Free Shortbread Bars Base
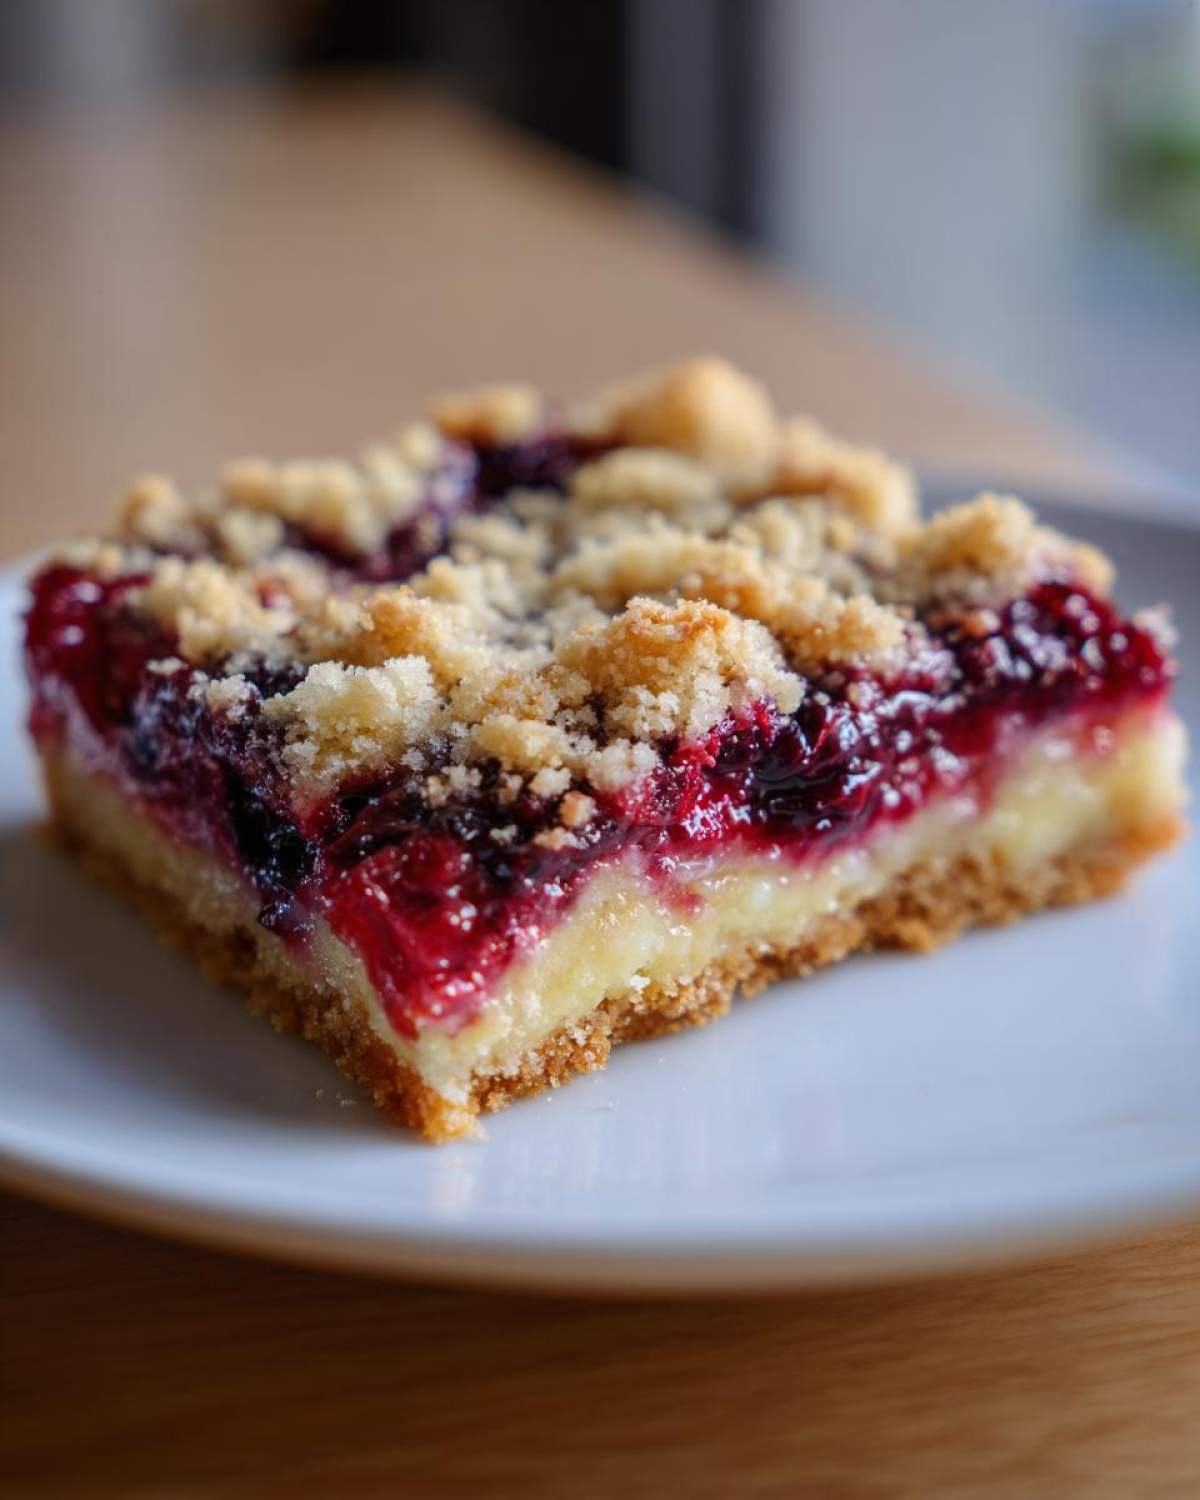
First things first, get that oven preheated to 350°F (175°C). You absolutely have to line that 8×8 inch pan with parchment paper, but make sure you leave an overhang on two sides! That overhang is your handle later when you need to lift these beauties out cleanly. Now, grab that big bowl with your base dry ingredients—the flour blend, almond flour, sugar, and salt. Cut in your cold butter until it looks like coarse sand, then quickly mix in that egg yolk and vanilla. Quick hands are your friend here! Take about two-thirds of that dough and press it firmly and evenly along the bottom of the pan to form our crust. Pop that in the oven for exactly 15 minutes for a pre-bake. We want it starting to set up!
Creating the Zesty Lemon Berry Filling
While the crust is getting its head start, it’s filling time! This is super simple. In a separate bowl, gently introduce the mixed berries to the sugar, the cornstarch (or arrowroot), the fresh lemon juice, and that gorgeous zest. Toss it together super gently—we don’t want to crush our berries into jam just yet! The cornstarch needs to coat everything so when it bakes, the juices thicken up nicely. Set this aside; it’s ready when the crust comes out.
Finishing with the Best Gluten Free Crumble Topping
Now for the streusel! Take the remaining dry ingredients reserved for the topping—the brown sugar gives it such a lovely chew—and cut in the last 1/4 cup of very cold butter. I like to use my fingertips for this part rather than a pastry blender because I can feel when the pieces are perfectly crumbly, about the size of small peas. Remember, cold butter equals that light, crisp Gluten Free Crumble Topping we are aiming for!
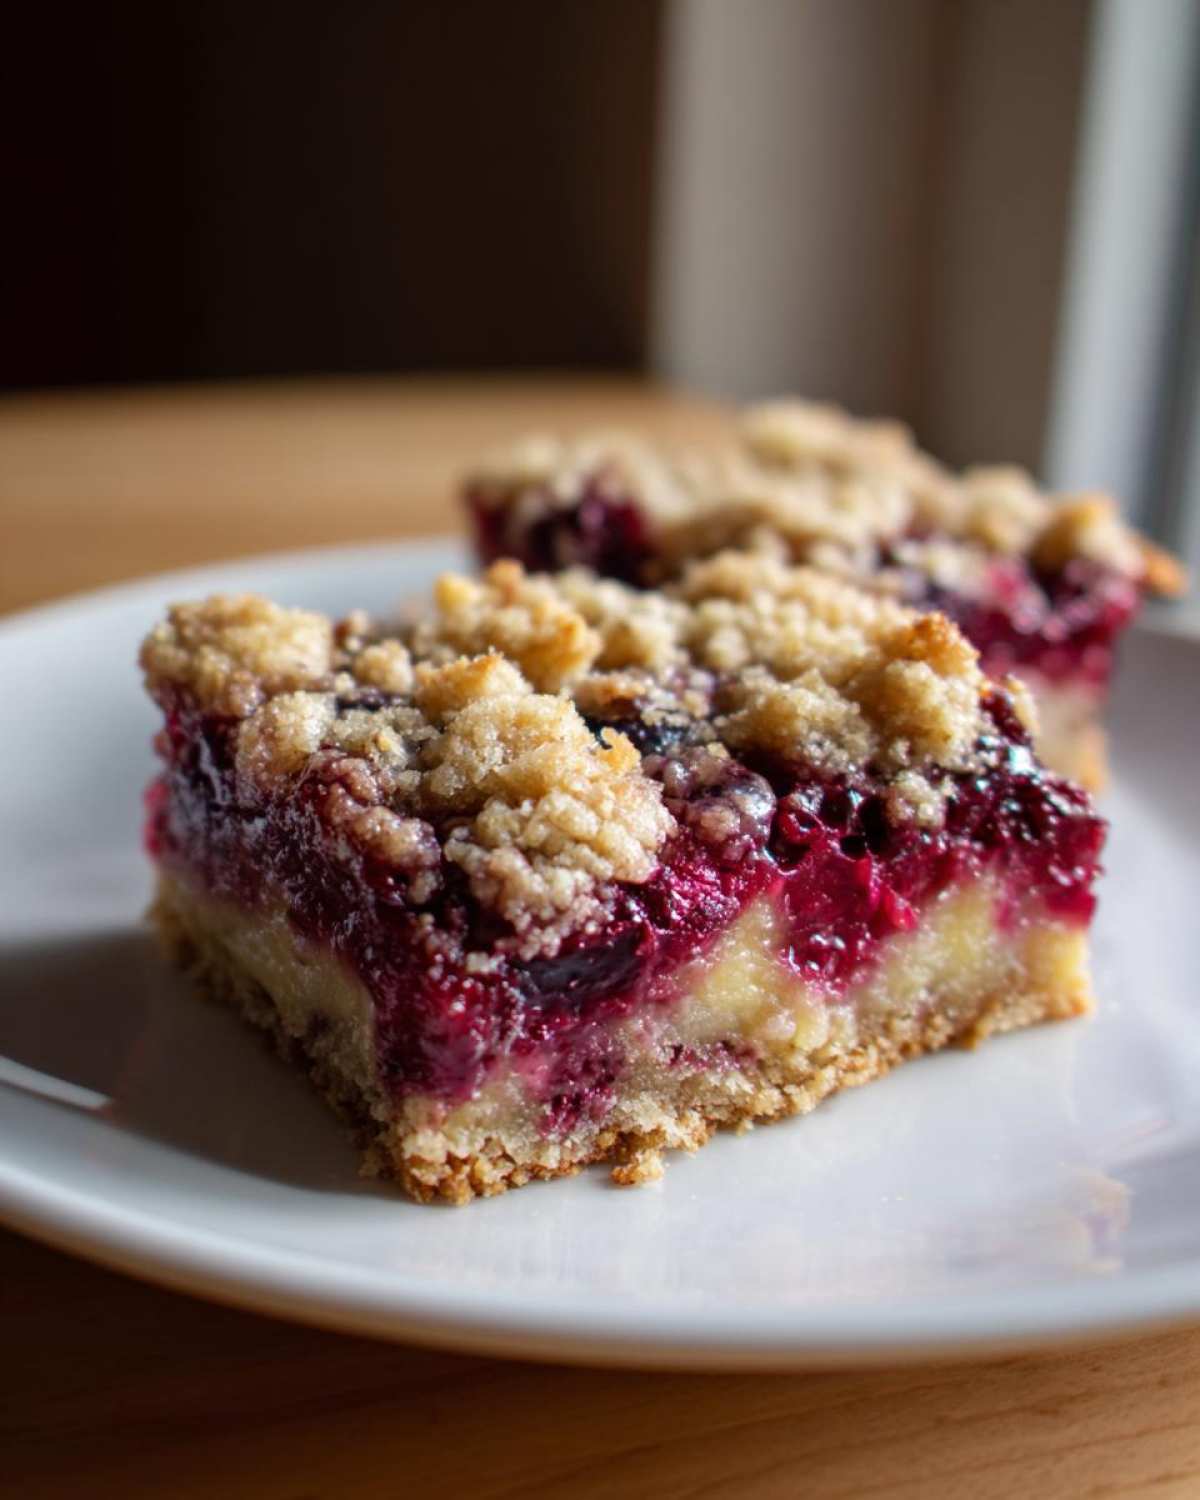
When the crust comes out after 15 minutes, spread that zesty berry mixture right over the hot base. Then, sprinkle that crumbly topping evenly over the berries. Bake everything together for about 35 to 40 minutes. You’re looking for a golden-brown top and filling that’s visibly bubbling up the sides. And here’s the hardest part: you must let these cool completely—at least two hours—on a wire rack before you even *think* about slicing them. Patience pays off tenfold here!
Tips for Success When Making Gluten Free Dessert Bars
Baking gluten-free is all about respecting the physics of the flours, honestly! The biggest mistake I see people make when tackling these Gluten Free Dessert Bars is overmixing the dough once the flour and liquid meet. Remember, there’s no gluten to develop, but overmixing still packs the starches down, leading to a gummy texture instead of that lovely, shortbread feel.
Keep that butter freezing cold for both the base and the topping. Seriously, if the dough feels warm in your hands, pop the whole bowl into the fridge for ten minutes. And please, I beg you, let these bars cool all the way down before slicing! If you try to cut them warm, they *will* crumble apart, even with the xanthan gum working hard for us. Patience is the final secret ingredient!
Ingredient Notes and Substitutions for Your Lemon Berry Crumbles
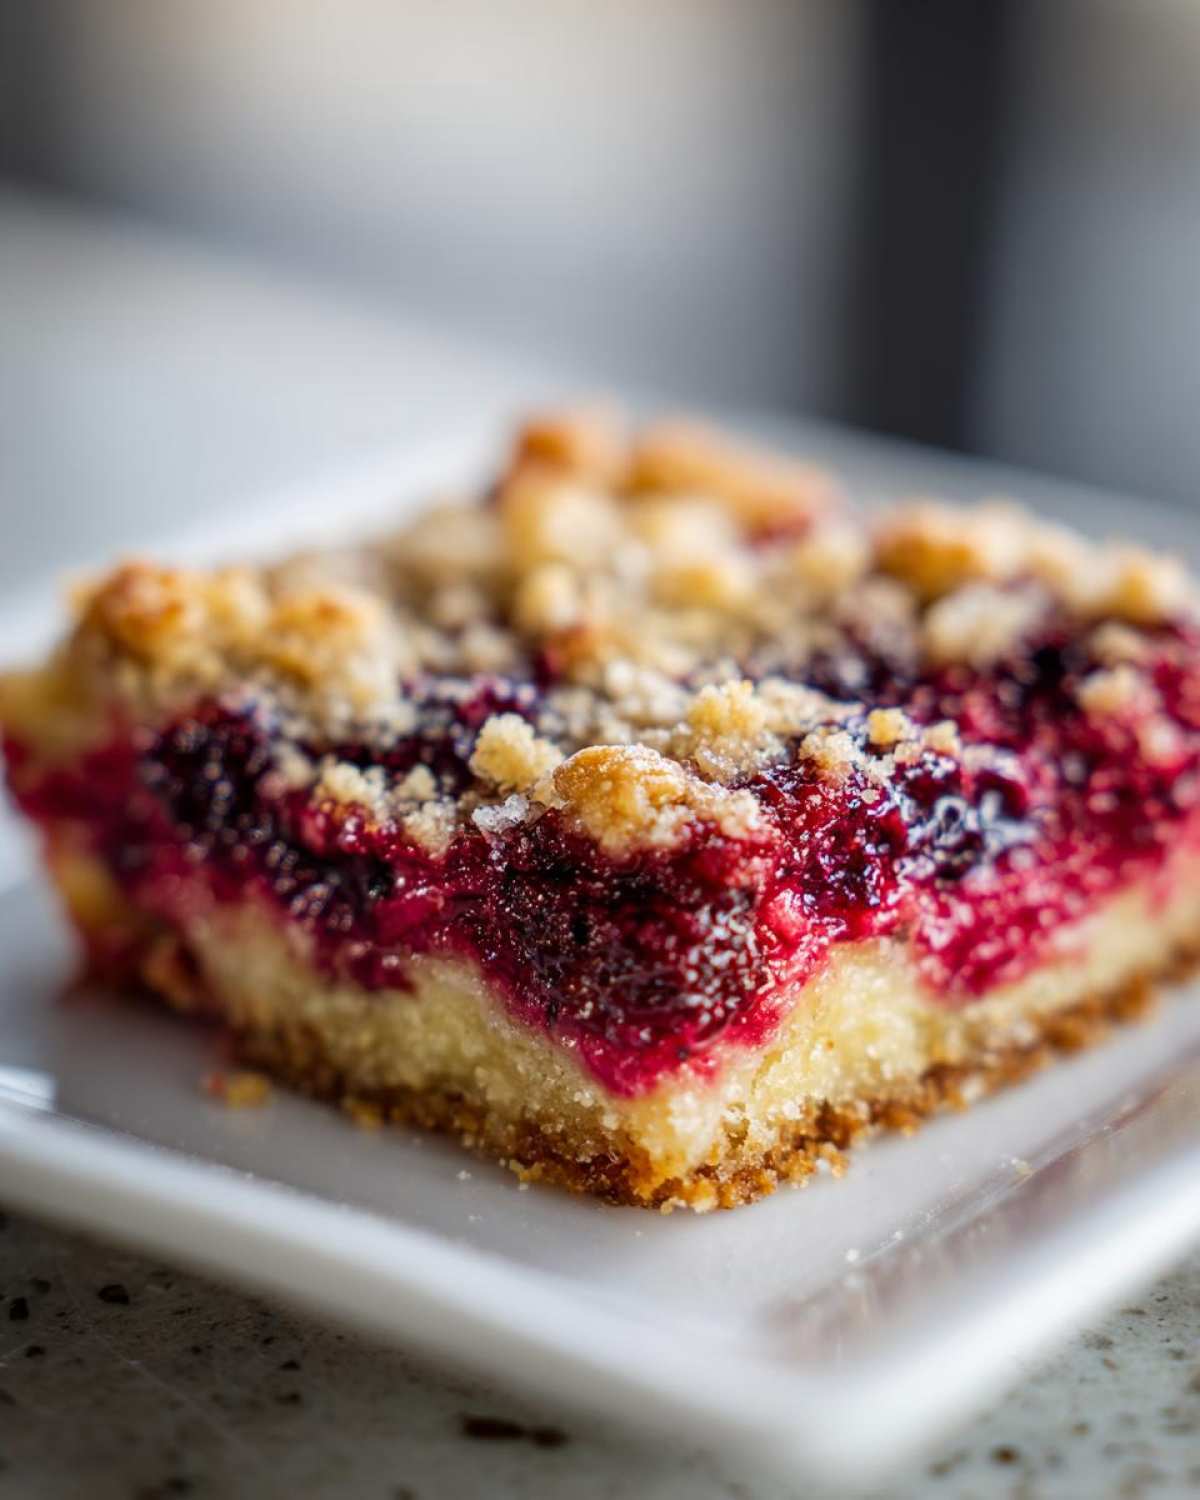
I get so many questions about swapping ingredients, especially when dealing with gluten-free baking, so let’s clear up some common concerns right now! I want you to feel confident making these Almond Flour Berry Bars even if your pantry looks a little different than mine. The goal is always consistency, and understanding how substitutes behave is the best way to ensure success!
The butter situation is usually the easiest swap if you need to keep things dairy-free. You can absolutely use a high-quality vegan butter stick, the kind that looks and feels solid when cold. Just make sure it’s a brand that bakes well because we need that fat content to create melt-in-your-mouth crumbs!
Frozen Berries vs. Fresh Berries
This is probably the most asked question in the summer! If you pick up a bag of beautiful frozen mixed berries, you can use them straight from the freezer—honestly, I do it all the time because it’s convenient. The important part is that you do not thaw them before tossing them in the filling mixture. If they thaw, they release a ton of liquid too early, which messes with our cornstarch ratio, and suddenly your lovely bar filling is running everywhere!
If you’re using fresh berries, great! Make sure they are relatively dry before you add them to the bowl with the sugar and lemon. You just want them coated, not swimming in extra juice.
Flour Blend Alternatives
Because this recipe relies on a very specific balance between the GF all-purpose blend and the almond flour, major swaps can change the texture dramatically. If you can’t find a mainstream GF blend with xanthan gum, you’ll need to add about half a teaspoon of pure xanthan gum to the required amount of your regular GF plain flour.
If you are out of almond flour for the crust, you could try swapping it with an equal amount of oat flour, or even switch to a 1:1 GF blend for that portion, but the flavor will be milder. Don’t try to eliminate the almond flour entirely from the *topping* though; it adds essential structure and crumble!
Making These Dairy Free Lemon Bars Gluten Free
As I mentioned with the butter, switching to a good vegan butter substitute works perfectly for keeping these **Homemade Lemon Crumb Bars GF** and dairy-free. What about the egg yolk? The yolk is mostly for richness and binding in the crust. If you need an egg substitute, a tiny bit of flax egg (one tablespoon of ground flaxseed mixed with three tablespoons of water, let sit 5 minutes) can often stand in for a single yolk in the crust mixture, but honestly, the yolk is less crucial than the very cold butter for texture success!
Storage and Make Ahead Berry Dessert Tips
The great news about these Gluten-Free Lemon Berry Crumble Bars is that they are actually *better* the next day! I know, I know, who can wait? But hear me out—once they cool completely and settle, the flavors meld together beautifully, and the crust firms up even more. This makes them a fantastic make ahead berry dessert for parties!
When it comes to storing them, airtight is the golden rule. I usually store them right on the counter, not in the fridge. The fridge can sometimes dry out gluten-free baked goods faster, even though these are super moist thanks to the berries. Keep them loosely covered in an airtight container at room temperature, and they should stay perfectly delicious for up to three days. If your kitchen is really warm, or if you made them with dairy butter, popping them in the fridge is okay—just bring them to room temperature for about 30 minutes before serving so that buttery crust softens up a bit!
Can you freeze them? Absolutely! If you cut them into individual squares first, you can lay them out on a small baking sheet and pop them into the freezer until solid. Then, transfer the frozen bars into a heavy-duty freezer bag. They keep well for about two months this way. When you want one, just pull it out and let it thaw on the counter for about an hour. Instant nostalgia!
Because they involve a lot of cutting that needs time to set, I always bake these bars the day before I plan to serve them. It takes all the pressure off party day. You just bake them, let them cool completely while you watch your favorite show, and then you can slice them perfectly the next morning. It’s such a handy trick for easy entertaining!
Variations on These Summer Berry Crumble Bars
The base recipe for these bars is so incredibly solid—it’s buttery, it’s citrusy, and it holds up to anything—which means we can have a ton of fun playing around with flavors! I absolutely love being able to pivot based on what’s in season or what I’m craving. These aren’t just one-trick ponies; they are a wonderful base for tons of different Summer Berry Crumble Bars variations.
Don’t feel locked into the mixed berry option, either. Sometimes I want something more singular, something that really lets one fruit shine through. That’s when I start experimenting with swaps for the filling and even adding little kicks to the shortbread base itself!
Swapping Out the Berries
If you have a favorite berry, go for it! The texture works perfectly whether you use fresh or frozen. My absolute favorite switch-up is going heavy on just one type of berry. If you love tartness, use just raspberries—they give the filling a beautiful, deep magenta color. If you want pure sweetness, use only blackberries. Blackberries and lemon are a match made in heaven, truly.
Want to try mixing in something else entirely? If you have some slightly tart chopped rhubarb lying around, try replacing a third of the berries with rhubarb. It gives the whole bar an amazing complexity that goes so well with that touch of almond flour in the crust. You might need an extra teaspoon of sugar in the filling if the rhubarb is very sour, but it is worth the tiny adjustment!
Adding Depth to the Crust and Crumble
This is where you can really surprise people! The shortbread base is neutral enough that you can infuse it with subtle complimentary flavors. Before you add the egg yolk to the crust mixture, try mixing in about half a teaspoon of almond extract right along with the vanilla. Wow! It seriously elevates the almond nuttiness already present from the almond flour. It makes the whole bar feel somehow more sophisticated.
For the topping crumble, if you want a real textural surprise, try mixing in about a tablespoon of rolled oats (just regular ones, not certified GF unless you are strictly reacting to wheat protein in the oats still) or even some chopped pecans or walnuts into the streusel mix before you sprinkle it on. The nuts toast up wonderfully in the oven and add a fantastic crunch factor that breaks up the tenderness of the shortbread underneath. It just gives you another amazing layer of texture!
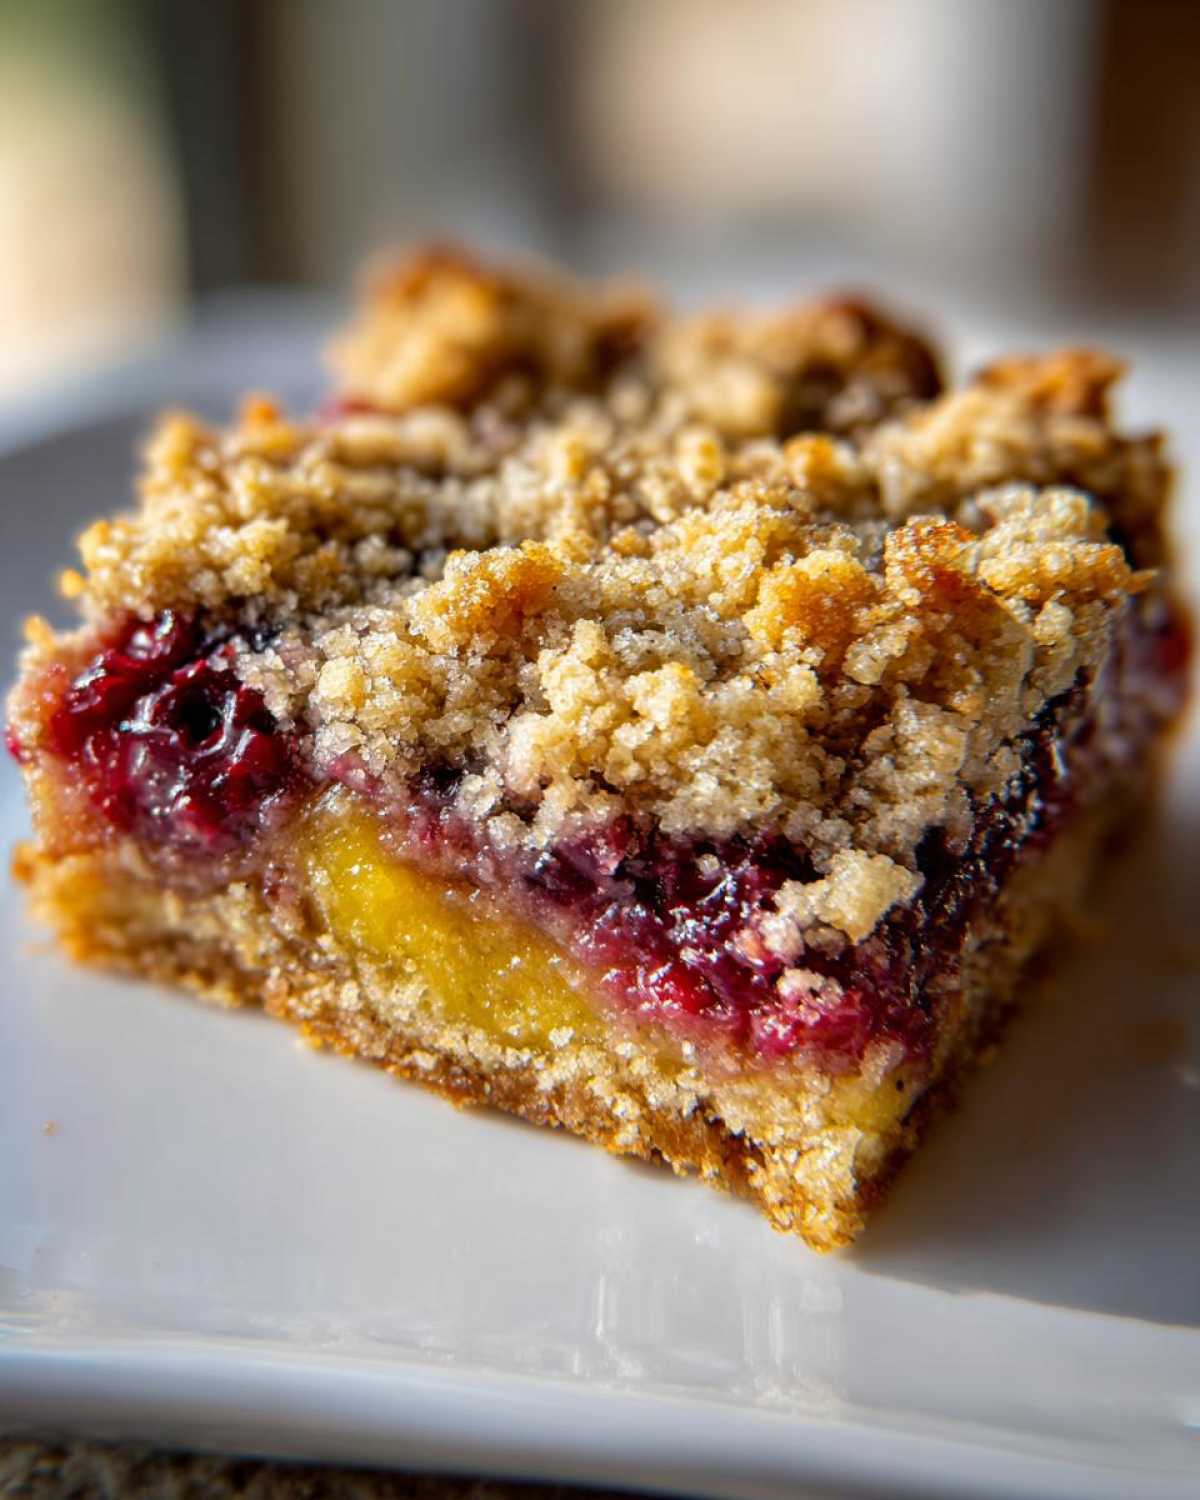
Remember, these are your **Gluten-Free Lemon Berry Crumble Bars**! Feel free to dust the top with a little cinnamon mixed into the brown sugar in the topping if you want a warmer spice note to balance that bright lemon. Honestly, once you make the base once, you realize how versatile these dessert bars are.
Frequently Asked Questions About Homemade Lemon Crumb Bars GF
I know when you’re trying a new gluten-free recipe, you always have a few nagging questions floating around! I’ve tried to cover the biggest ones down here, drawn from every message I’ve gotten about these Homemade Lemon Crumb Bars GF over the years. Hopefully, this clears up any lingering doubts so you can get baking!
Can I use a different gluten-free flour blend than what is listed?
That’s a great question, and the answer depends on what your usual blend is like! The recipe calls specifically for a blend that includes xanthan gum for structure. If you use a blend that *doesn’t* have xanthan gum, you absolutely must add about half a teaspoon to the crust and another half teaspoon to the topping dry ingredients separately. If your blend is mostly rice or tapioca flour, the texture might turn out a bit softer than I prefer, but they will still taste fantastic. Stick as closely as you can to a reliable all-purpose GF blend for the base!
How do I keep the crumble topping from burning before the center is done?
This is super common, especially in ovens that run hot! If you notice your topping getting too deeply golden brown about halfway through the total bake time, here’s my fix: take a small square of aluminum foil and just gently lay it over the top of the bars. It shields the crumble from direct heat while letting the underneath—the filling and the bottom crust—continue to cook through. I usually do this for the last 10 to 15 minutes of baking time. It works like a charm for protecting those gorgeous Gluten Free Crumble Topping edges!
Is it possible to make these bars dairy-free without compromising texture?
Yes, you totally can! Butter provides essential richness, but modern vegan butter substitutes are excellent these days because they are made to hold their shape when cold. When swapping, use a high-quality, solid stick-style vegan butter in place of the unsalted butter for both the crust and the topping. Because the cold temperature is key to cutting those crumbs, make sure your vegan butter is chilled thoroughly before you start mixing. I’ve found the texture comes out nearly identical when using the right substitute!
My filling looks watery, not thick like yours—what went wrong?
Ugh, watery filling is the worst disappointment! This almost always comes down to one of two things. First, did you use frozen berries? If so, you *must* toss them with the cornstarch while they are still frozen solid. If they start to thaw, the moisture leaches out before the cornstarch can fully activate in the oven, and you end up with soup. Second, ensure you’re using enough cornstarch or arrowroot! It needs that little boost to counteract the juice from those lovely berries. If you suspect your berries were extra juicy, next time, try adding just a half teaspoon more of the thickener.
Can I easily adapt this recipe for a larger 9×13 pan?
You certainly can adapt these for a larger pan if you’re serving a crowd! To transition these easy Gluten Free Dessert Bars to a 9×13 inch pan, you’ll need to increase all ingredients by about 50%. That means approximately 2 1/4 cups of your GF blend, 3/4 cup almond flour, and so on. Because the layer of dough will be thinner, you’ll need to reduce your baking time slightly—maybe start checking at the 30-minute mark instead of 35. Watch the topping color; that’s your best cue!
Estimated Nutritional Snapshot for Gluten-Free Lemon Berry Crumble Bars
Now, I know some of you are watching the macros, and some of you just want to know if this treat will ruin your day—I get it! Finding a homemade treat that tastes amazing while navigating gluten-free restrictions can be tricky, so having a general idea of what’s in these bars helps!
I pulled all this information directly from the recipe quantities, focusing on standard ingredient usage. Please remember this is just a guide when you’re serving up these incredible Gluten Free Dessert Recipes. If you swap brown sugar for coconut sugar or use a different brand of butter, these numbers will shift a little bit. It’s all about iteration in the kitchen, right?
When you calculate these figures, it’s based on yielding 16 bars from the 8×8 pan. A single bar is a beautiful portion—sweet, satisfying, and perfect as an afternoon pick-me-up!
- Serving Size: 1 bar
- Calories: Approximately 240
- Sugar: 18g (That’s where the berries and brown sugar come in!)
- Total Fat: 12g
- Protein: 3g
- Total Carbohydrates: 32g
Notice the good fiber count (around 2g per bar)? That really comes from using the almond flour and all those wonderful berries we packed in there! It’s a treat that I feel much better serving because it’s full of whole-food ingredients rather than highly processed fillers. Enjoy every bite!
PrintGluten-Free Lemon Berry Crumble Bars
Make these easy, flavorful dessert bars featuring a gluten-free shortbread base, a bright lemon and mixed berry filling, and a crisp crumble topping.
- Prep Time: 20 min
- Cook Time: 55 min
- Total Time: 1 hour 35 min
- Yield: 16 bars
- Category: Dessert
- Method: Baking
- Cuisine: American
- Diet: Gluten Free
Ingredients
- 1 1/2 cups gluten-free all-purpose flour blend (with xanthan gum)
- 1/2 cup almond flour
- 1/2 cup granulated sugar
- 1/4 teaspoon salt
- 1/2 cup (1 stick) cold unsalted butter, cut into cubes
- 1 large egg yolk
- 1 teaspoon vanilla extract
- 1 1/2 cups mixed berries (fresh or frozen, do not thaw)
- 1/2 cup granulated sugar
- 2 tablespoons cornstarch or arrowroot powder
- 1/4 cup fresh lemon juice
- 1 tablespoon lemon zest
- 1/2 cup gluten-free all-purpose flour blend
- 1/4 cup packed light brown sugar
- 1/4 cup almond flour
- 1/4 teaspoon salt
- 1/4 cup cold unsalted butter, cut into small pieces
Instructions
- Preheat your oven to 350°F (175°C). Line an 8×8 inch baking pan with parchment paper, leaving an overhang on two sides for easy removal.
- Prepare the crust: In a medium bowl, whisk together the 1 1/2 cups gluten-free flour blend, almond flour, 1/2 cup granulated sugar, and 1/4 teaspoon salt.
- Cut in the cold butter using a pastry blender or your fingers until the mixture resembles coarse crumbs. Mix in the egg yolk and vanilla extract until just combined.
- Press about two-thirds of the mixture evenly into the bottom of the prepared pan to form the crust. Bake for 15 minutes.
- Prepare the filling: While the crust bakes, gently toss the mixed berries, 1/2 cup sugar, cornstarch, lemon juice, and lemon zest in a separate bowl until the berries are coated.
- Prepare the crumble topping: In a small bowl, combine the remaining 1/2 cup gluten-free flour blend, brown sugar, almond flour, and 1/4 teaspoon salt. Cut in the 1/4 cup cold butter until crumbly.
- Remove the partially baked crust from the oven. Spread the berry filling evenly over the hot crust.
- Sprinkle the crumble topping evenly over the berry layer.
- Bake for 35 to 40 minutes, or until the topping is golden brown and the filling is bubbly.
- Let the bars cool completely in the pan on a wire rack (at least 2 hours) before lifting them out using the parchment paper overhang and cutting them into squares.
Notes
- If using frozen berries, do not thaw them before mixing with the filling ingredients.
- For a dairy-free version, substitute the butter with a solid, high-quality vegan butter alternative.
- You can substitute the mixed berries with just blueberries or raspberries if preferred.
- Store cooled bars in an airtight container at room temperature for up to 3 days.
Nutrition
- Serving Size: 1 bar
- Calories: 240
- Sugar: 18g
- Sodium: 85mg
- Fat: 12g
- Saturated Fat: 6g
- Unsaturated Fat: 6g
- Trans Fat: 0g
- Carbohydrates: 32g
- Fiber: 2g
- Protein: 3g
- Cholesterol: 30mg
