

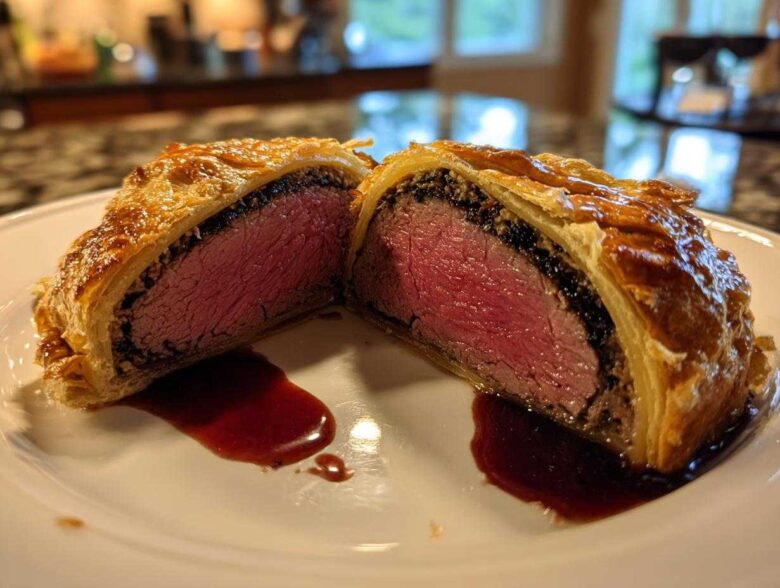
Listen, if you’re looking for a recipe that whispers luxury and screams ‘special occasion,’ the **Beef Wellington** is it. I get it—it looks intimidating! For years, I thought this classic English roast was reserved only for fancy chefs, but trust me, after tackling it dozens of times for big family holidays, I figured out the exact, non-negotiable steps to make it seamless. This isn’t just another dinner; it’s a centerpiece! This guide cuts through the nonsense and focuses only on what matters: searing that beautiful beef tenderloin just right and getting that pastry golden brown while keeping the inside a truly perfect, rosy medium-rare. Forget the stress; we’re making an absolute showstopper. For more of my favorite cooking adventures and behind-the-scenes kitchen talk, check out my main blog page!
Why This Classic Beef Wellington Recipe Works Every Time
I’m not just giving you random steps; this method is built on years of testing. It delivers on flavor and presentation every time, making it my go-to for any special gathering. If you want a true holiday centerpiece dinner, this is the one!
- Achieving the Perfect Medium Rare Beef Wellington: We focus heavily on searing the outside quickly and using temperature checks—no guesswork required here!
- The Secret to Beef Wellington No Soggy Bottom: Moisture control is everything. We dry out the mushrooms completely and rely on strategic chilling to keep that pastry crisp.
For more centerpiece inspiration, take a peek at my main holiday centerpiece dinner inspiration page.
Achieving the Perfect Medium Rare Beef Wellington
Honestly, the magic isn’t in the pastry; it’s in the beef’s center. If you skip the initial sear and the mandatory chill breaks, you end up with grey meat. We make sure that beautifully marbled center-cut tenderloin hits that 125°F mark exactly, giving you that picture-perfect rosy color throughout.
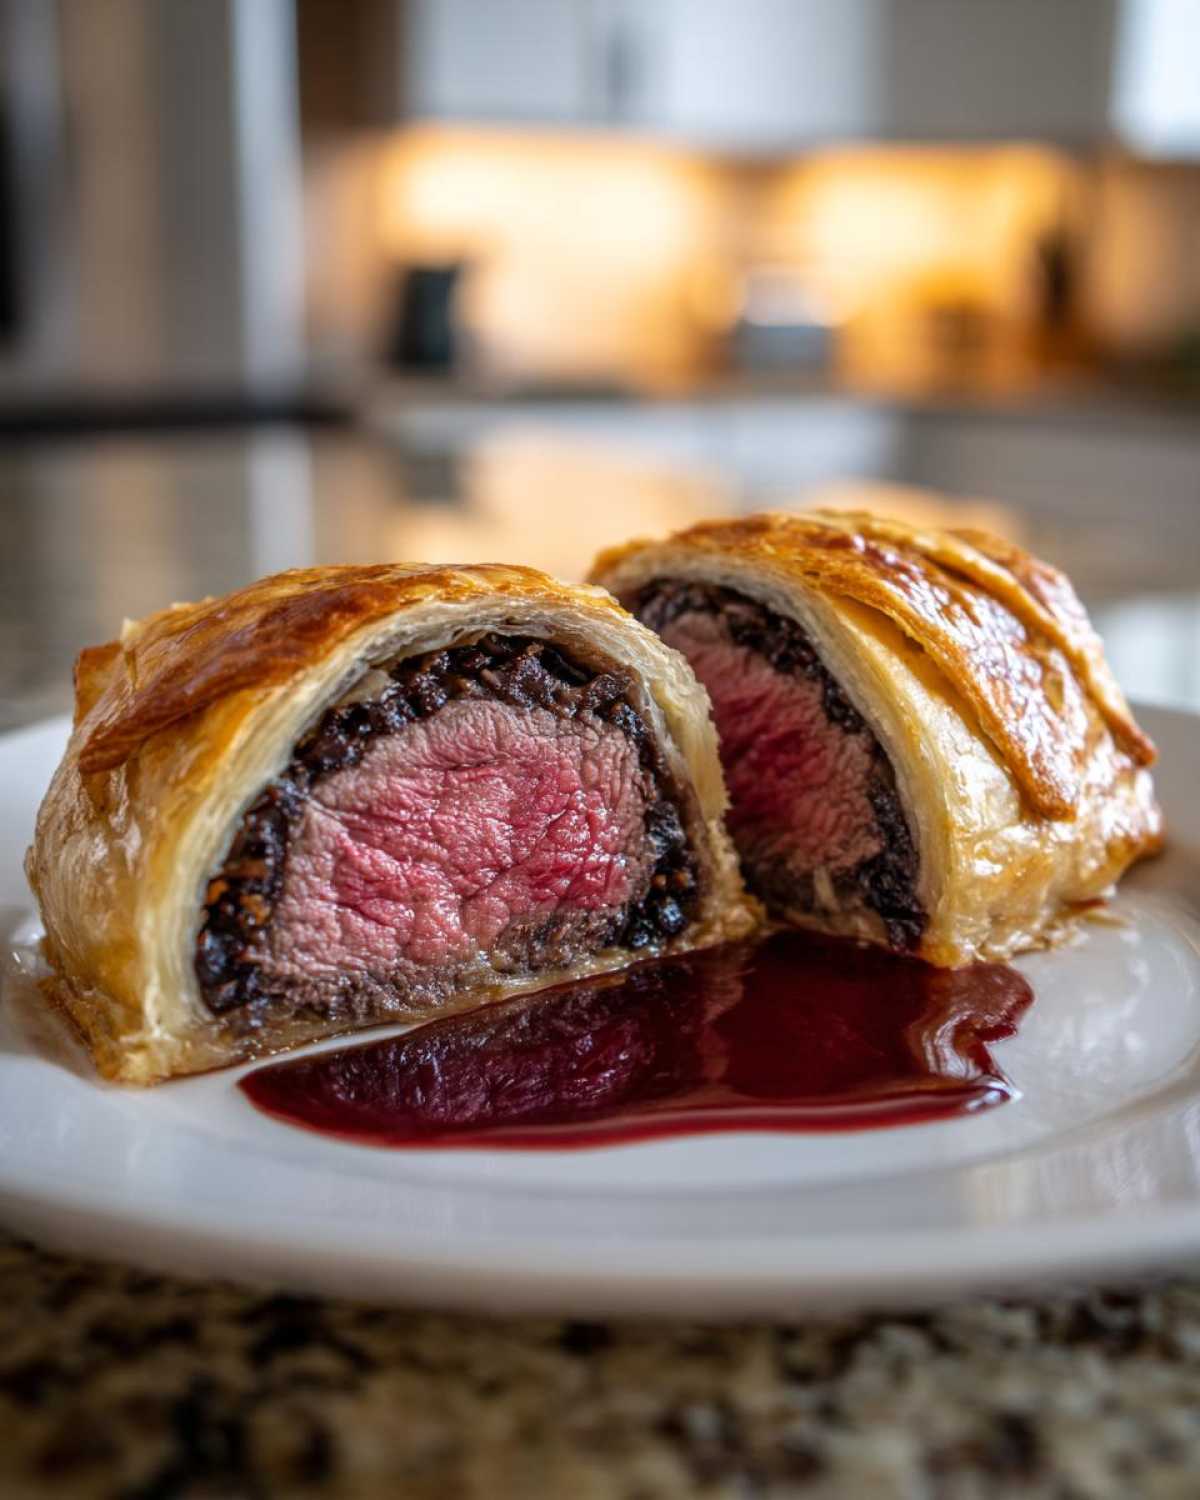
The Secret to Beef Wellington No Soggy Bottom
This is the make-or-break point for any Beef Wellington, right? A soggy bottom means you spent an hour wrapping meat for nothing! My method emphasizes drying the duxelles until it feels almost like paste, ensuring it absorbs zero moisture from the beef or the pastry during that crucial bake time.
Essential Ingredients for Your Beef Wellington
Okay, since this is a showstopper meal, you can’t skimp on the quality here. We need things that really sing together! This recipe requires a few specific components to earn its place in the “Gourmet Beef Recipes” hall of fame. Don’t worry, I’ve listed exactly what you need below. Remember, attention to detail when buying these core items makes all the difference later on.
Here’s what you’ll be grabbing for that glorious puff pastry creation:
- 2 lb center-cut beef tenderloin, trimmed
- 2 tablespoons olive oil
- 1 tablespoon Dijon mustard
- 1 pound cremini mushrooms, finely chopped
- 2 shallots, minced
- 2 cloves garlic, minced
- 1/4 cup dry white wine
- 2 tablespoons fresh thyme leaves
- Salt and black pepper to taste
- 12 thin slices prosciutto
- 1 package (14 ounces) all-butter puff pastry, thawed
- 1 large egg, beaten (for egg wash)
- For the Sauce: 1 cup dry red wine
- For the Sauce: 1 cup beef broth
- For the Sauce: 1 tablespoon cold butter
If you want to see how I usually pair this with other amazing mains, check out my gourmet beef recipes collection!
Ingredient Notes and Substitutions for Beef Wellington
Let’s talk specifics so you get that perfect internal cook! For the beef, you absolutely want a beautiful, uniform center-cut center cut tenderloin recipe roast. You need that consistent shape so the pastry cooks evenly around it. If you can only find a larger piece, trim it aggressively into a perfect log shape!
For the pastry, I insist on all-butter puff pastry if you can find it. It browns better and tastes richer than shortening-based versions. Yes, it’s slightly more expensive, but this is your moment to shine! And please, when chopping your mushrooms, take the time to process them finely—we want that duxelles mixture to be almost a paste so it spreads beautifully over the prosciutto layer.
How to Make Beef Wellington Step by Step
Okay, deep breaths! We are tackling this legendary dish now, and I promise if you follow these steps exactly—especially the chilling parts—you’ll nail this. This process is all about creating distinct layers that stay separate and crisp until the very last second. Don’t rush the cooling stages; that’s where the magic happens to give you that beautiful, layered cross-section!
For the full, detailed walkthrough, this entire section is pulled straight from my comprehensive how to make Beef Wellington step by step guide.
Searing and Preparing the Beef Tenderloin
First things first: grab your beef. Season it generously with salt and pepper—don’t be shy! Get a heavy-bottomed pan screaming hot with olive oil. We are searing this roast on all sides until it gets a gorgeous, dark brown crust. This only takes a minute or two per side. Once seared, immediately pull it off the heat and brush it all over with Dijon mustard. That mustard adds a little zing and helps the next layer stick. Pop it in the fridge for at least 20 minutes to chill down completely. Seriously, don’t skip this chill time!
Creating the Duxelles Mushroom Topping
Now for the flavor powerhouse—the duxelles. Pulse your mushrooms, shallots, and garlic until they are super fine, like heavy sand. Throw this mixture into a totally dry skillet over medium heat. This is the tedious but vital part: you have to cook out ALL the water. Keep stirring until the mixture looks paste-like and there’s no steam rising off it. Add the wine and thyme and cook until that evaporates too. Dump it onto a plate and let it get completely cold. I mean ice-cold! If it’s warm, it steams your prosciutto and ruins the pastry.
Assembling the Beef Tenderloin Pastry Wrap
Time to layer! Lay out a big sheet of plastic wrap. Overlap your prosciutto slices into one large rectangle; this needs to be big enough to wrap the whole roast. Spread that fully cooled duxelles mixture thinly and evenly over the prosciutto. Place the chilled, mustarded beef right on one edge and use the plastic wrap to roll the prosciutto/duxelles tightly around that beef log. Twist the ends of the plastic wrap like a giant candy wrapper to make it super tight. Pop it back in the fridge for another 30 minutes (or longer!) to really firm up the shape.
Final Wrapping and Baking the Beef Wellington
Roll out your puff pastry; it needs to be big enough to hug the whole chilled package. Unwrap the beef log and place it seam-down on the pastry. Brush the edges of the pastry with your egg wash—this is the glue! Carefully fold the pastry over, trim away excess—we don’t want four layers, just enough to seal—and seal those seams super tight. Give it one last, important chill time of at least 30 minutes. When you’re ready to bake, preheat to 400°F (200°C). Brush the entire surface with the last of the egg wash and score a pretty pattern on top. Bake until the internal temperature hits 125°F (52°C) for that perfect medium rare beef wellington.
Preparing the Red Wine Reduction Sauce
While that beauty is baking, make the sauce so it’s ready when the beef rests. Simmer your red wine in a small pot until it shrinks by half. Pour in the beef broth and keep reducing until it coats the back of a spoon slightly. Take it off the heat—this is important!—and whisk in that cold butter, one tiny piece at a time. This is what we call monter au beurre, and it makes the sauce shiny and luxurious. Taste it and season before serving.
Tips for a Perfect Medium Rare Beef Wellington
Achieving that dreamy, rosy center without overcooking the incredibly tender beef tenderloin is seriously the biggest win here. My biggest piece of advice, truly, is to stop trusting the clock and start trusting your thermometer! We aren’t just guessing when it comes to a beautiful beef tenderloin pastry wrap.
You need a reliable instant-read thermometer. Insert it into the thickest part of the beef, making sure you pierce *through* the pastry and duxelles layers and aim for the absolute center. Pull it out when the thermometer reads 120°F–125°F. Why lower? Because that residual heat after it comes out of the oven—the resting period—will continue to cook it up to that beautiful medium-rare.
Resting and Slicing Your Beef Wellington
This step is almost as important as the baking itself! Once it comes out of the oven, you cannot saw into it immediately. Wrap the whole Wellington loosely in foil and let it rest on a cutting board for a good 10 to 15 minutes. This allows those precious juices that were driven to the center by the heat to redistribute throughout the meat. If you skip this, all that moisture just floods out onto your serving platter!
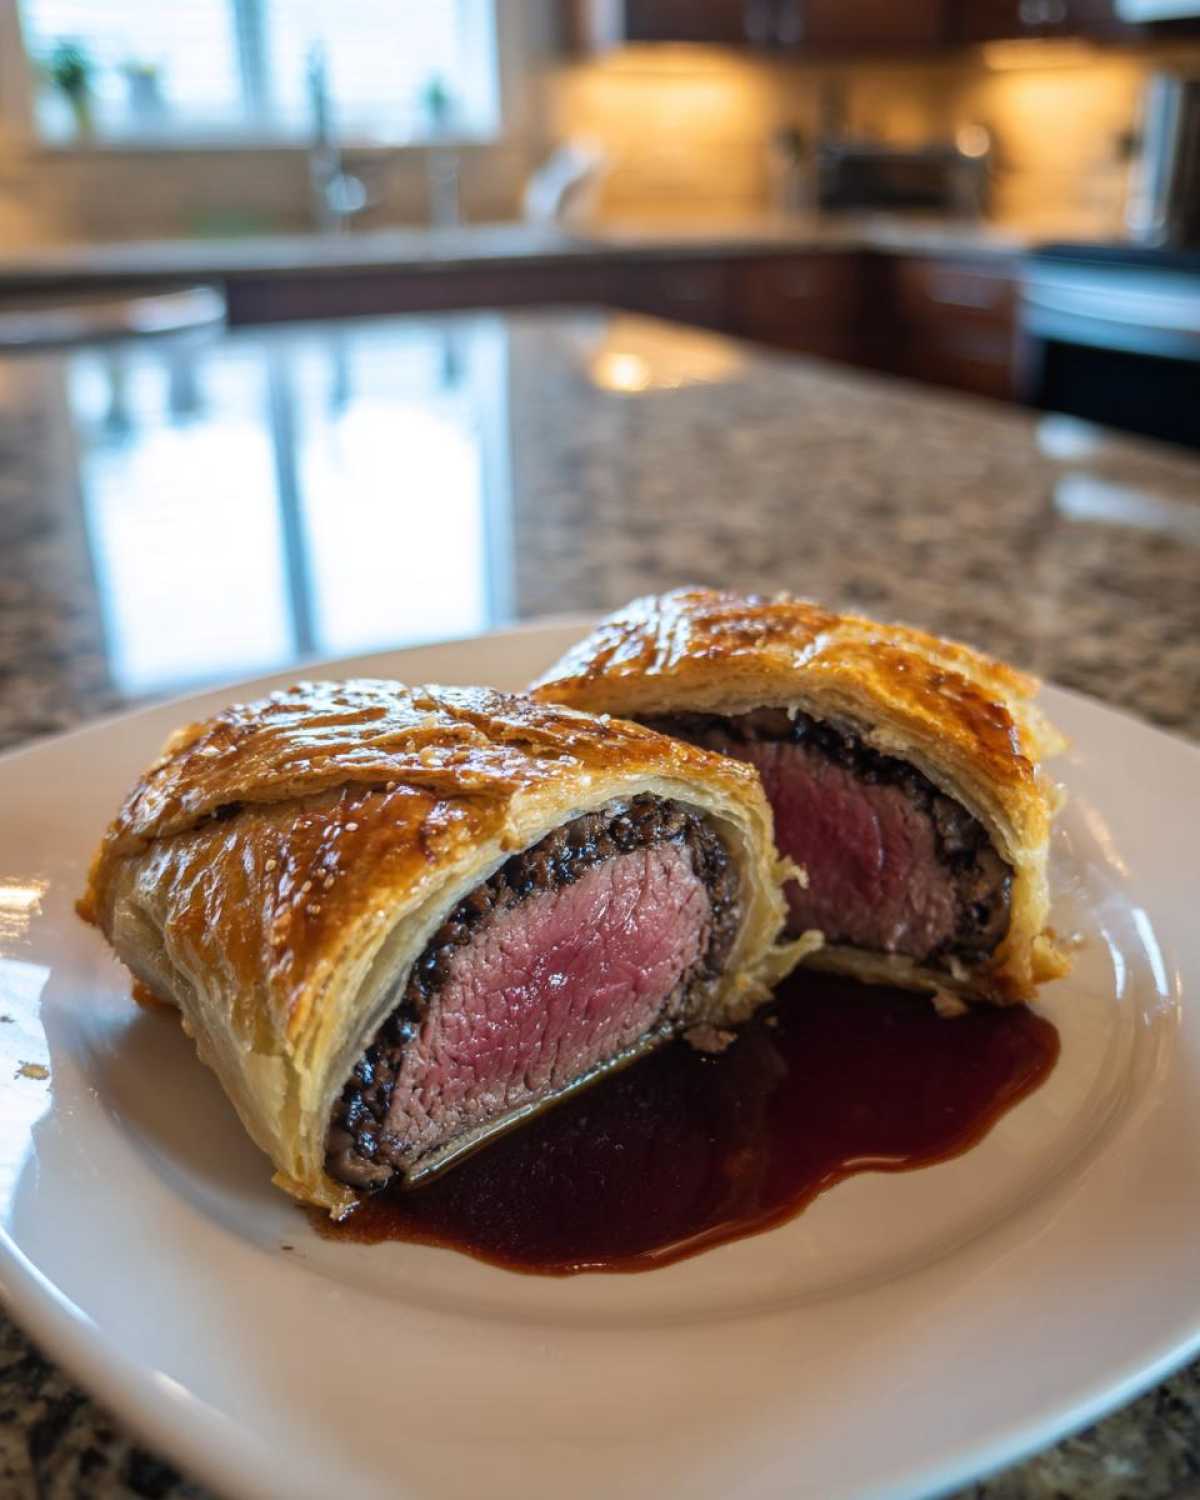
When you finally slice it—you’re aiming for thick, gorgeous coins—use a very sharp, large serrated knife. Cutting too aggressively or with a dull blade will compress the pastry and smash those lovely layers we worked so hard to create!
Make Ahead and Storage for Your Beef Wellington
If you’re planning a big feast, you absolutely need to know about the make ahead beef wellington miracle! I often prep this baby a full day before I actually plan to serve it. It actually tastes better when the different layers have time to mingle overnight in the cold.
Once you have your Wellington fully wrapped in the puff pastry (after that final egg wash) and it’s chilled solid, you can actually wrap it tightly in plastic wrap again and stash it in the fridge for up to 24 hours. Just remember: the final egg wash should happen right before it goes into the hot oven on party day. If you’re freezing it, that works too! Wrap it extra tight in plastic, then foil, and freeze it. You’ll need to thaw it completely in the fridge overnight before baking, but it’s a lifesaver.
For leftovers—if you actually have any!—just wrap the slices tightly in plastic or foil and keep them in the fridge for about three days. When you reheat, don’t microwave it, please! You’ll ruin that crisp crust. Pop individual slices on a baking sheet at about 350°F (175°C) for about 10 minutes until the pastry is warm and crisp again. You can find my full tips on timing for this convenience trick over at my make ahead beef wellington guide.
Serving Suggestions for This Impressive Dinner Party Main
So, you’ve nailed the spectacular Beef Wellington—it’s resting perfectly, the pastry is golden, and the aroma is incredible. Now, what do you serve alongside this masterpiece? Because the Wellington is so rich, savory, and decadent, you need sides that complement the flavor without competing with that beautiful beef and mushroom duxelles.
We already handled the red wine reduction sauce, which is gorgeous, but for vegetables, think bright, clean flavors. If you’re serving this for an impressive dinner party main, skip the heavy casseroles. I love keeping it simple.
Here are my top picks to complete the plate:
- Creamy Mashed Potatoes or Potato Gratin: You need something soft to soak up any extra sauce! A simple buttery mash or a thinly sliced potato gratin works wonders.
- Asparagus with Lemon Zest: Quick-blanched or lightly roasted asparagus adds the necessary green color and a welcome sharp, acidic flavor that cuts through the richness of the pastry and beef.
- Haricots Verts (Fine Green Beans): Tossed lightly with toasted slivered almonds and a tiny splash of vinegar—they add great texture.
One last crucial point: the final beef wellington serving temperature! Don’t serve it piping hot right out of the oven’s residual heat. Because it has rested, it should be beautifully warm, not scorching. This ensures the meat stays tender and moist, and your guests can actually taste the complex flavors.
Frequently Asked Questions About Beef Wellington
I know this can feel like a huge undertaking, especially if it’s your first time tackling this dish for a special occasion. Don’t worry, you’re not alone! I get loads of questions every time I post about this traditional Beef Wellington. Here are the best answers to the things that seem to trip people up the most. If you’re looking for guidance before you dive in, my Beef Wellington for Beginners guide might give you extra confidence!
Can I use filet mignon instead of beef tenderloin for Beef Wellington?
Absolutely! Filet mignon and center-cut beef tenderloin are essentially the same cut of meat—that wonderfully lean, tender portion. The main thing you need to watch out for is thickness. Since Wellington relies on a nicely shaped log of meat, if your filet mignon cuts are thinner, you might have to wrap two or three together using the prosciutto and plastic wrap technique to build up a thick enough center. Just make sure it’s a uniform cylinder so it cooks evenly.
What temperature should the oven be for baking Beef Wellington?
We need high heat to crisp up that pastry quickly before the beef overcooks! We preheat the oven to a solid 400°F (200°C). This high temperature gives the puff pastry the immediate blast of heat it needs to puff up beautifully and start browning fast. If your oven runs a little cool, that’s fine, but don’t go much lower than 375°F, or you risk the pastry getting heavy before it sets.
How do I prevent the puff pastry from burning before the beef is done?
This is such a common issue, especially if your duxelles layer was thin or your beef was smaller! Around the 25-minute mark, if you notice the pastry edges are getting very dark brown but your thermometer hasn’t hit the target yet, just quickly form a loose tent out of aluminum foil and drape it over the top. This shields the pastry from direct heat while allowing the internal temperature of the meat to safely climb toward that perfect 125°F medium-rare mark. Pull the foil off for the last 5 minutes if you want it super golden.
Share Your Homemade Beef Wellington Success
You did it! You conquered the legendary Beef Wellington! I am so incredibly proud of you for trusting this process and bringing this magnificent dish to your table. Seriously, tackling this recipe is an accomplishment, and I want to hear all about it!
Now that you’ve sliced into that masterpiece and seen that perfect medium-rare center, don’t be shy! Come back here and leave a rating below—tell me how your duxelles turned out or if you opted for the simple roast instead of the sauce. Your feedback helps everyone else feel confident tackling this dish next time. And if you took a glorious photo of your finished roast, please tag me on social media! Seeing your homemade successes is genuinely the best part of sharing these recipes.
I hope this becomes a treasured part of your own family celebrations. If you have any lingering questions or need help with next steps, you can always reach out directly through my contact page. Happy cooking, and enjoy every single glorious bite!
PrintClassic Beef Wellington with Red Wine Reduction Sauce

Follow these steps to prepare a traditional Beef Wellington featuring a perfectly cooked beef tenderloin wrapped in duxelles, prosciutto, and puff pastry.
- Prep Time: 60 min
- Cook Time: 40 min
- Total Time: 115 min
- Yield: 6 servings
- Category: Dinner
- Method: Baking
- Cuisine: English
- Diet: Low Fat
Ingredients
- 2 lb center-cut beef tenderloin, trimmed
- 2 tablespoons olive oil
- 1 tablespoon Dijon mustard
- 1 pound cremini mushrooms, finely chopped
- 2 shallots, minced
- 2 cloves garlic, minced
- 1/4 cup dry white wine
- 2 tablespoons fresh thyme leaves
- Salt and black pepper to taste
- 12 thin slices prosciutto
- 1 package (14 ounces) all-butter puff pastry, thawed
- 1 large egg, beaten (for egg wash)
- For the Sauce: 1 cup dry red wine
- 1 cup beef broth
- 1 tablespoon cold butter
Instructions
- Season the beef tenderloin generously with salt and pepper. Sear all sides in hot olive oil until browned, about 1-2 minutes per side. Remove from heat and brush all over with Dijon mustard. Chill the beef for at least 20 minutes.
- Prepare the duxelles: Pulse mushrooms, shallots, and garlic in a food processor until finely chopped but not pureed. Cook the mixture in a dry skillet over medium heat, stirring often, until all moisture has evaporated (about 15-20 minutes). Stir in white wine and thyme; cook until the wine evaporates. Season and spread the duxelles mixture onto a plate to cool completely.
- Lay a large sheet of plastic wrap on your work surface. Arrange the prosciutto slices in an overlapping rectangle large enough to wrap the tenderloin. Spread the cooled duxelles evenly over the prosciutto.
- Place the chilled tenderloin at one end of the prosciutto. Use the plastic wrap to tightly roll the prosciutto and duxelles around the beef. Twist the ends of the plastic wrap to secure a tight cylinder. Chill for 30 minutes to firm up.
- Roll out the puff pastry on a lightly floured surface into a rectangle large enough to encase the beef. Remove the plastic wrap from the beef and place the beef seam-side down on the pastry. Brush the edges of the pastry with the beaten egg.
- Fold the pastry over the beef, trimming any excess. Crimp the edges firmly to seal completely. Wrap tightly in plastic wrap again and chill for at least 30 minutes, or up to 24 hours.
- Preheat your oven to 400°F (200°C). Brush the chilled Wellington all over with the egg wash. Score the top lightly with a knife in a decorative pattern, avoiding cutting through to the meat.
- Bake for 30-40 minutes, or until the pastry is golden brown and the internal temperature reaches 125°F (52°C) for medium-rare.
- While the Wellington bakes, make the sauce: Simmer red wine in a small saucepan until reduced by half. Add beef broth and reduce again until slightly thickened. Whisk in the cold butter off the heat. Season.
- Let the Beef Wellington rest for 10-15 minutes before slicing thickly and serving with the red wine sauce.
Notes
- Chilling the components at each stage helps maintain the shape and prevents a soggy bottom crust.
- Use a meat thermometer inserted through the pastry into the center of the beef for accurate cooking.
- For an extra crisp crust, place the pastry-wrapped Wellington in the freezer for 15 minutes before the final egg wash and baking.
Nutrition
- Serving Size: 1 slice
- Calories: 550
- Sugar: 3
- Sodium: 450
- Fat: 35
- Saturated Fat: 15
- Unsaturated Fat: 18
- Trans Fat: 0.5
- Carbohydrates: 25
- Fiber: 3
- Protein: 38
- Cholesterol: 140
