

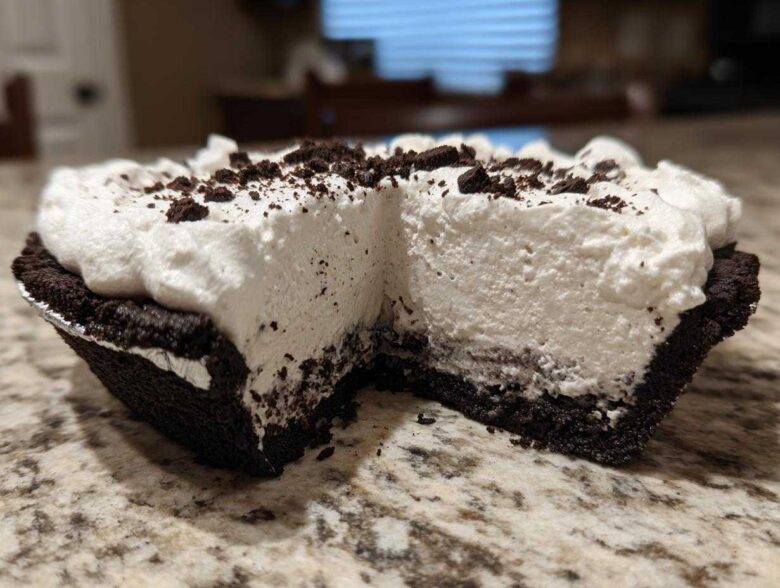
When that summer heat hits and you need something truly wonderful but absolutely refuse to turn on the oven, I have the answer! Forget fussy layers and long baking times; we are diving straight into the most glorious, cool, creamy treat you can imagine. This recipe for the Easy No-Bake Oreo Crust Ice Cream Pie is my go-to celebration dessert. I promise you, it’s the best ice cream pie you will ever make because it’s so darn easy and totally customizable. My brother practically begged me to bring this to his recent backyard BBQ; he said it was faster than setting up the grill!
Why This Easy No-Bake Oreo Crust Ice Cream Pie is Your New Favorite
Why mess around when perfection is this simple? This recipe strips away all the unnecessary steps, leaving you with pure frozen dessert bliss. Honestly, it’s the recipe I fall back on whenever I need a crowd-pleaser without stressing out. It’s the ultimate easy summer dessert!
- You never have to touch your oven! It’s completely no-bake, which keeps your kitchen cool even in July.
- It sets up unbelievably fast—you’re done actively mixing in under half an hour.
- It’s the perfect make-ahead frozen treat because it tastes even better when it’s rock solid.
- It looks totally impressive, even though it’s made with basic ingredients!
Quick Prep Time for Your Ice Cream Pie
Seriously, you won’t believe how little time this takes. We are talking 20 minutes of active work, and you probably have most of the crust ingredients already. That 20 minutes gets you a fantastic Oreo crust pie that is ready for the freezer. It’s my secret weapon for those last-minute party dessert ideas—truly a quick ice cream pie champion!
Customizable Ice Cream Pie Filling Options
This is where you get to play! While my favorite is classic vanilla or mint chip, this recipe is designed to be a canvas for your creativity. You can make a S’mores pie by swirling in marshmallow fluff or go for a salty-sweet peanut butter version. Thinking about a birthday? Just use birthday cake ice cream! It keeps the magic of a customizable ice cream pie alive without any extra fuss.
Gathering Ingredients for Your Homemade Ice Cream Dessert
Okay, you can’t make magic without the right supplies, right? Luckily, for this spectacular ice cream pie, the list is short and the ingredients are mostly staples! Getting all your components ready before you start mixing is key to making this a smooth, no-panic process. Having everything measured out means you can move quickly when you’re building that lovely Oreo crust pie. This truly is the fastest way to an amazing homemade ice cream dessert!
For the No Bake Oreo Crust Pie Base
The crust is EVERYTHING here. It holds all that creamy goodness! Make sure your cookies are finely crushed—no big chunks sneaking in there. We want a unified base.
- 1 3/4 cups crushed Oreo cookies (you’ll need about 30 cookies, crush them up well!)
- 1/2 cup unsalted butter, melted—and I mean fully liquid, not just soft.
- 1/2 teaspoon salt. Don’t skip this! It just wakes up the chocolate flavor a bit.
For the Cool Creamy Treat Filling and Topping
For the filling, this is the most important part: your ice cream needs to be softened. I mean just slightly soft—think like soft-serve consistency, not soup! This makes spreading easy. If it’s too hard, you’ll tear up your perfectly set crust.
- 1.5 quarts softened hard-packed ice cream (Vanilla, Chocolate, or whatever flavor screams summer to you!)
- 1 cup whipped topping, thawed (the stuff from the tub is perfect).
- If you want that extra layer of decadence—and goodness, you should—grab 1/2 cup of chocolate syrup or caramel sauce.
Step-by-Step Instructions for the Perfect Ice Cream Pie
Now for the fun part! Getting this ice cream pie assembled is just like building a beautiful, delicious tower. We move fast in the beginning so the crust sets up, and then patience kicks in while the freezer does the heavy lifting. Follow these steps exactly, and you’ll have a structurally sound, dreamy no bake pie!
Preparing the Oreo Crust Pie
First things first: let’s get that base ready. You need a medium bowl for mixing. Toss in your crushed Oreos, the melted butter, and that tiny pinch of salt. Mix everything with a fork or your hands until it looks like wet sand—you should be able to pinch a bit and have it hold its shape.
Now, press it all firmly into a 9-inch pie plate. I mean firmly! Get the bottom even, and then really push it up the sides. Think about making a little moat for the ice cream! Once it’s packed tight, that crust needs a quick chill. Pop it into the freezer for just 15 minutes. That short freeze is what builds the trust you need for a sturdy crust that won’t crumble when you slice it.
Assembling and Freezing Your Ice Cream Pie
Once that crust is chilled and firm, take your softened ice cream out. Gently spread that creamy layer evenly right over the crust. Don’t overwork it; just smooth the top with a spatula so it looks nice and neat. This is when you get to decide how decadent you want to go!
If you decided to use that chocolate syrup or caramel sauce, drizzle it lovingly over the ice cream layer now. It’s going to get trapped in the cold later, creating amazing ribbons of flavor throughout your finished frozen pie recipes!
Once it’s all assembled, cover the whole thing loosely with plastic wrap—make sure the wrap doesn’t stick to the filling! Then, commit to putting it away. We need the pie to freeze until it’s completely solid, which means a minimum of 4 hours. Honestly, I always leave mine overnight to be safe.
Finishing Touches for Your Frozen Dessert Recipes
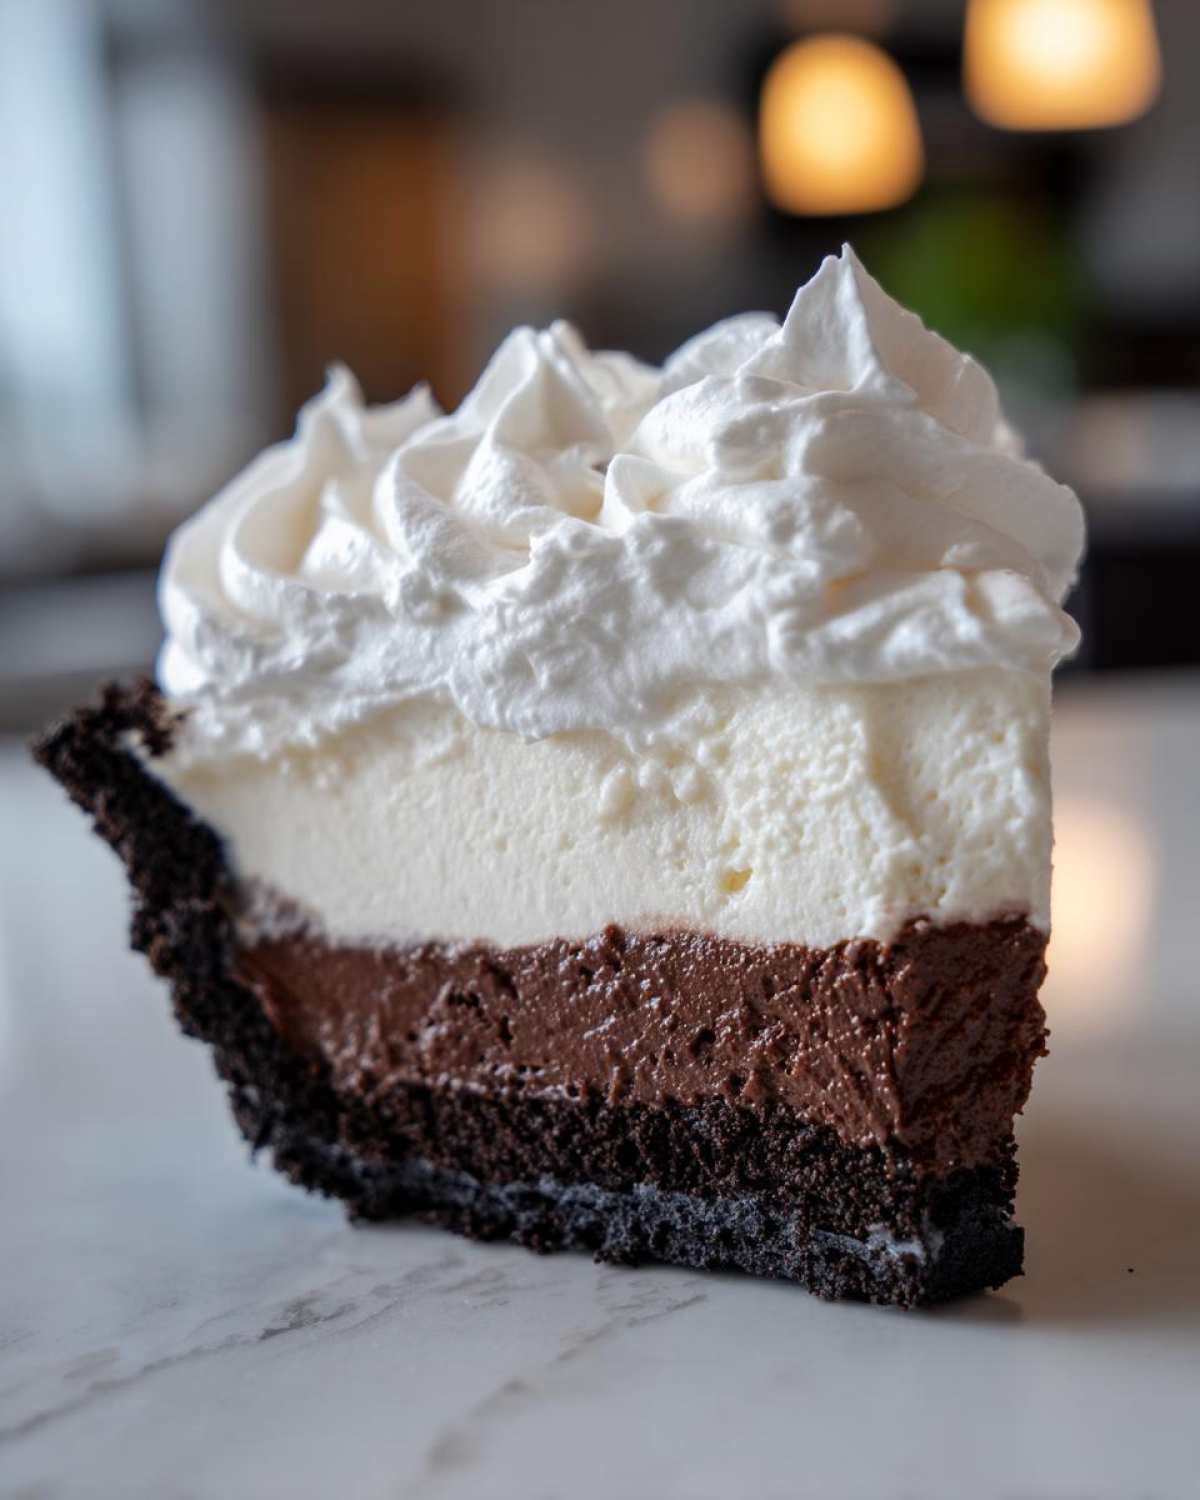
When you’re ready to serve, take the pie out and gently spread the thawed whipped topping all over the top surface. This creates the dreamy, cloud-like finish we want for our frozen dessert recipes. Don’t smooth it perfectly; let it be wavy and rustic!
If you find your topping is too soft after spreading, don’t panic! Just pop the whole pie back into the freezer for another 30 minutes to let that whipped topping firm up a bit before you present it. Then, let it rest on the counter for maybe 5 minutes before slicing. That tiny bit of resting time makes cutting so much cleaner!
Tips for Success Making Your Best Ice Cream Pie
Listen, I’ve made this dessert dozens of times now, and trust me, I’ve learned a few things the hard way so you don’t have to! Having an amazing frozen pie recipes repertoire means knowing the pitfalls before you start. My goal is for your finished ice cream pie to look exactly like something you’d pay $30 for at a fancy bakery, not something that fell apart when you tried to slice it!
Graham Cracker Crust Dessert Substitution
If you aren’t a die-hard Oreo fan or maybe you just ran out of them, don’t worry one bit! You can absolutely substitute the crust. For a beautiful graham cracker crust dessert, just follow the rule of thumb: use about 1 3/4 cups of graham cracker crumbs, and use the same amount of melted butter—usually about 6 tablespoons for graham crackers, since they absorb slightly less fat than Oreos. Press it in just as firmly and give it that same 15-minute freezer chill before moving on to filling!
Layering Flavors in Your Ice Cream Pie
Want to get really ambitious? Layering is the way to go, especially if you’re making this for a birthday bash! Maybe you want a layer of mint chip followed by chocolate. The secret here is patience. Spread your first layer of softened ice cream right over the pre-chilled crust. I mean it—it needs to be smooth.
Then, you have two options: either stick it back in the freezer for a full hour until that first layer is hard as a rock, OR, if you’re in a real rush, freeze it for 30 minutes until it’s just firm enough that it won’t merge with the next layer.
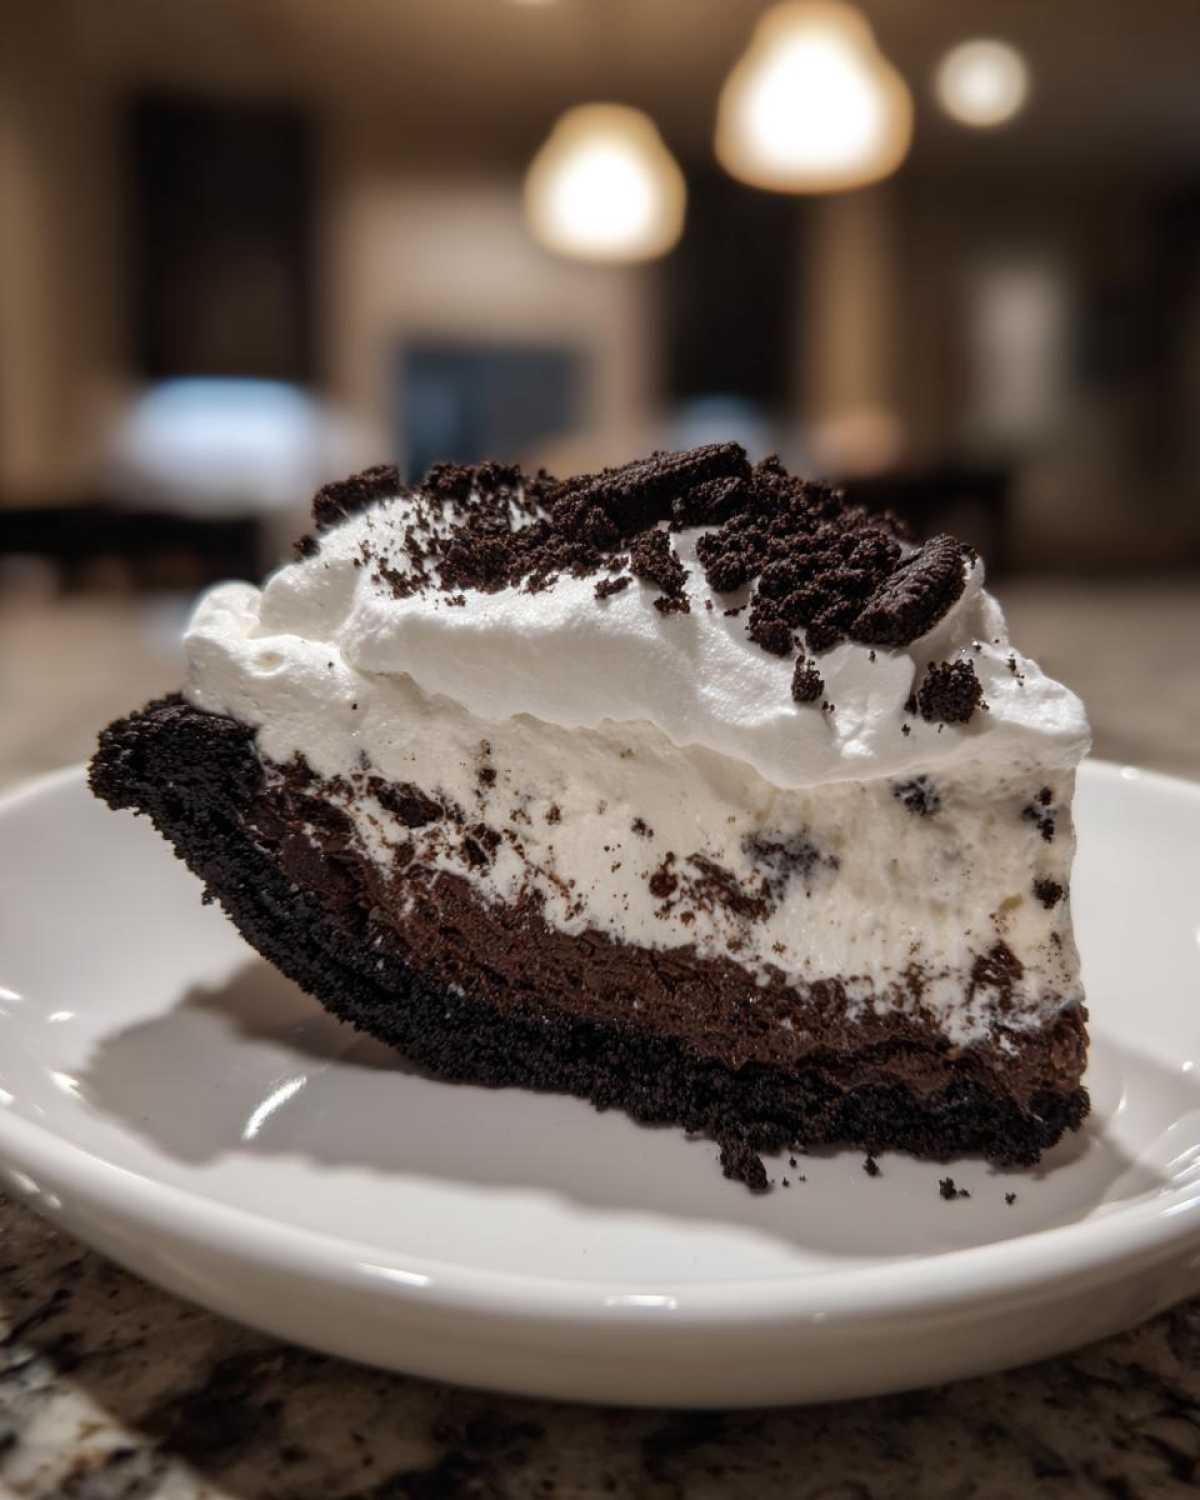
Once layer one is set, then you spread your second flavor right on top, smooth it out, and return the whole ice cream pie to the deep freeze for the required 4 hours to set completely. It makes the final slice look fantastic!
Serving Suggestions for This Party Dessert Idea
So, you’ve pulled this gorgeous, frozen beauty out of the freezer—now what? Presenting it right is almost as important as making it, especially when you’re hosting! Since this ice cream pie is so rich and satisfying—it’s an indulgent weekend dessert if ever there was one—you want to pair it with something that cuts through that richness instead of competing with it.
For a perfect, sophisticated finish to any meal where you’re serving this party dessert idea, I always offer strong, hot coffee. The bitter warmth plays beautifully against the frozen filling. Trust me on this one; it’s a classic pairing for a reason! If you want a little extra something, perhaps you can pair it with my iced cappuccino mascarpone mousse recipe, even though that’s technically another dessert—sometimes you just need a little extra creamy indulgence!
If you’re serving this after something heavy, a little brightness goes a long way. Fresh berries—sliced strawberries, raspberries, or blueberries—are fantastic scattered around the plate. They give you a little burst of tartness to balance the sweet cream. If you’re feeling extra fancy, a tiny drizzle of raspberry coulis over the top of the sliced pie works wonders. It makes the presentation pop and adds a light, fruity counterpoint to the heavy Oreo crust pie base. You want your guests to feel refreshed, not bogged down, after their slice of this incredible frozen creation!
Storage and Make Ahead Frozen Treat Instructions
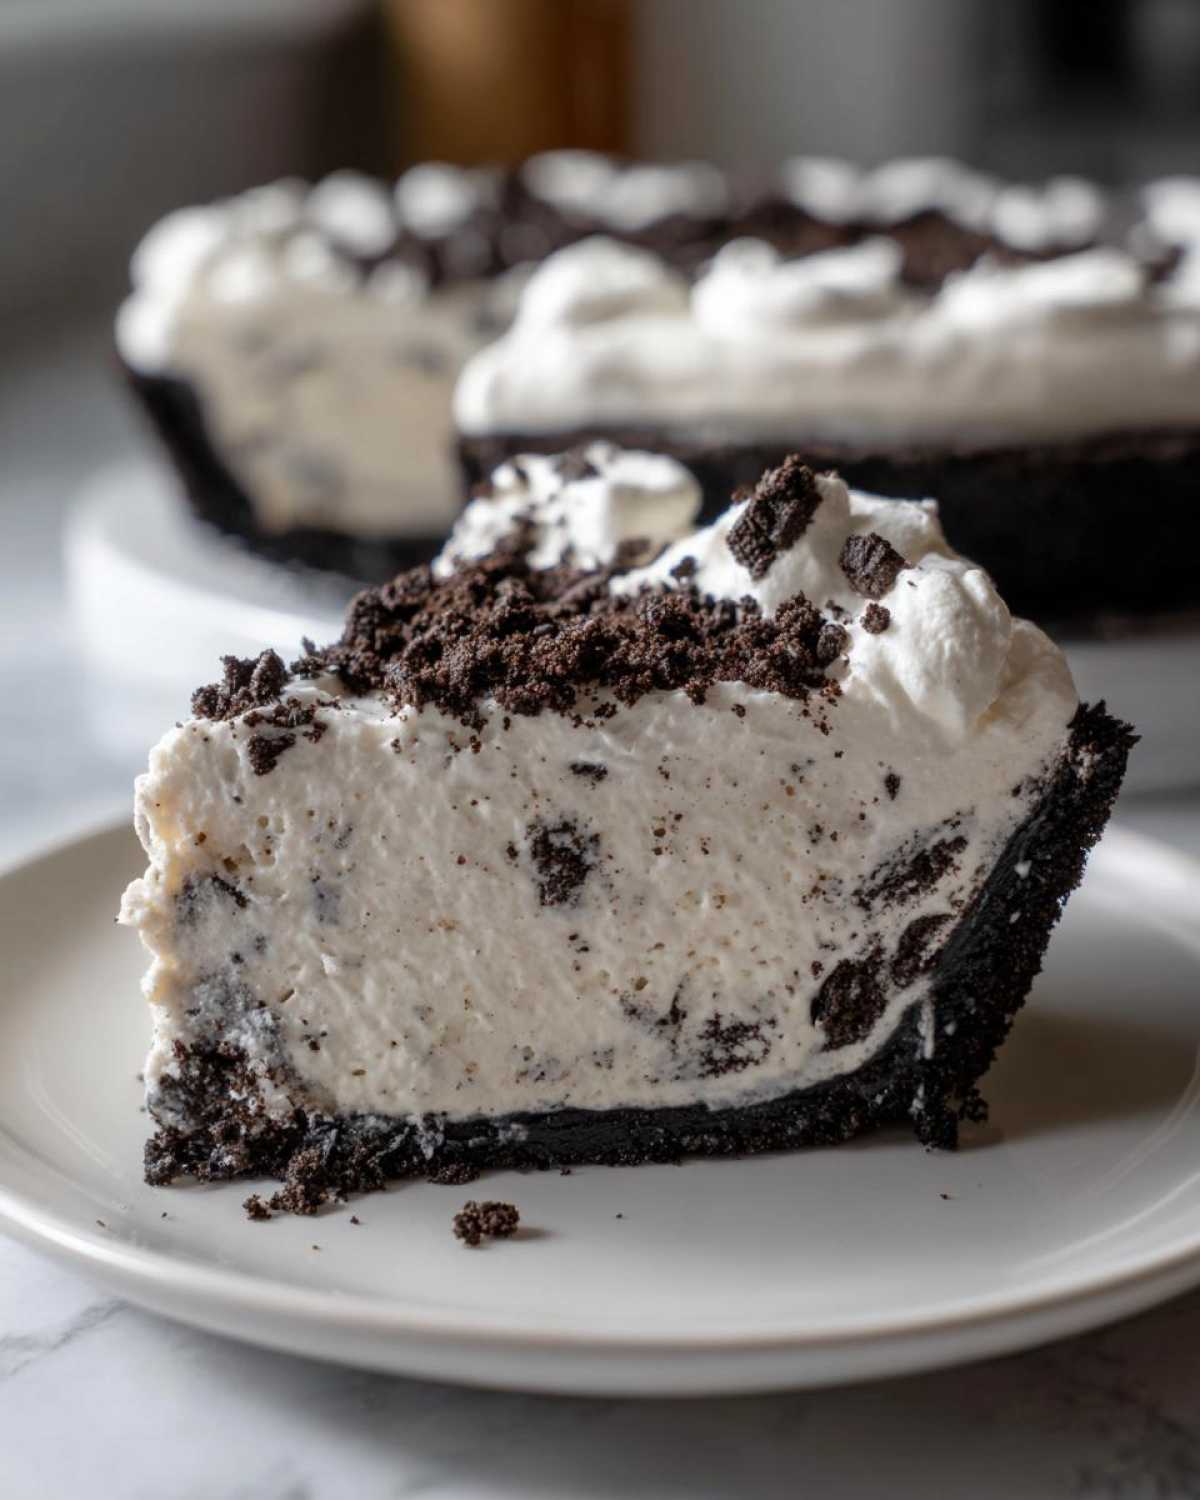
I always triple this recipe when I make it because, let’s be honest, leftovers of the best ice cream pie are a gift to your future self! The best part about this dessert—besides being no-bake—is that it’s designed to be a make ahead frozen treat. You can assemble the entire thing, right up to the final whipped topping, days before you plan to serve it.
When you wrap up any leftovers, you have to be meticulous. Ice cream draws odors from the freezer like a magnet, and we don’t want our delicious pie tasting like frozen peas! I use two layers of plastic wrap pressed directly against the filling to create a tight seal, and then I usually wrap that in foil just for extra insulation and stability.
This pie holds up really well in the freezer, usually for about a week if it’s wrapped securely. After about 10 days, the crust starts to get a little overly hard, and the topping can sometimes harden up too much, but it’s generally safe for up to two weeks. Remember my earlier tip? When you pull your slice of ice cream pie out, always give it 5 to 10 minutes on the counter before you try to cut it. That tiny bit of warming time makes all the difference between a clean slice and a disastrous, icy mess. It’s totally worth the wait!
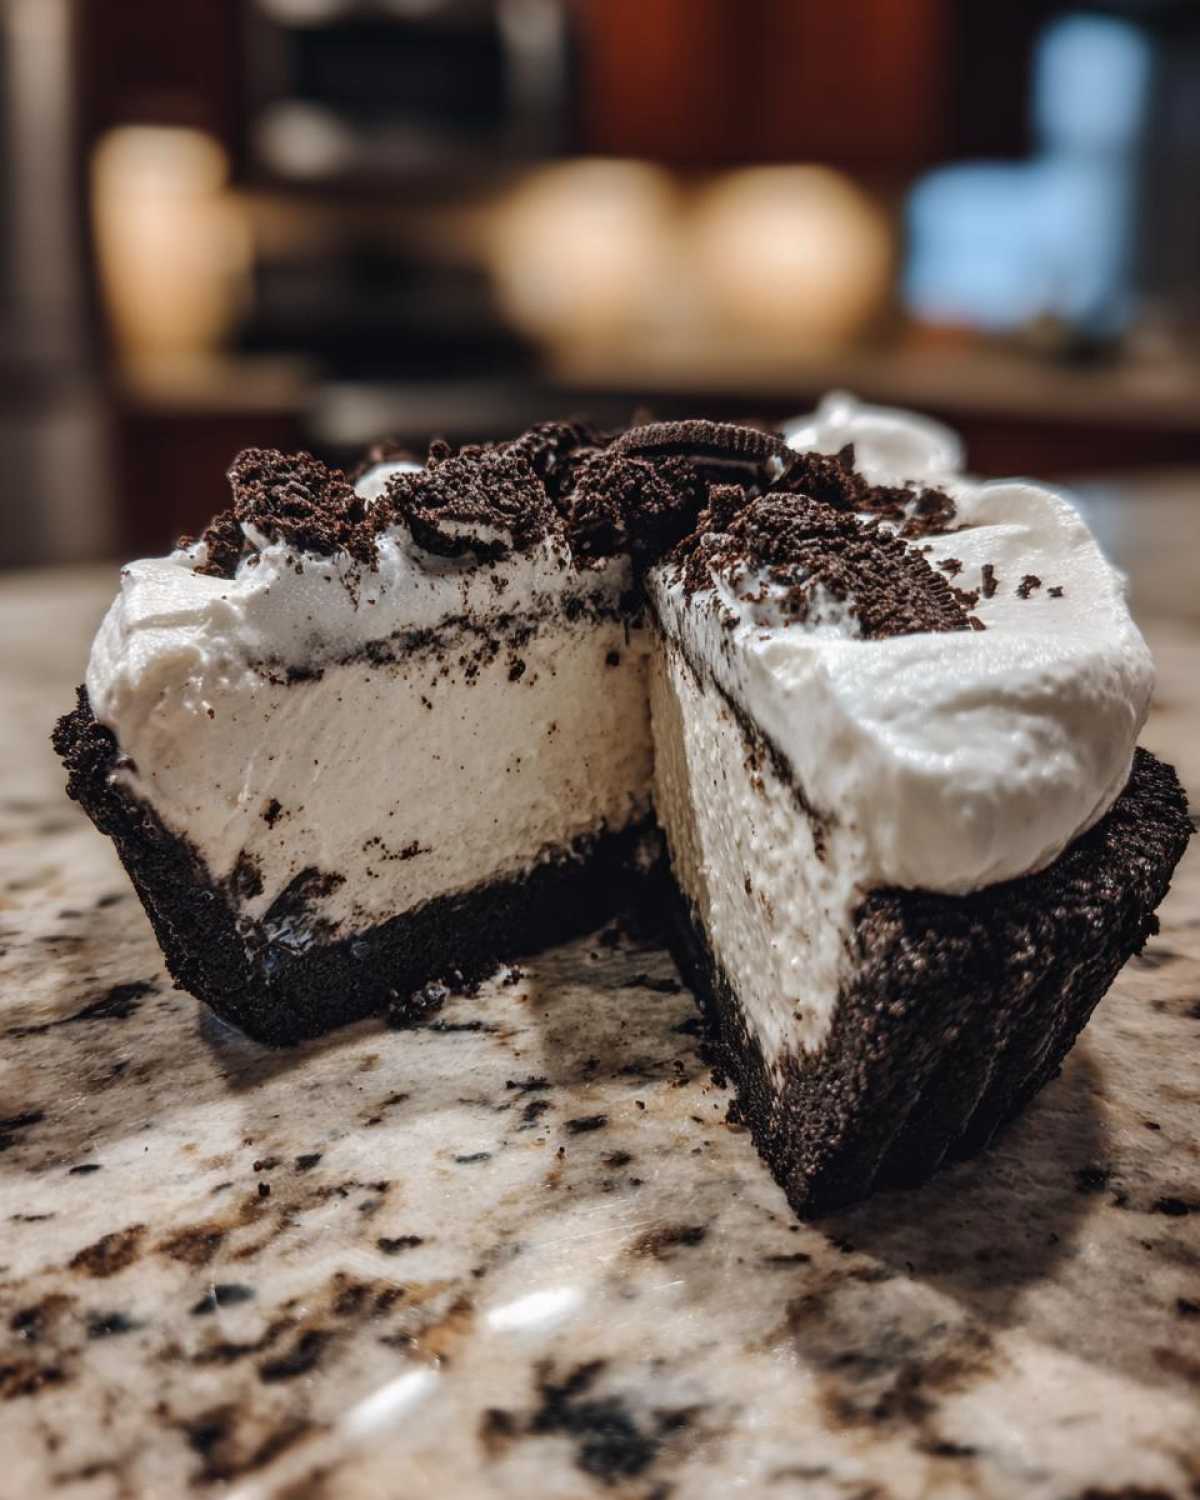
Knowing you can make this spectacular dessert early is such a relief when planning big parties or BBQs. Pulling your perfect make ahead frozen treat out of the freezer the morning of the party means you have zero stress when guests arrive. Just top it, let it firm up that final 30 minutes, and dig in! It’s pure genius.
Frequently Asked Questions About the Ice Cream Pie
I get so many questions about this recipe once people try it for the first time—it’s just that addictive! It’s great that everyone wants to customize it, but sometimes you just need a solid answer about freezing or swapping ingredients. Here are the top things folks ask me about making their ice cream pie.
Can I use a different cookie for the Oreo crust pie?
Oh yes, you absolutely can! While I swear by the rich, dark flavor of the Oreos for this specific Oreo crust pie, you can definitely use other cookies if that’s what you have on hand. Think about chocolate wafers, or even vanilla wafers if you want a less intense chocolate flavor in the base. Just remember that different cookies absorb butter differently, so the texture might change slightly. If you use something lighter like vanilla wafers, you might want to check the moisture level before pressing it into the pan—you still need that wet-sand consistency.
How long can this easy summer dessert be kept frozen?
This is where this recipe shines as an excellent make-ahead hero! As long as you wrap it up tight—and I mean *really* tight with plastic wrap, pressing right onto the surface—this easy summer dessert stays fantastic for about a week to ten days. After two weeks, the crust can start to get a little too hard, and the whipped topping might develop freezer burn if it isn’t sealed perfectly. Honestly, though, mine never lasts that long! If you are stacking things in the freezer, make sure you put a sturdy plate or cutting board on top so the wrapping doesn’t get crushed and break the seal. You can find more general tips over on the blog!
What is the best temperature to let the pie sit before slicing?
If you pull this straight from a deep freeze and try to cut it, you’re going to end up with ice shards everywhere and a mangled crust. No thank you! For the cleanest slice, I let my finished pie sit on the counter—out of direct sunlight, of course—for about 5 to 10 minutes. That short wait is just enough time for the ice cream to soften *just a touch* around the edges, making your knife glide right through for a perfect wedge. If your kitchen is super, super warm, maybe try 7 minutes instead of 10!
Can I make this with store-bought frozen yogurt instead of ice cream?
You betcha! Frozen yogurt works wonderfully in this recipe. It often comes slightly softer than hard-packed ice cream, which can actually speed up your prep time a little bit. Just be aware that the tanginess of the yogurt might change the overall profile, especially if you were planning on using sweeter toppings like caramel. It stays a fantastic cool creamy treat either way, though!
Nutritional Snapshot of This Cool Creamy Treat
Look, I’m not going to lie to you—this is not a health food. It’s an absolutely epic, indulgent weekend dessert that tastes like pure joy! Because we use rich cookies, butter, and full-fat ice cream, the numbers are going to reflect that decadent nature. But hey, you deserve a treat, right? This is definitely a cool creamy treat worth savoring!
Please keep in mind these are just estimates based on standard ingredient brands for one slice of our 8-serving pie. If you use gourmet ice cream or homemade whipped cream, your numbers will certainly change. We’re aiming for delight, not diet precision here!
- Serving Size: 1 slice
- Calories: 450 (Just a rough guide!)
- Fat: 28g (That’s the butter and ice cream talking!)
- Saturated Fat: 16g
- Carbohydrates: 48g
- Sugar: 45g (Yup, that’s significant, but worth every bite!)
- Protein: 6g
- Sodium: 350mg
If you’re worried about the sugar and fat for a big gathering, my suggestion is simple: use a slightly less rich ice cream flavor, like a simple vanilla bean instead of a super dense chocolate fudge swirl. Or, you can always reduce the size of your slices slightly! Every little bit helps when you are enjoying a fabulous slice of homemade ice cream dessert.
Share Your Homemade Ice Cream Dessert Creations
That’s it! You now have the key to the easiest, most satisfying ice cream pie imaginable. I’m so excited for you to try this next time you need a quick ice cream pie or a fun, make-ahead frozen treat. Seriously, these frozen dessert recipes are foolproof when you follow the freezing times!
I put my heart into making sure this recipe works perfectly for you, and I truly love seeing what flavors you all come up with. If you made this, please, please leave me a rating! Five stars if it blew you away! It helps other people find the recipe when they are looking for the best frozen pie recipes.
If you took a picture of your amazing finished product—maybe you chose cherry chocolate or even peanut butter filling!—I’d love to see it! Tag me on social media or just send a quick note through the contact page. Nothing makes my day better than knowing my family favorite frozen dessert has become part of someone else’s special memory.
Happy scooping, and enjoy every single cool, creamy bite!
PrintEasy No-Bake Oreo Crust Ice Cream Pie

Make this simple, customizable ice cream pie using a no-bake Oreo crust. It is a cool, creamy treat perfect for summer parties.
- Prep Time: 20 min
- Cook Time: 0 min
- Total Time: 4 hr 20 min
- Yield: 8 servings
- Category: Dessert
- Method: No-Bake/Freezing
- Cuisine: American
- Diet: Vegetarian
Ingredients
- 1 3/4 cups crushed Oreo cookies (about 30 cookies)
- 1/2 cup unsalted butter, melted
- 1/2 teaspoon salt
- 1.5 quarts softened hard-packed ice cream (any flavor)
- 1 cup whipped topping, thawed (for topping)
- Optional: 1/2 cup chocolate syrup or caramel sauce
Instructions
- Combine the crushed Oreo cookies, melted butter, and salt in a medium bowl. Mix until the crumbs are evenly moistened.
- Press the crumb mixture firmly and evenly into the bottom and up the sides of a 9-inch pie plate.
- Place the crust in the freezer for 15 minutes to set.
- Remove the crust from the freezer. Spread the softened ice cream evenly over the chilled crust. Smooth the top with a spatula.
- If you are adding a sauce layer, drizzle it over the ice cream now.
- Cover the pie loosely with plastic wrap and freeze for at least 4 hours, or until completely firm.
- Before serving, spread the thawed whipped topping over the frozen ice cream layer.
- Return the pie to the freezer for 30 minutes to firm up the topping, if desired.
- Slice and serve cold.
Notes
- You can substitute the Oreo crust with a graham cracker crust for a different flavor profile.
- Use two different flavors of ice cream, layering them after the first layer has frozen for 1 hour.
- Let the pie sit at room temperature for 5 to 10 minutes before slicing for easier serving.
Nutrition
- Serving Size: 1 slice
- Calories: 450
- Sugar: 45g
- Sodium: 350mg
- Fat: 28g
- Saturated Fat: 16g
- Unsaturated Fat: 12g
- Trans Fat: 0.5g
- Carbohydrates: 48g
- Fiber: 2g
- Protein: 6g
- Cholesterol: 55mg
