

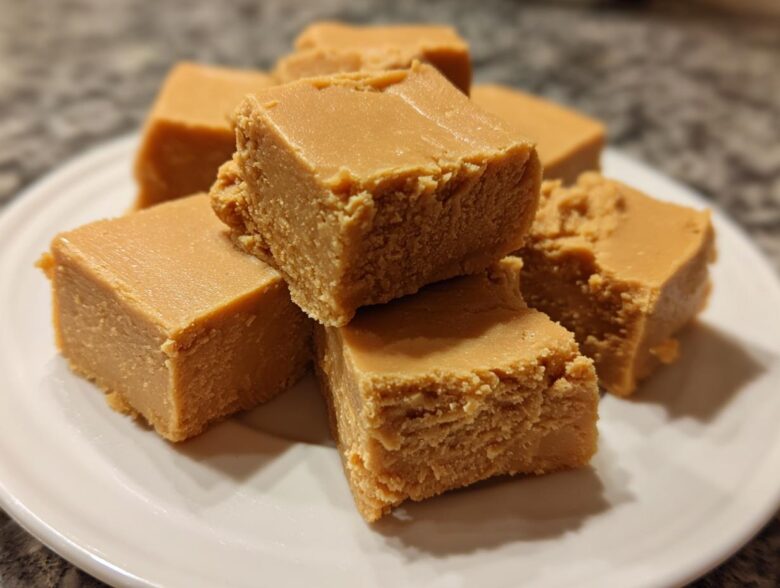
Oh my goodness, are you ready for a blast from the past that actually tastes better than you remember? Forget those waxy, crumbly candies you sometimes get stuck with. This isn’t just any candy; this is true, old-fashioned penuche fudge, and trust me, this is the best brown sugar fudge recipe you will ever try. It’s all about deep, buttery caramel flavor and that texture—I mean, truly melt-in-your-mouth smooth! My secret, learned from years of messy batches, is sticking exactly to the cooling temperatures. If you follow my temperature tricks, you’ll get that perfect, creamy confection every single time. It’s my go-to when I need a truly satisfying, homemade treat for gifts. You can read more about my general baking philosophy over at my baking journey blog posts!
Why This Old Fashioned Penuche Fudge Recipe Works (The Secret to Creamy Fudge)
People always ask me why their homemade fudge turns out grainy or crumbly. Honestly, it all comes down to trusting the science, not just the clock! Making perfect creamy fudge like this old fashioned fudge recipe is essentially about controlling sugar crystallization. We’re dealing with sugar crystals here, and we want them tiny—so tiny you can’t even detect them. That’s where the candy thermometer comes in; it’s your absolute best friend for getting that luxurious, smooth texture that melts the second it hits your tongue.
We have two key temperature checkpoints we absolutely cannot mess around with. Getting these right turns a good batch into divine buttery fudge.
Mastering the Soft-Ball Stage for Perfect Penuche Fudge
When we cook this penuche fudge on the stove, we are boiling off water until the sugar concentration is exactly right. That sweet spot is the soft-ball stage, which is 234°F. If you stop short, your fudge won’t set up properly; it’ll be too soft. If you go too far, you’re heading toward hard candy territory, and that’s definitely not what we want for a melt-in-your-mouth experience. Trust me, if you’re making this classic confection, pulling it off the heat at exactly 234°F is non-negotiable.
The Importance of Cooling to 110°F Before Beating
This step is where 90% of home cooks go wrong! Once you hit that temperature and remove it from the heat, you must let it cool *completely* without touching it until it drops down to 110°F. If you start beating it while it’s too hot, the crystals form too quickly and too large, resulting in that terrible grainy texture we are trying to avoid in this brown sugar fudge recipe. Patience here pays off big time! 110°F is cool enough that the sugar molecules are ready to integrate into a smooth, creamy matrix when you finally start beating the mixture.
Gathering Ingredients for Your Penuche Fudge
Okay, assembling your supplies for this buttery fudge is wonderfully simple, but the quality of a few things really makes a difference. Because this is a *no chocolate fudge* recipe, the vanilla and brown sugar notes have to shine! You only need six basic items, but grab your measuring cups and get ready to be precise, especially with that sugar!
- 2 cups granulated sugar
- 1 cup packed light brown sugar – make sure that brown sugar is nice and soft and truly packed down!
- 1 cup heavy cream – please, don’t try to sneak in milk here; the fat in the heavy cream is what gives us that unbelievably rich mouthfeel.
- 1 tablespoon butter – real butter, the good stuff!
- 1 teaspoon vanilla extract
- 1/4 teaspoon salt
Ingredient Notes and Substitutions for Buttery Fudge
Since we don’t have a distracting chocolate flavor hiding anything, every single ingredient needs to be top-notch. The heavy cream is crucial, as I mentioned. It contains the necessary fat content to stabilize the sugar syrup as it cools and gets beaten later on, helping create that incredible texture we’re aiming for.
If you want to dress this up a bit—and who doesn’t?—you can absolutely stir in about half a cup of toasted pecans during the last minute of beating. They give a fantastic crunch against the smooth base. Also, for an adult twist, sometimes I’ll swap maybe a teaspoon of that vanilla extract for a really nice splash of bourbon while the mixture is cooling down before beating. That adds a lovely warmth that pairs perfectly with the caramel notes. If you’re looking for some fun flavor pairings, check out what I’ve done with caramel flavors in my Salted Caramel Clusters recipe!
Step-by-Step Instructions for the Best Penuche Fudge
Alright, step away from the microwave! If you want truly authentic old fashioned fudge, you have to commit to the stovetop. I know it sounds intimidating—all those warnings about sugar—but I promise, if you watch your thermometer and follow these steps for this penuche fudge, you’ll have the smoothest candy ever. We are aiming for textbook perfection here, so keep your eyes peeled and your wooden spoon ready! If you need a caramel flavor inspiration while you wait for yours to set, check out my Caramel Brown Sugar Latte recipe—it’s pure comfort!
Preparing the Pan and Initial Sugar Dissolution for Penuche Fudge
First things first, let’s get ready for quick action later! Line that 8×8 inch pan with parchment paper, making sure you have a little overhang on two sides—that acts as a little handle to lift the whole block out later, which is super handy. Lightly grease that paper; we want easy release, no sticking allowed! Now, grab a heavy-bottomed saucepan. I cannot stress this enough: use the heaviest pan you’ve got. Thin pots scorch sugar, and scorched sugar means grainy, sad fudge. Toss in your granulated sugar, brown sugar, and the heavy cream. Heat this over medium heat, stirring gently but consistently until you can no longer feel any sugar granules gritty on the bottom. I mean totally dissolved!
Cooking to Temperature and Crucial Cooling for Creamy Fudge
Once those sugars are happy and dissolved, stop stirring hard and stick in that candy thermometer. Make sure the tip is submerged but not touching the bottom—that gives a false high reading! Let it boil away until it hits exactly 234°F. That’s our soft-ball stage, the magic number for perfect texture. If you stop short, it’s too soft; go too far, and you’re headed toward hard candy territory, which ruins the creamy fudge dream. As soon as that thermometer screams 234°F, rip the pan off the heat immediately! Now, drop in your tablespoon of butter—do not stir it! Just let it melt. Then, you have to walk away. Seriously, leave it alone. Let that mixture cool undisturbed until your thermometer reads 110°F. Being patient here is what separates good old fashioned fudge from fantastic fudge.
Beating and Setting Your Homemade Fudge Recipe
When you hit that all-important 110°F, add your vanilla extract. Now the fun starts! Grab a sturdy wooden spoon or use your electric mixer on medium speed. You are going to beat this mixture like crazy! Keep going until you see a huge visual change—it goes from glossy and liquid to dull, thick, and creamy. It should start clinging to the spoon and hold a soft peak when you lift it. This usually takes about five to ten minutes, so get ready for a serious arm workout! Once it’s thick, dump it straight into your prepared pan and spread it quickly; we are making homemade fudge recipe squares, so don’t scrape the sides of the bowl because that duller fudge stuck there might not set right. Just let it level out naturally, and then let it rest on the counter, completely untouched, for several hours until it’s firm enough to cut.
Making This Caramel Flavor Fudge a Holiday Candy Recipe Staple
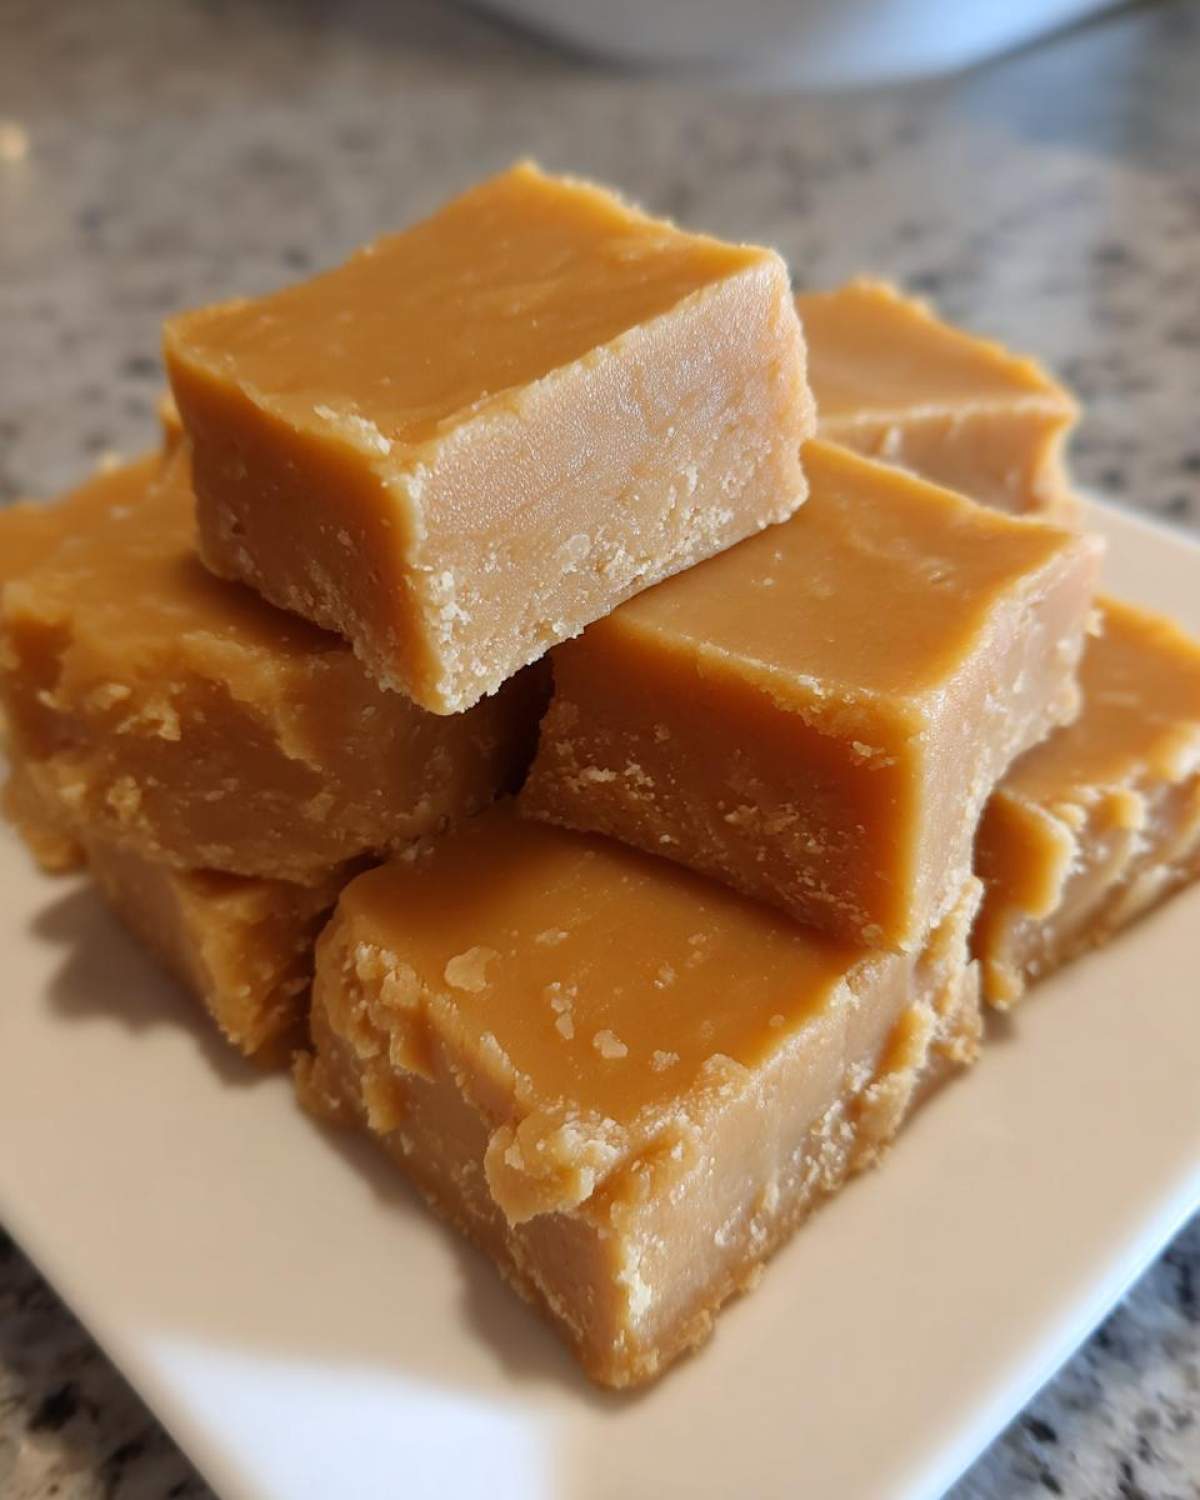
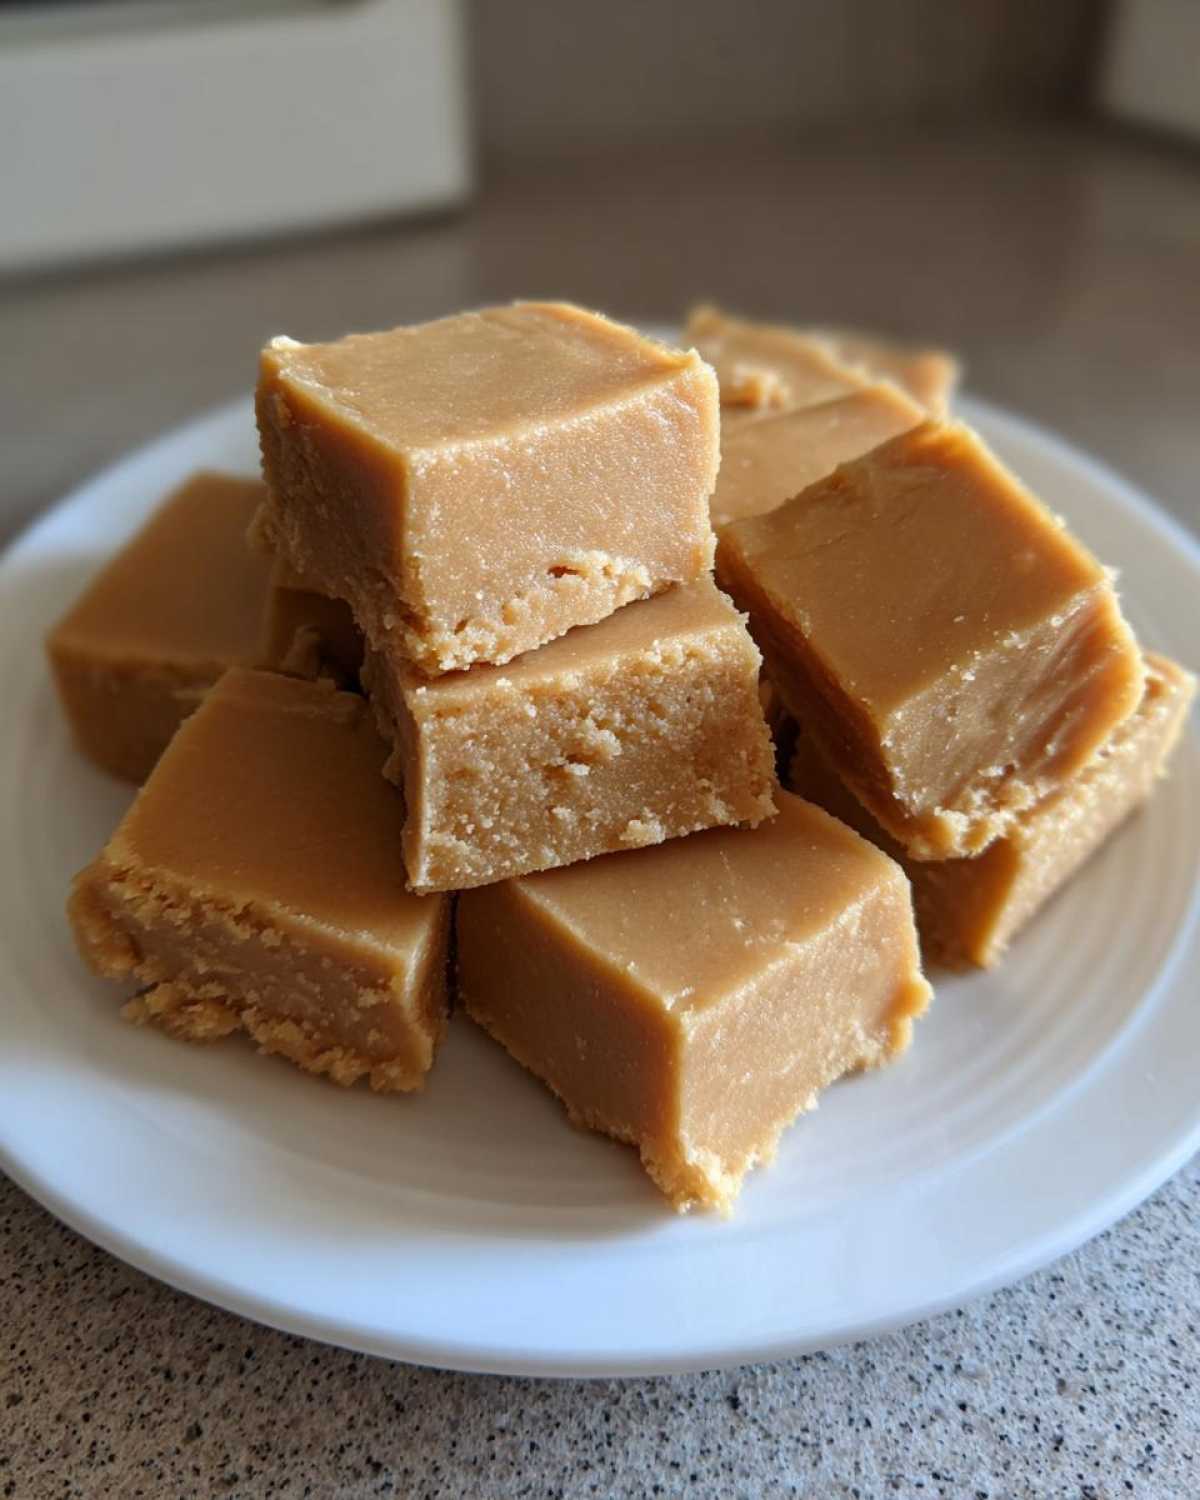
Once you’ve successfully navigated the heat and the beating—and trust me, you will—you’re left with the absolute best caramel flavor fudge, just begging to be part of a gift basket! Penuche has this beautiful, soft tan color that looks so elegant sitting next to dark chocolate truffles or peppermint bark. It screams cozy holiday baking.
When I make a big batch of this, I always plan to package some up for neighbors or teachers. It’s such a lovely, slightly unexpected treat because everyone expects chocolate! For presentation, I usually cut them into perfect one-inch squares.
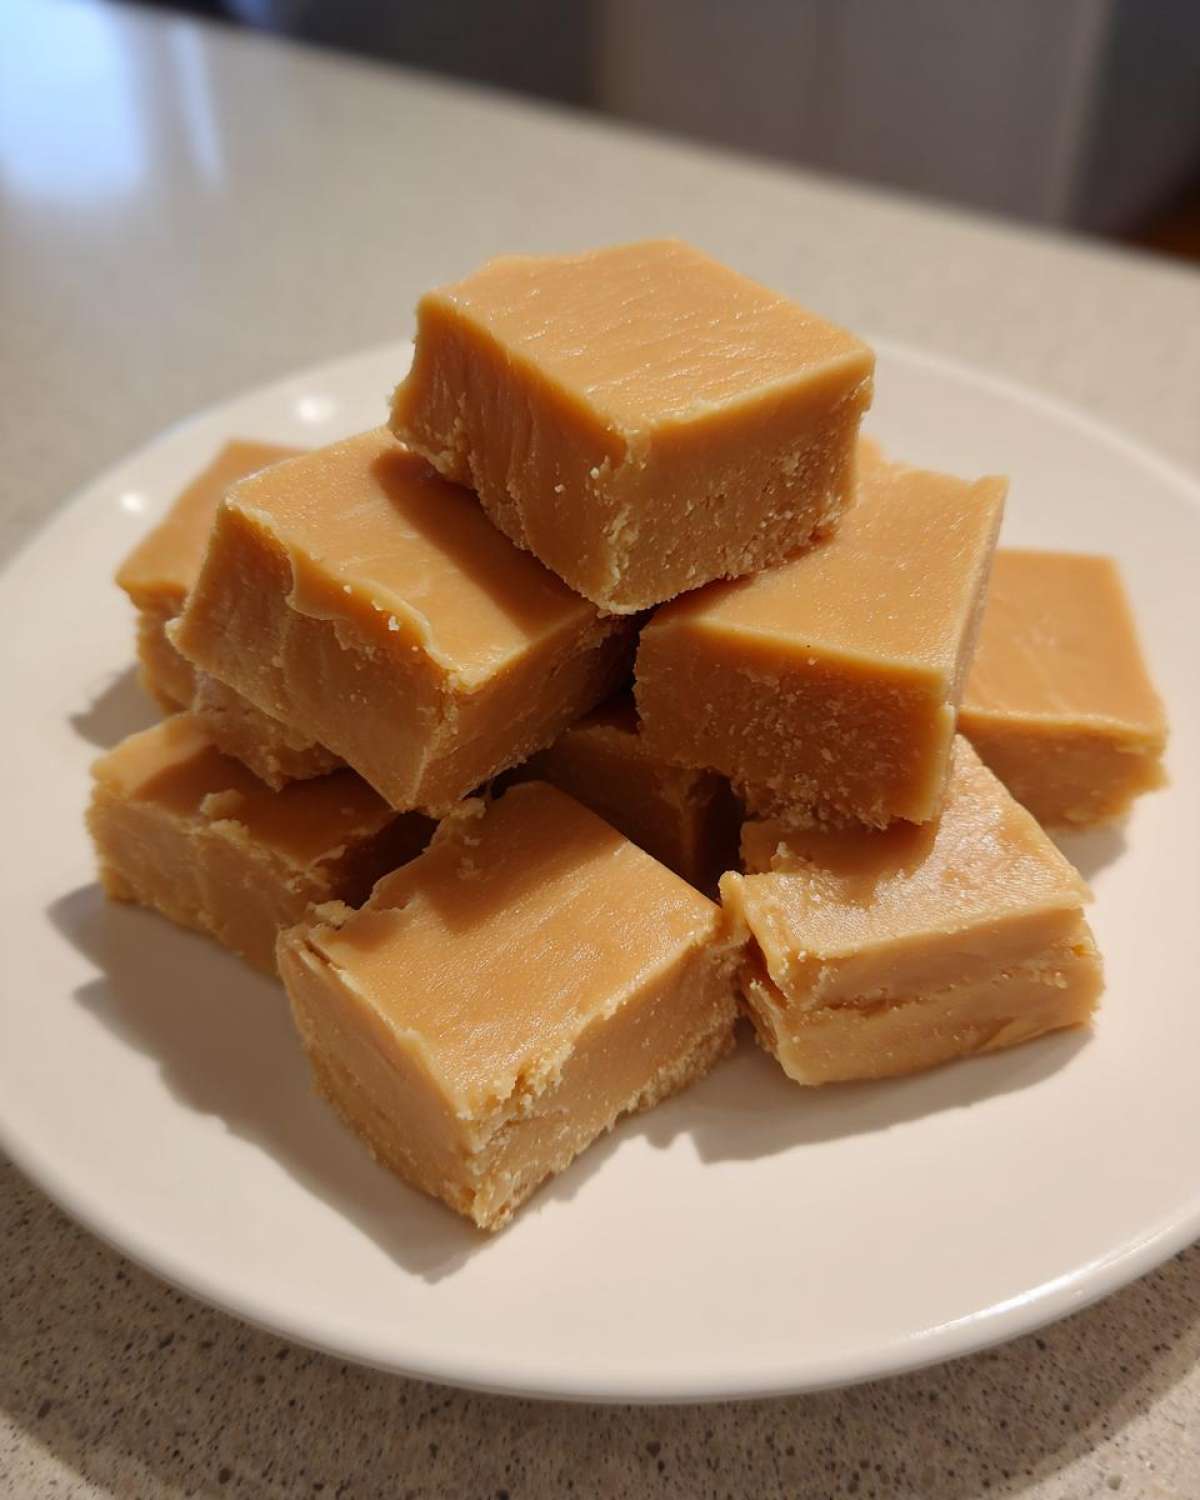
For gifting, I skip the fancy boxes in favor of something more rustic. Try lining a small tin or a cute little cardboard box with maybe some crisp, clean parchment paper or even some festive plaid tissue paper. Stack the squares neatly. A simple, wide satin ribbon tied around the tin makes it look absolutely professional.
If you’re wrapping them individually first, a small square of cellophane tied with kitchen twine works beautifully. It keeps the moisture in and looks adorable. If you’re looking for other chewy, complex flavors for your holiday spread, you have to check out my recipe for Salted Caramel Clusters. They have that same deep, satisfying flavor profile that everyone seems to love!
Tips for Success When Making Traditional Fudge Making Penuche Fudge
Even when you follow the recipe religiously, sometimes candy making can feel like trying to catch smoke! Don’t panic if your first batch of penuche fudge gives you a little trouble. Usually, any texture issue boils down to temperature or stirring at the wrong time. I’ve gathered the most crucial tips here so you can avoid the dreaded grainy texture that plagues so many traditional fudge making attempts.
For starters, humidity is the enemy of smooth fudge, especially when you are trying to hit precise temperatures. If it’s super muggy outside, you might find your cooking time is longer, or you might need to let it cool just a tiny bit longer before beating. Sugar loves moisture, and too much moisture in the air can mess with how those crystals form when you’re beating it!
Here are my tried-and-true fixes to ensure you get that dreamy, smooth result:
- Don’t Scrape the Sides While Cooling: Once you take the pan off the heat and start that mandatory cooling down to 110°F, *do not stir it*. If you accidentally nudge the sides and move sugar crystals that have already started to form, they will become the seed crystals that make your entire batch grainy later.
- Vigorous Beating is Mandatory: If your fudge comes out crumbly but you know your temperatures were spot-on, you likely didn’t beat it long enough. You need to beat until the mixture is visibly dull and thick—it should look almost paste-like, not shiny like syrup. This mechanical action is what creates the super fine crystals needed for truly creamy fudge.
- Pan Choice Matters: I mentioned it before, but seriously, use a heavy-bottomed pan. Even a thin spot on a cheap saucepan can overheat one section of the syrup, creating little burnt spots that will ruin the texture of the whole batch. Want more tips on maintaining that perfect texture across different recipes? Check out my guide on traditional fudge making techniques!
If you follow these guidelines, especially around that 110°F cooling mark and the vigorous beating, you’ll create the most satisfying, best penuche fudge you’ve ever had. It truly is a classic confection worth the effort!
Storing and Serving Your Melt in Your Mouth Candy
You’ve made it! The most satisfying part of making this melt in your mouth candy isn’t just the taste, but knowing you have a whole tray of perfect, creamy squares ready to go. Now we just need to keep them that way, right? Luckily, this simple recipe is quite sturdy, provided you treat it right.
Here’s the deal on storage: You want to keep this fudge exactly as it is—firm, room temperature, and completely sealed off from the world. Do not put this in the refrigerator! I know that feels counterintuitive, but the temperature change makes the sugar weep and encourages that horrible grainy texture to reappear. Keep it in an airtight container, layered perhaps with squares of wax paper between the layers so they don’t stick together.
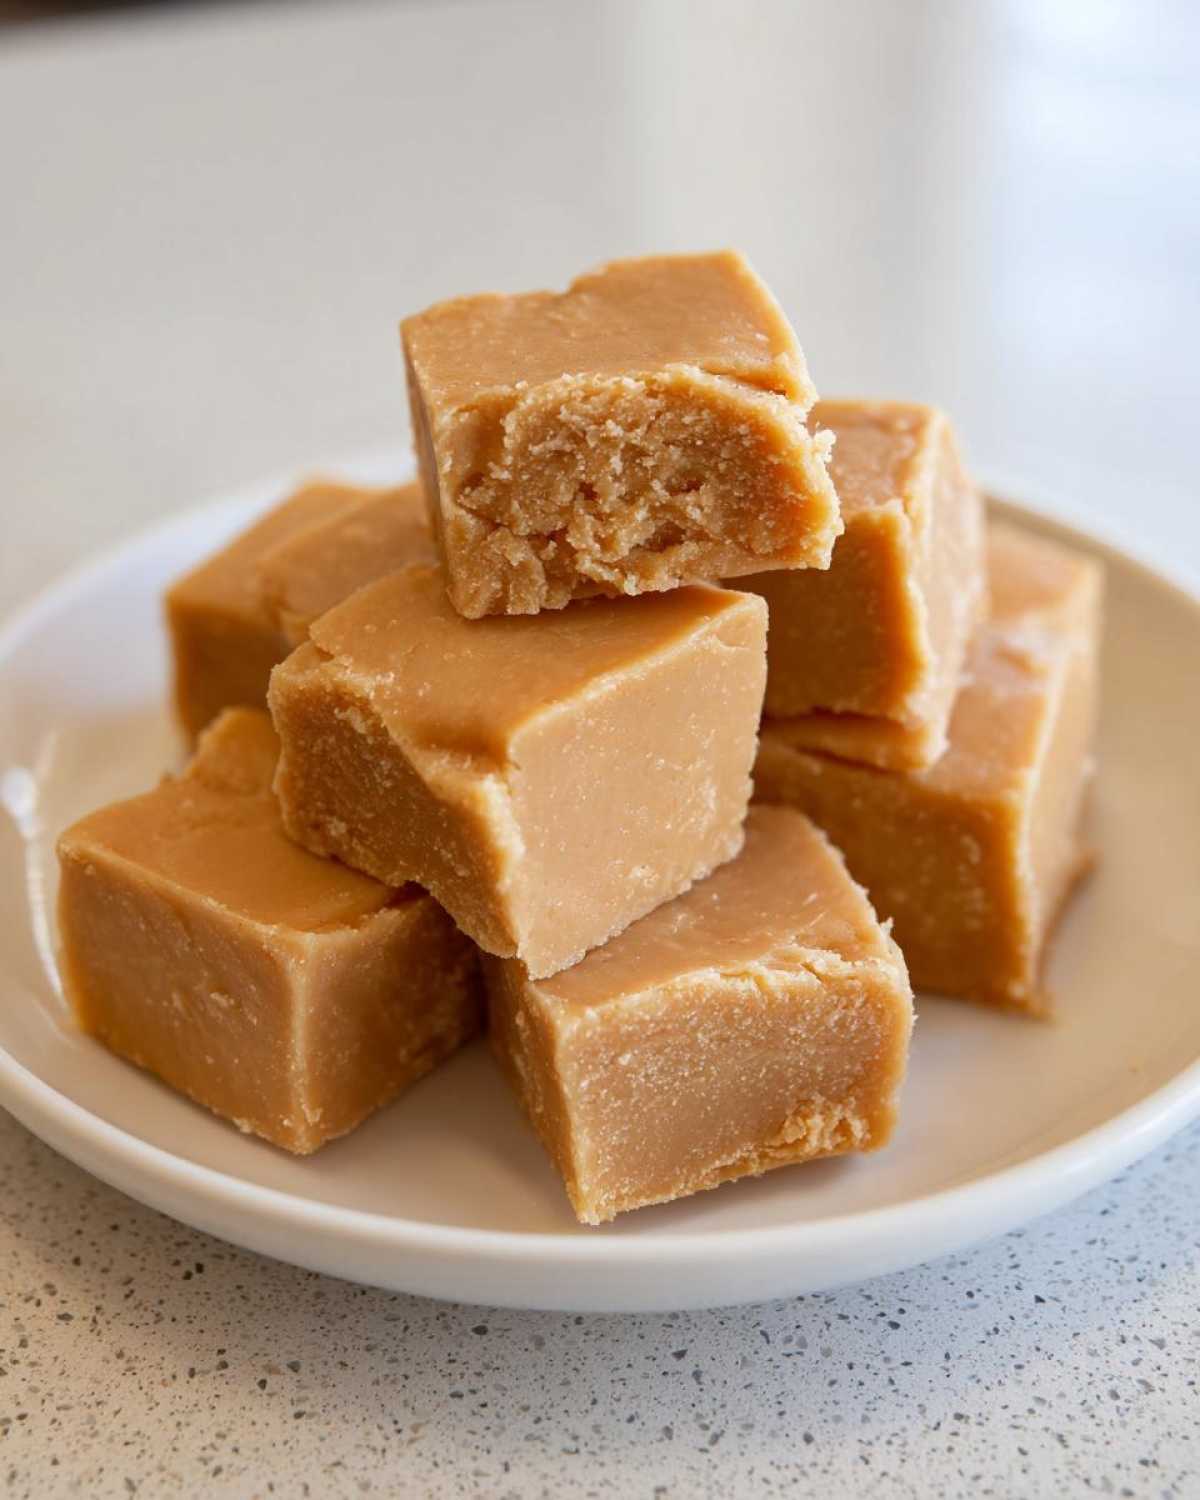
If you store it properly in a cool, dry pantry, this fudge is excellent for up to two weeks. Honestly, most batches don’t last that long in my house! Because it’s so buttery and rich, it makes a fantastic bite alongside something warm.
I love setting out a small platter of these squares when company comes over, exactly as they are, maybe just dusted with a tiny bit of powdered sugar for looks. But my absolute favorite way to enjoy a piece of this rich, caramel-y goodness is after dinner with a seriously strong cup of coffee. It’s the perfect pairing!
If you’re looking for something equally decadent but maybe with a little chill to it, you have to try out my recipe for the Iced Cappuccino Mascarpone Mousse. It’s a totally different dessert experience, but just as comforting!
Frequently Asked Questions About Penuche Fudge
I figured you might have a few lingering thoughts, especially if you’ve tried making this kind of candy before and ran into some trouble. Making a perfect classic confection like this relies heavily on temperature, but I’m happy to clear up any confusion about texture, substitutions, or overall technique!
Can I make this Penuche Fudge without a candy thermometer?
Oh, honey, please don’t try it! I know it seems like an extra hassle, but I cannot stress this enough: Do not attempt this brown sugar fudge recipe without a reliable candy thermometer. The line between perfect, creamy fudge and sugary sludge is incredibly delicate. If you try to use the cold water test, you might be off by just a few degrees, and that throws off the entire crystallization process. Remember, we need that exact soft-ball stage at 234°F to ensure your fudge sets up correctly. Trust me, investing in a thermometer is cheaper than wasting all those good ingredients!
What is the difference between Penuche and regular fudge?
That’s a fantastic question! When people talk about “regular fudge,” they almost always mean chocolate fudge. Penuche is actually a specific, wonderful variation. The fundamental difference is the sugar base. For traditional chocolate fudge, you primarily use granulated white sugar. For this vanilla fudge, or penuche, the primary sweetener is brown sugar. That molasses content in the brown sugar is what gives it that deep, natural caramel color and that rich, complex, almost butterscotch-like flavor. It’s a classic confection, but distinctly caramel-forward, and it’s completely delicious as a no chocolate fudge option!
If you want to dive deeper into the history and variations of this amazing candy, make sure you check out my article on the history and methods of making classic confections!
Estimated Nutritional Data for Penuche Fudge
Before you cut into those beautiful squares, I want to give you the basic rundown on what you’re looking at nutritionally for this decadent treat. Keep in mind, this is truly old-school candy making, relying on all that lovely butter and sugar, so the numbers reflect something special rather than an everyday snack! These values are estimates, as how much sugar you pack or the exact brand of cream you use can make tiny differences.
We always check the numbers, right? For a deeper dive into how we calculate these kitchen estimates, take a peek at my general nutritional disclaimer page. But for the most part, this is what you can expect per glorious one-inch square:
- Serving Size: 1 square
- Calories: 160
- Sugar: 28g (That’s where all the flavor comes from!)
- Sodium: 45mg
- Fat: 4g
- Saturated Fat: 2.5g
- Unsaturated Fat: 1.5g
- Trans Fat: 0g
- Carbohydrates: 30g
- Fiber: 0g
- Protein: 1g
- Cholesterol: 15mg
It’s rich, it’s sweet, and it’s perfect for holidays or when you just need that real, classic confection taste. Don’t stress over those numbers—make the fudge, enjoy the amazing caramel flavor drift between the squares, and savor every last bite!
Share Your Experience Making This Best Penuche Recipe
Okay, now that you’ve melted the sugar and conquered the cooling stage to create this incredible, satiny melt in your mouth candy, I absolutely have to hear about it! Making candy is such a personal experience, and I love comparing notes with you all about how your butteriness turned out.
Did you nail that 110°F cooling point precisely? Was the beating phase as exhausting for you as it is for me? Please don’t be shy! I want to know everything. Drop your star rating for this best penuche recipe in the comments below. A five-star rating lets me know I successfully guided you to that perfect, creamy texture!
And if you took a picture of your finished squares—especially if you added pecans or a little splash of bourbon—I would be thrilled if you shared it on social media and tagged me. Seeing your beautiful homemade fudge always makes my day brighter. You can easily drop me a line or share your photos through my contact page anytime!
Thanks so much for baking with me. Happy candying, everyone!
PrintOld-Fashioned Penuche Fudge (Brown Sugar Fudge)
Make smooth, creamy Penuche Fudge using brown sugar for a rich caramel flavor. This recipe focuses on proper technique for a melt-in-your-mouth texture.
- Prep Time: 10 min
- Cook Time: 25 min
- Total Time: 4 hours 35 min
- Yield: About 49 one-inch squares
- Category: Dessert
- Method: Stovetop Cooking
- Cuisine: American
- Diet: Vegetarian
Ingredients
- 2 cups granulated sugar
- 1 cup packed light brown sugar
- 1 cup heavy cream
- 1 tablespoon butter
- 1 teaspoon vanilla extract
- 1/4 teaspoon salt
Instructions
- Line an 8×8 inch pan with parchment paper, leaving an overhang for easy removal. Lightly grease the paper.
- Combine the granulated sugar, brown sugar, and heavy cream in a heavy-bottomed saucepan.
- Stir the mixture over medium heat until the sugars dissolve completely. Do not let the mixture boil rapidly yet.
- Insert a candy thermometer into the side of the pan, making sure it does not touch the bottom.
- Cook the mixture, stirring occasionally, until it reaches 234°F (Soft-Ball Stage). This usually takes about 15 to 20 minutes after it starts boiling.
- Remove the pan from the heat immediately when it reaches 234°F.
- Add the butter and salt. Do not stir the mixture after removing it from the heat.
- Let the mixture cool completely without stirring until it reaches 110°F. This cooling step is critical for texture.
- Once cooled to 110°F, add the vanilla extract.
- Begin beating the mixture vigorously with a wooden spoon or an electric mixer on medium speed. Beat until the fudge loses its glossy shine and becomes thick and creamy, holding its shape. This takes about 5 to 10 minutes.
- Quickly pour the thickened fudge into the prepared pan. Do not scrape the sides of the pan.
- Let the fudge set completely at room temperature for several hours before cutting into squares.
Notes
- For the smoothest texture, cool the sugar mixture undisturbed to exactly 110°F before beating.
- If you prefer a slight variation, stir in 1/2 cup of chopped pecans during the final minute of beating.
- Use a heavy saucepan to prevent scorching the sugars.
Nutrition
- Serving Size: 1 square
- Calories: 160
- Sugar: 28g
- Sodium: 45mg
- Fat: 4g
- Saturated Fat: 2.5g
- Unsaturated Fat: 1.5g
- Trans Fat: 0g
- Carbohydrates: 30g
- Fiber: 0g
- Protein: 1g
- Cholesterol: 15mg
