

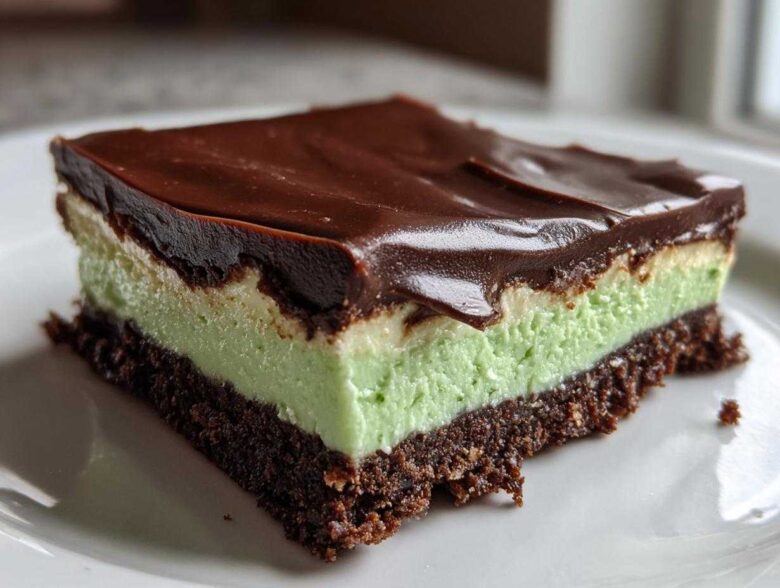
When summer hits, or honestly, whenever I just need a huge dose of chocolate and mint without turning on the oven, I head straight for my list of chilled desserts. Forget complicated steps; we are talking pure, layered magic here. These No-Bake Chocolate Mint Icebox Bars are absolutely legendary in my house. They’re creamy, they’re crisp, and they taste exactly like the best peppermint patty you’ve ever had, but in bar form.
I’ve been perfecting my chilled bar recipes for years—my secret is always the chilling time, trust me! You don’t need an oven for these; just a little patience during the setting stage. If you love quick assembly and incredible make-ahead convenience, then I promise, these layered beauties are about to become your new obsession. Head over to my favorite chocolate mousse recipe if you need another chilled treat inspiration, but for now, let’s get these bars assembled!
Why You Will Love These No-Bake Chocolate Mint Icebox Bars
Seriously, what’s not to adore about a dessert that checks every convenience box? These chocolate mint bars are my go-to because:
- They are truly no-bake—your oven stays cool all day long!
- The texture is incredible: crisp base, creamy filling, silky top.
- They are the ultimate make-ahead dessert for parties or holidays.
- The mint and chocolate layers balance out perfectly; it’s heaven!
Check out my guide on other quick energy bars if you love this kind of fast prep!
Essential Ingredients for Creamy No Bake Mint Dessert
Okay, gathering what you need for these No-Bake Chocolate Mint Icebox Bars is half the battle, and honestly, it’s super straightforward! Because we aren’t baking anything, the quality of what you put in matters even more. We are layering three distinct textures here, so I’ve broken down the list for you. Pay close attention to the temperature requirements—things like the cream cheese needing to be softened and the heavy whipping cream being ice cold are non-negotiable if you want that perfect, cloud-like mint layer!
Getting these ratios right guarantees you get that perfect slice every time. If you want to brush up on your cream cheese work later on, my favorite frosting recipe is right here, but for these bars, it’s all about the blend!
For the Chocolate Wafer Crust
We keep this base simple so the mint filling can really shine. You just need chocolate wafer cookie crumbs—you know, the kind that are perfect for making little pie crusts. You’ll mix those crumbs with a little melted butter to bind it all together. That’s it! No need for extra sugar in this layer; the cookies are sweet enough.
For the Layered Chocolate Mint Icebox Bars Filling
This section is where the magic happens! You need softened cream cheese for that rich, smooth texture. Then we bring in the flavor: powdered sugar to sweeten it up, vanilla extract for depth, and the crucial peppermint extract for that cool burst. Don’t forget the heavy whipping cream and the granulated sugar—those get whipped separately into stiff peaks before we lovingly fold them in. If you want that classic minty green color, grab your food coloring, but that’s totally optional!
For the Rich Chocolate Ganache Topping
This layer has to set up nicely on top of the filling, which means we’re making a simple ganache here. It’s just two ingredients: semi-sweet chocolate chips and a little bit of heavy cream. You heat the cream until it’s steaming, pour it over the chips, and stir until it melts into this beautiful, glossy river of dark chocolate goodness. It sets up perfectly in the fridge, giving you that wonderful snap when you bite into the bar.
Step-by-Step Instructions for No-Bake Chocolate Mint Icebox Bars
Okay, this is the fun part where everything comes together! Since we aren’t battling heat, our main weapon is the refrigerator. Make sure your 8×8 pan is lined with parchment paper with plenty of overhang—this is my secret trick for pulling out perfect squares later on without messing up the beautiful layers. Seriously, don’t skip that overhang!
Remember, these No-Bake Chocolate Mint Icebox Bars rely on firm chilling, so set aside a little time for waiting between steps. If you want a truly professional-looking slice, you’ll want to let this chill overnight, but two hours between layers is the absolute minimum. I always check out my turtle pie recipe when I need more chilling inspiration!
Preparing and Chilling the Crust
First things first: the base. Mix your chocolate wafer crumbs with the melted butter until it looks like wet sand. Then, you’re going to press this mix firmly into the bottom of that prepared 8×8 pan. I mean firmly. Use the bottom of a measuring cup or glass to really pack it down tight against the bottom. Pop that pan into the fridge for just 15 minutes while you move on to the creamy bit.
Creating the Creamy No Bake Mint Dessert Filling
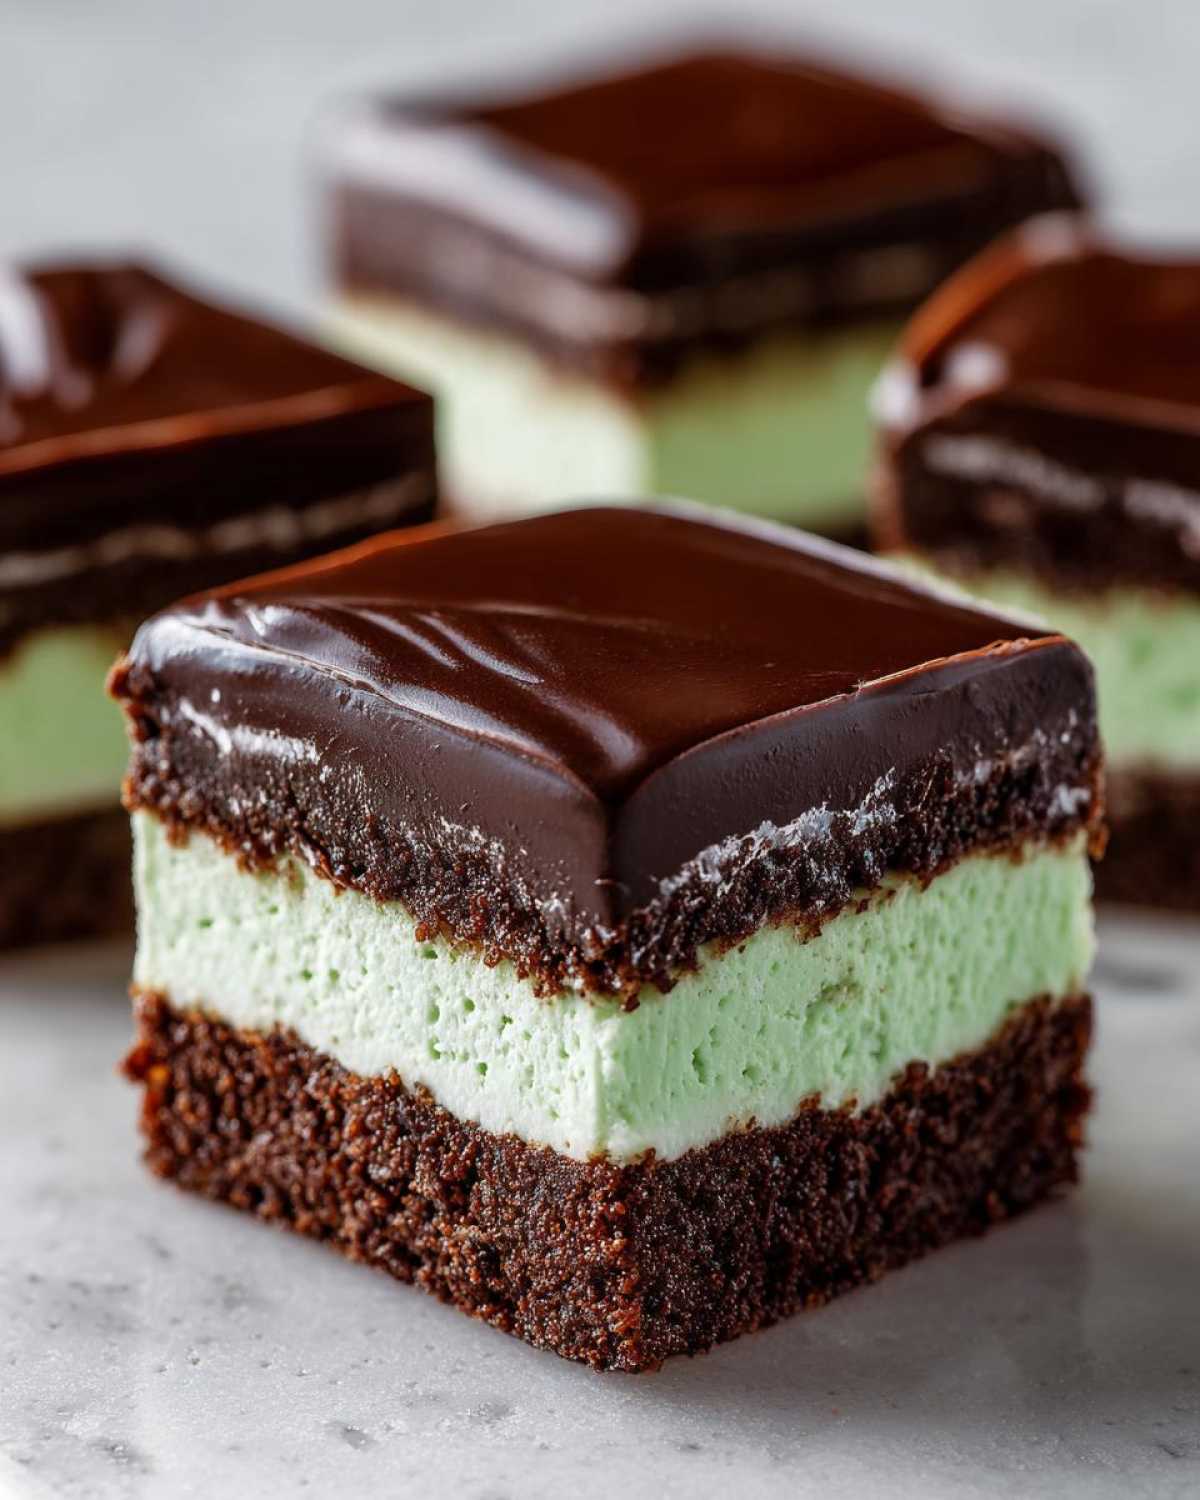
Now for the star layer! In a large bowl, you need to beat your softened cream cheese with the powdered sugar, vanilla, and peppermint extract until it’s totally smooth—no lumps allowed here! In a separate, very cold bowl, whip your heavy cream and granulated sugar until you get stiff peaks. When you combine these two mixtures, you must be gentle! Fold that whipped cream into the cream cheese just until barely combined. Overmixing here causes the whole thing to deflate, and we want it light and fluffy!
Layering and Setting the Mint Layer
Once the crust is chilled, take that lovely, fluffy mint filling and spread it evenly right over the top. Use an offset spatula for a nice, flat surface. Make sure the edges are touching the crust so there are no air pockets forming. Pop this back into the refrigerator. This layer needs firming up, so let it sit for a solid 2 hours before you even think about touching that chocolate topping.
Finishing with the Chocolate Ganache Topping
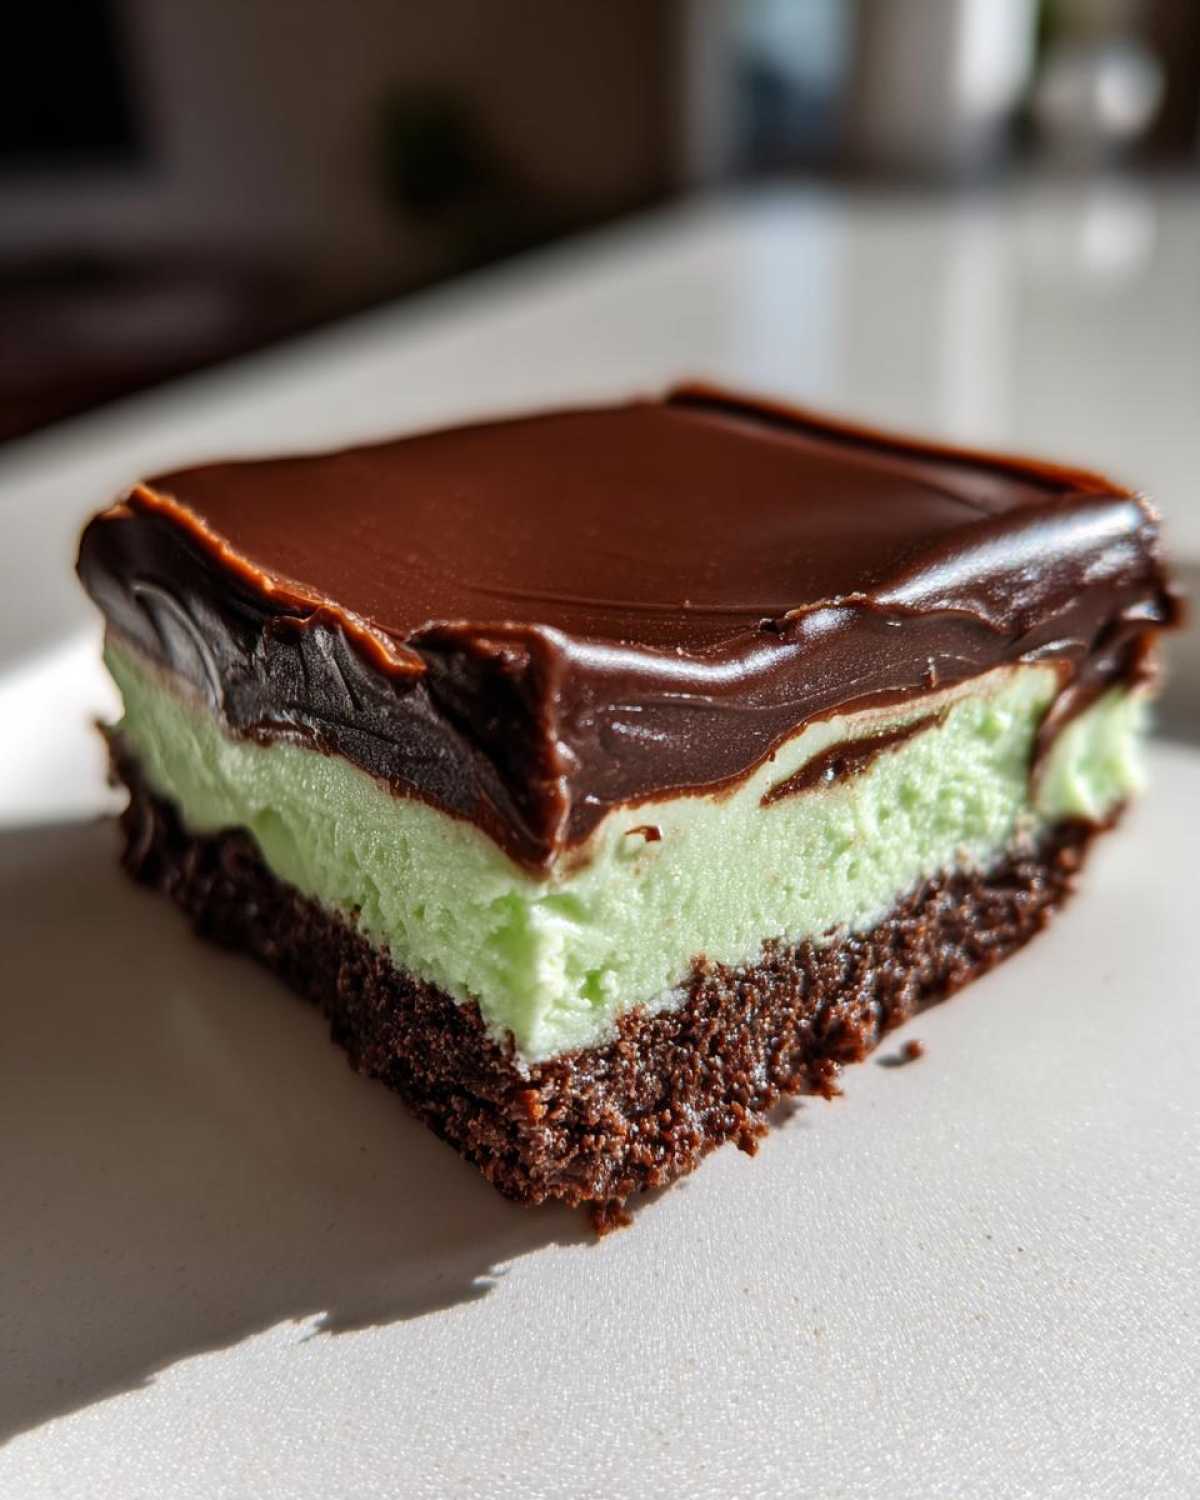
While Layer Two is setting, get your ganache ready! Heat that half-cup of heavy cream until it’s just steaming—you might see tiny bubbles around the edges, but don’t let it boil over. Pour that hot cream straight over your chocolate chips in a heatproof bowl. Let it sit there, untouched, for about five minutes. This lets the heat do its job. Then, slowly whisk it from the center outward until you have a gorgeous, smooth, glossy chocolate topping. Pour this right over your set mint layer and spread it out carefully.
Final Chill and Serving the No-Bake Chocolate Mint Icebox Bars
This is the hardest part: waiting! You need to chill the entire pan for at least 4 hours, but honestly, if you can wait until the next day, the chocolate layer will be perfectly firm, and the bars will slice like a dream. When they are rock solid, use those parchment paper overhangs to lift the whole slab out onto a cutting board. Wipe a sharp knife under hot water between cuts for the cleanest lines possible when you slice them into squares!
Tips for Perfect No-Bake Chocolate Mint Icebox Bars
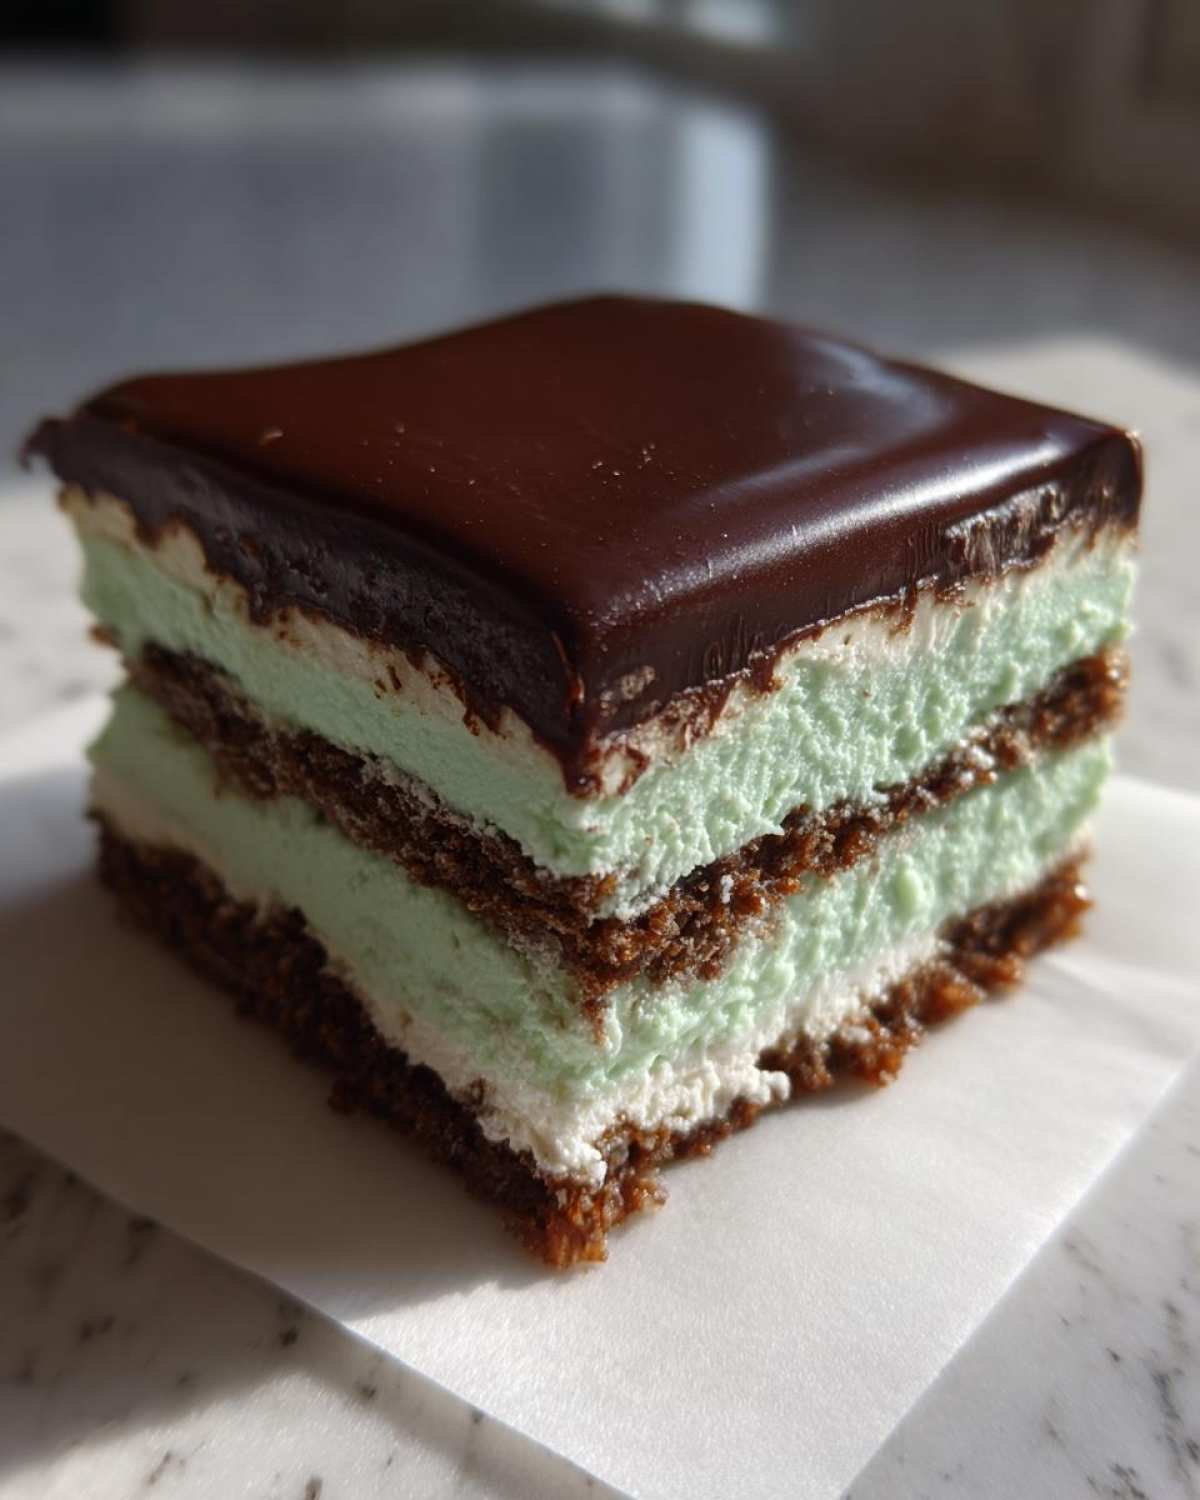
So, you’ve assembled your layers, but how do you move them from “good” to absolutely “perfect”? It all comes down to little tweaks I’ve learned over the years of making these No-Bake Chocolate Mint Icebox Bars. First tip: taste that mint filling before you fold in the whipped cream! If you want that deep, cool mint flavor, this is your last chance to boost the peppermint extract—maybe try 3/4 teaspoon instead of 1/2 teaspoon if you’re a true mint fanatic.
Next, talk about firmness. If you live somewhere super warm, you might want that filling to be extra sturdy. Don’t skip that 2-hour chill time for the mint layer before adding the ganache! Also, when you make the ganache, make sure your cream is hot enough to fully melt the chocolate chips smoothly. A slightly firmer ganache means cleaner cuts later. If you haven’t read my general baking tips over on the blog yet, you should!
Ingredient Notes and Substitutions for Simple Chocolate Mint Bars
When people ask me about adapting my No-Bake Chocolate Mint Icebox Bars, it usually comes down to one or two ingredients they don’t have on hand. That’s totally fine! Baking, or in this case, *no-baking*, should be flexible. But I do have strong opinions on substitutions, especially when it comes to flavor!
Let’s talk crumbs first. I specified chocolate wafer cookies because they grind down so nicely and are naturally dark, which complements the ganache, but if you only have Oreos—minus the cream filling, of course—go for it! Just make sure you still use the full 1/4 cup of melted butter to bind them. Graham crackers work too, but you lose a bit of that deep chocolate base flavor.
Now, the mint flavor. The peppermint extract totally dictates how much you need. If you’re using a pure, potent extract, stick to the half teaspoon; trust me, peppermint can sneak up on you and take over the whole dessert! If your extract seems a little weaker, you can bump it up slightly, but always taste as you go. If you are out of peppermint extract completely, don’t panic! You can use an extra half teaspoon of vanilla and maybe add a tiny bit of mint extract from a flavored tea bag steeped in warm water, but that’s getting complicated!
For that rich, dark topping, if you only have milk chocolate chips, you can use them, but I highly recommend sticking to semi-sweet or even bittersweet chips. The mint filling is quite sweet thanks to the powdered sugar, so using a slightly darker chocolate helps balance everything out beautifully. If you don’t have heavy cream for the ganache, you can use whole milk or half-and-half, but you MUST reduce the amount slightly; the topping will be thinner, so you’ll need extra chill time—maybe even an overnight stay in the fridge! For more thoughts on swapping out ingredients, check out how I play around with things in my zucchini bread recipe!
Storage and Make Ahead Mint Chocolate Refrigerator Dessert
This is where these No-Bake Chocolate Mint Icebox Bars really shine for busy cooks like us! They are honestly better the next day. All those beautiful layers—the crisp crust, the creamy filling, the firm chocolate top—they just meld together overnight in the fridge, making them even easier to cut cleanly.
You can absolutely make these ahead of time! I usually prepare them completely, slice them, and then store them in an airtight container layered between pieces of wax paper or parchment right in the refrigerator. They stay wonderfully fresh and creamy for up to 5 days. That’s a whole week of easy grab-and-go desserts, which is amazing.
Now, can you freeze them? Yes, you sure can! If you know you won’t eat them all within five days, wrapping individual squares tightly in plastic wrap and then foil works wonders. They freeze well for about a month. When you want one, just pull it out of the freezer and let it thaw on the counter for about 20 to 30 minutes. It thaws perfectly without losing any texture, making them a great frozen no bake mint bar treat for later!
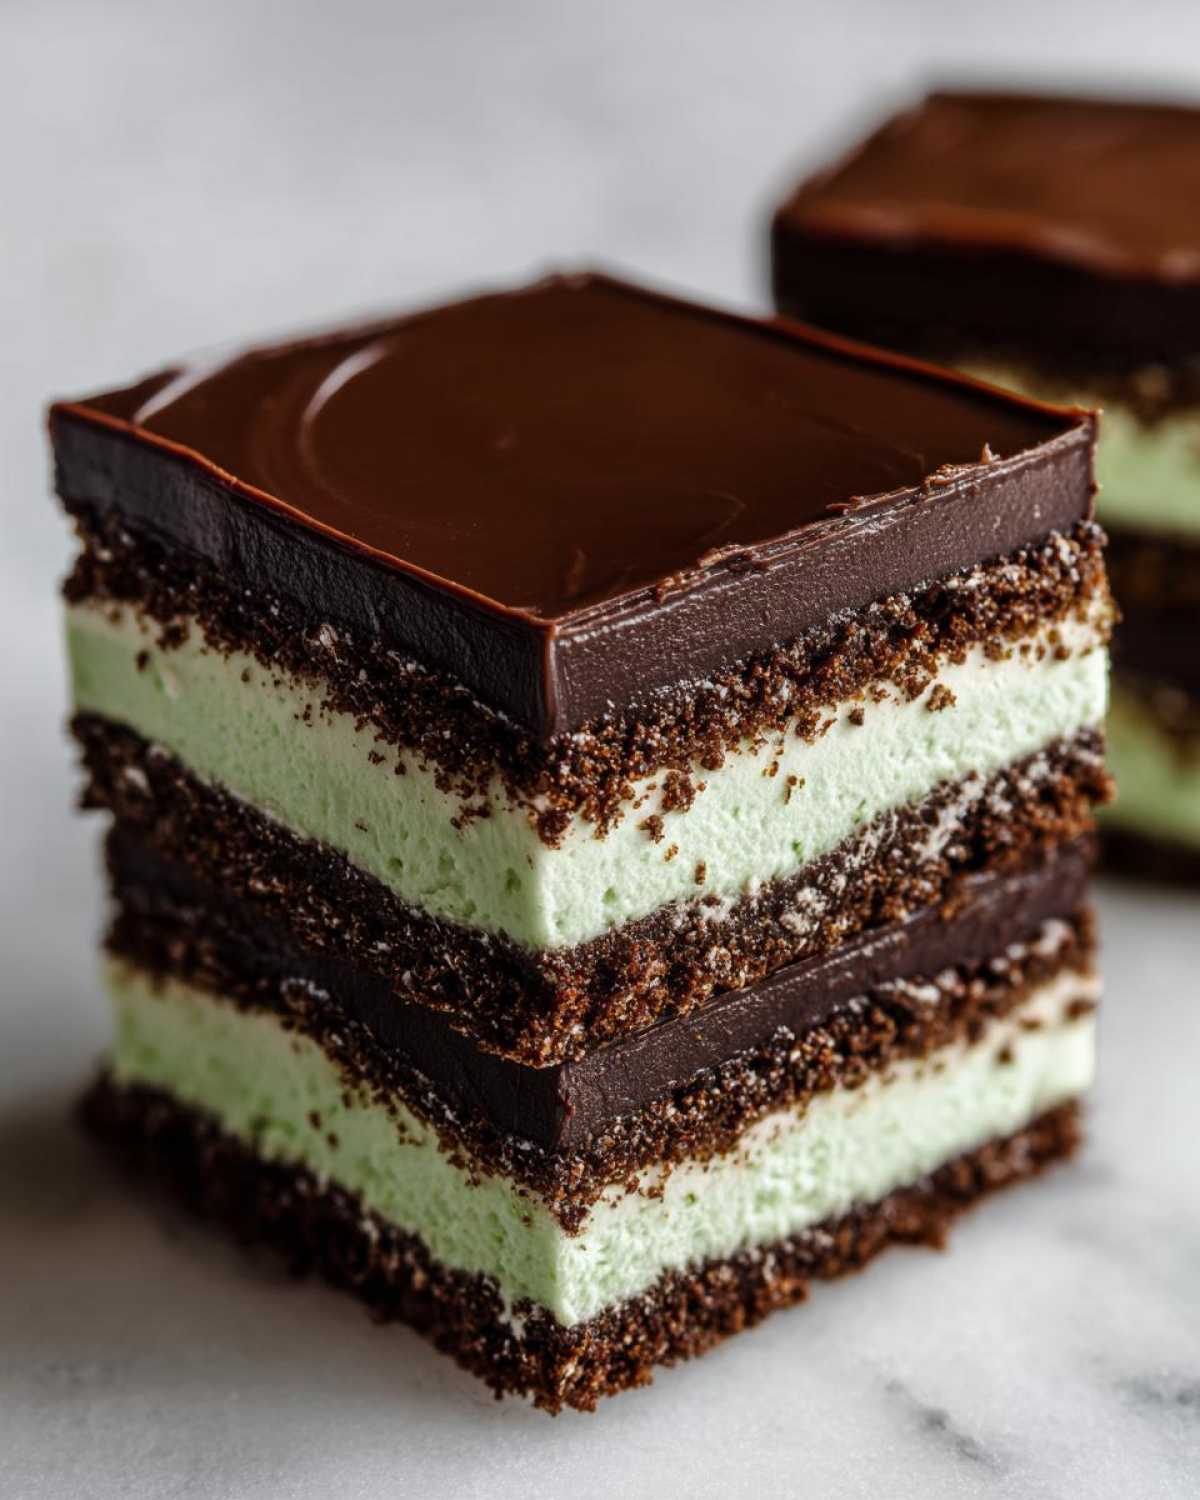
Because these bars are so forgiving and travel so well once they are firm, I always make an extra batch when I’m pulling out the pan for a potluck or holiday gathering. If you’re looking for more batch cooking ideas, check out my guide on other make ahead mint squares!
Frequently Asked Questions About This Easy Mint Icebox Dessert Recipe
It’s totally normal to have a few questions when you’re dealing with a cold chocolate mint bars recipe that relies totally on chilling instead of baking. These little hiccups always come up, especially around setting times! Here are the things I hear most often about making these layered beauties.
Can I make these No-Bake Chocolate Mint Icebox Bars without food coloring?
Absolutely, yes! Please don’t stress about food coloring if you don’t have it or just don’t like using it. The gorgeous flavor—that peppermint and chocolate punch—is already there, so the bars taste just as amazing without the green tint. It just means you’ll have a beautiful white/cream-colored mint layer instead of a green one. Personal preference wins every time!
How long must the bars chill before cutting?
This is critical if you want those neat, tidy squares that look perfect for serving! For the best results possible, especially for that firm chocolate top, you need to let the whole pan chill overnight—at least 8 hours is my strong recommendation. If you’re in a huge rush, the absolute minimum time for the mint layer to firm up is 2 hours, and then you need another 4 hours after the chocolate ganache goes on. If you cut them too soon, you’ll end up with a gorgeous mess rather than actual simple chocolate mint bars!
Why won’t my mint filling set up like your Creamy No Bake Mint Dessert?
Usually, this is one of two culprits, and both are easy to fix next time. First, did you whip that heavy cream enough? It needs to reach stiff peaks before you fold it in. If it’s too soft, the whole filling stays looser. Second, check your peppermint extract. If you used a very tiny amount, the flavor might be weak, but more importantly, the alcohol in some extracts can inhibit proper setting. Make sure you beat the cream cheese layer really well first to incorporate the sugar, and then be gentle—but thorough—when folding!
What’s the best way to get an extra crispier crust?
While this recipe is designed to keep the oven off, if you have a sweet tooth for extra crunch, you can always give that crust a quick bake! Just slide the crust (with the butter mixed in) into a 350-degree oven for about 8 minutes until it smells fragrant. Let it cool completely before you add the mint layer, though! This gives you an even sturdier base for these fantastic make ahead mint chocolate squares.
If you’re looking for more amazing recipes perfect for parties, check out my collection of easy holiday mint bars!
Estimated Nutritional Data for No Bake Chocolate Mint Dessert
Okay, so these No-Bake Chocolate Mint Icebox Bars are definitely a treat, not a health food, but it’s good to know what you’re working with! I always run the numbers for my own peace of mind. Keep in mind that because these are homemade, the exact numbers can shift slightly depending on the exact brand of cookie crumbs or chocolate chips you grab.
Here’s the breakdown based on 16 standard squares:
- Calories: Around 310 per bar
- Total Fat: About 20g (Watch that saturated fat!)
- Carbohydrates: Roughly 30g
- Protein: A nice little boost at 4g
- Sugar: You’re looking at about 25g, mostly from the topping and filling.
It’s worth every single bite, I promise you that! If you’re diving into other rich recipes later, you can compare what you find in my Chocolate Mint Cream Bars recipe for reference.
Share Your Experience Making Our No-Bake Chocolate Mint Icebox Bars
I put my heart and soul into making sure these instructions for the No-Bake Chocolate Mint Icebox Bars are perfectly clear, but the real fun is hearing from you! Did you try boosting that mint flavor? Did you let them chill overnight? I absolutely adore seeing how these desserts turn out in your kitchens.
Please, if you loved this no bake chocolate mint dessert, take a moment to leave a star rating right down below! It helps me know what recipes to keep sharing, and those comments are my favorite part of the day. If you shared a picture on Instagram or Facebook, tag me so I can see your perfectly set squares! And if you have any nagging questions about setting or storage, don’t hesitate to reach out via my contact page!
Estimated Nutritional Data for No Bake Chocolate Mint Dessert
Okay, so these No-Bake Chocolate Mint Icebox Bars are definitely a treat, not a health food, but it’s good to know what you’re working with! I always run the numbers for my own peace of mind. Keep in mind that because these are homemade, the exact numbers can shift slightly depending on the exact brand of cookie crumbs or chocolate chips you grab.
Here’s the breakdown based on 16 standard squares:
- Calories: Around 310 per bar
- Total Fat: About 20g (Watch that saturated fat!)
- Carbohydrates: Roughly 30g
- Protein: A nice little boost at 4g
- Sugar: You’re looking at about 25g, mostly from the topping and filling.
It’s worth every single bite, I promise you that! If you’re diving into other rich recipes later, you can compare what you find in my Chocolate Mint Cream Bars recipe for reference.
Share Your Experience Making Our No-Bake Chocolate Mint Icebox Bars
I put my heart and soul into making sure these instructions for the No-Bake Chocolate Mint Icebox Bars are perfectly clear, but the real fun is hearing from you! Did you try boosting that mint flavor? Did you let them chill overnight? I absolutely adore seeing how these desserts turn out in your kitchens.
Please, if you loved this no bake chocolate mint dessert, take a moment to leave a star rating right down below! It helps me know what recipes to keep sharing, and those comments are my favorite part of the day. If you shared a picture on Instagram or Facebook, tag me so I can see your perfectly set squares! And if you have any nagging questions about setting or storage, don’t hesitate to reach out via my contact page!
PrintNo-Bake Chocolate Mint Icebox Bars
Make these simple, layered chocolate mint icebox bars without using your oven. They feature a crisp crust, a cool mint filling, and a rich chocolate topping.
- Prep Time: 25 min
- Cook Time: 0 min
- Total Time: 25 min
- Yield: 16 bars
- Category: Dessert
- Method: Chilling
- Cuisine: American
- Diet: Vegetarian
Ingredients
- 1 1/2 cups chocolate wafer cookie crumbs
- 1/4 cup unsalted butter, melted
- 8 ounces cream cheese, softened
- 1 cup powdered sugar
- 1 teaspoon vanilla extract
- 1/2 teaspoon peppermint extract
- 2 cups heavy whipping cream, cold
- 1/4 cup granulated sugar (for whipped cream)
- 1 cup semi-sweet chocolate chips
- 1/2 cup heavy cream (for ganache)
- Green food coloring (optional)
Instructions
- Combine the chocolate wafer crumbs and melted butter in a bowl. Press the mixture firmly into the bottom of an 8×8 inch baking pan lined with parchment paper, leaving an overhang for easy removal. Chill the crust for 15 minutes.
- In a large bowl, beat the softened cream cheese, powdered sugar, vanilla extract, and peppermint extract until smooth.
- In a separate bowl, whip the 2 cups of cold heavy cream with 1/4 cup of granulated sugar until stiff peaks form. Gently fold the whipped cream into the cream cheese mixture until just combined. Add a few drops of green food coloring if desired.
- Spread the mint filling evenly over the chilled crust. Return the pan to the refrigerator to chill for at least 2 hours, or until the filling is firm.
- Prepare the topping: Place the chocolate chips in a heatproof bowl. Heat the 1/2 cup of heavy cream in a small saucepan until it just begins to simmer. Pour the hot cream over the chocolate chips. Let stand for 5 minutes, then whisk until smooth and glossy.
- Pour the chocolate ganache over the chilled mint layer. Spread evenly.
- Refrigerate the bars for at least 4 hours, or preferably overnight, until the topping is set.
- Use the parchment paper overhang to lift the bars from the pan. Cut into squares before serving.
Notes
- For a firmer crust, you can bake the crust at 350 degrees Fahrenheit for 8 minutes, but this recipe is designed to be no-bake.
- Store leftover bars tightly covered in the refrigerator for up to 5 days.
- If you prefer a stronger mint flavor, increase the peppermint extract to 3/4 teaspoon.
Nutrition
- Serving Size: 1 bar
- Calories: 310
- Sugar: 25
- Sodium: 150
- Fat: 20
- Saturated Fat: 12
- Unsaturated Fat: 8
- Trans Fat: 0
- Carbohydrates: 30
- Fiber: 1
- Protein: 4
- Cholesterol: 55
