

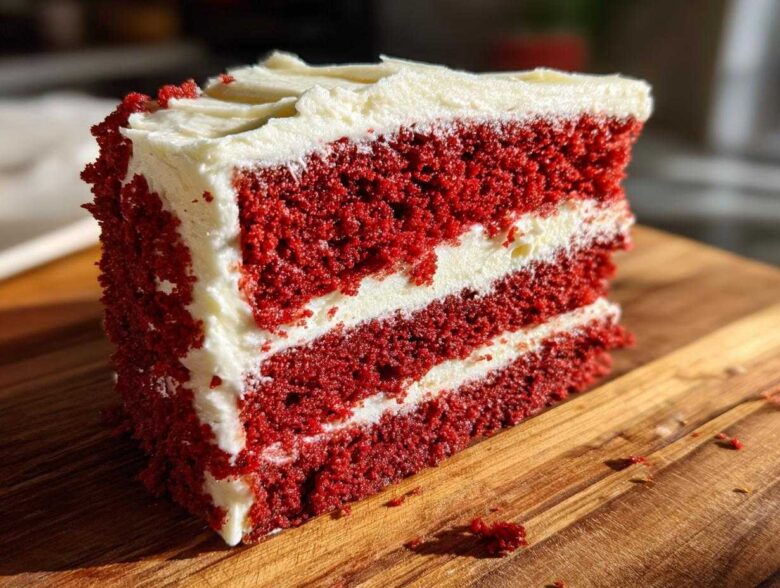
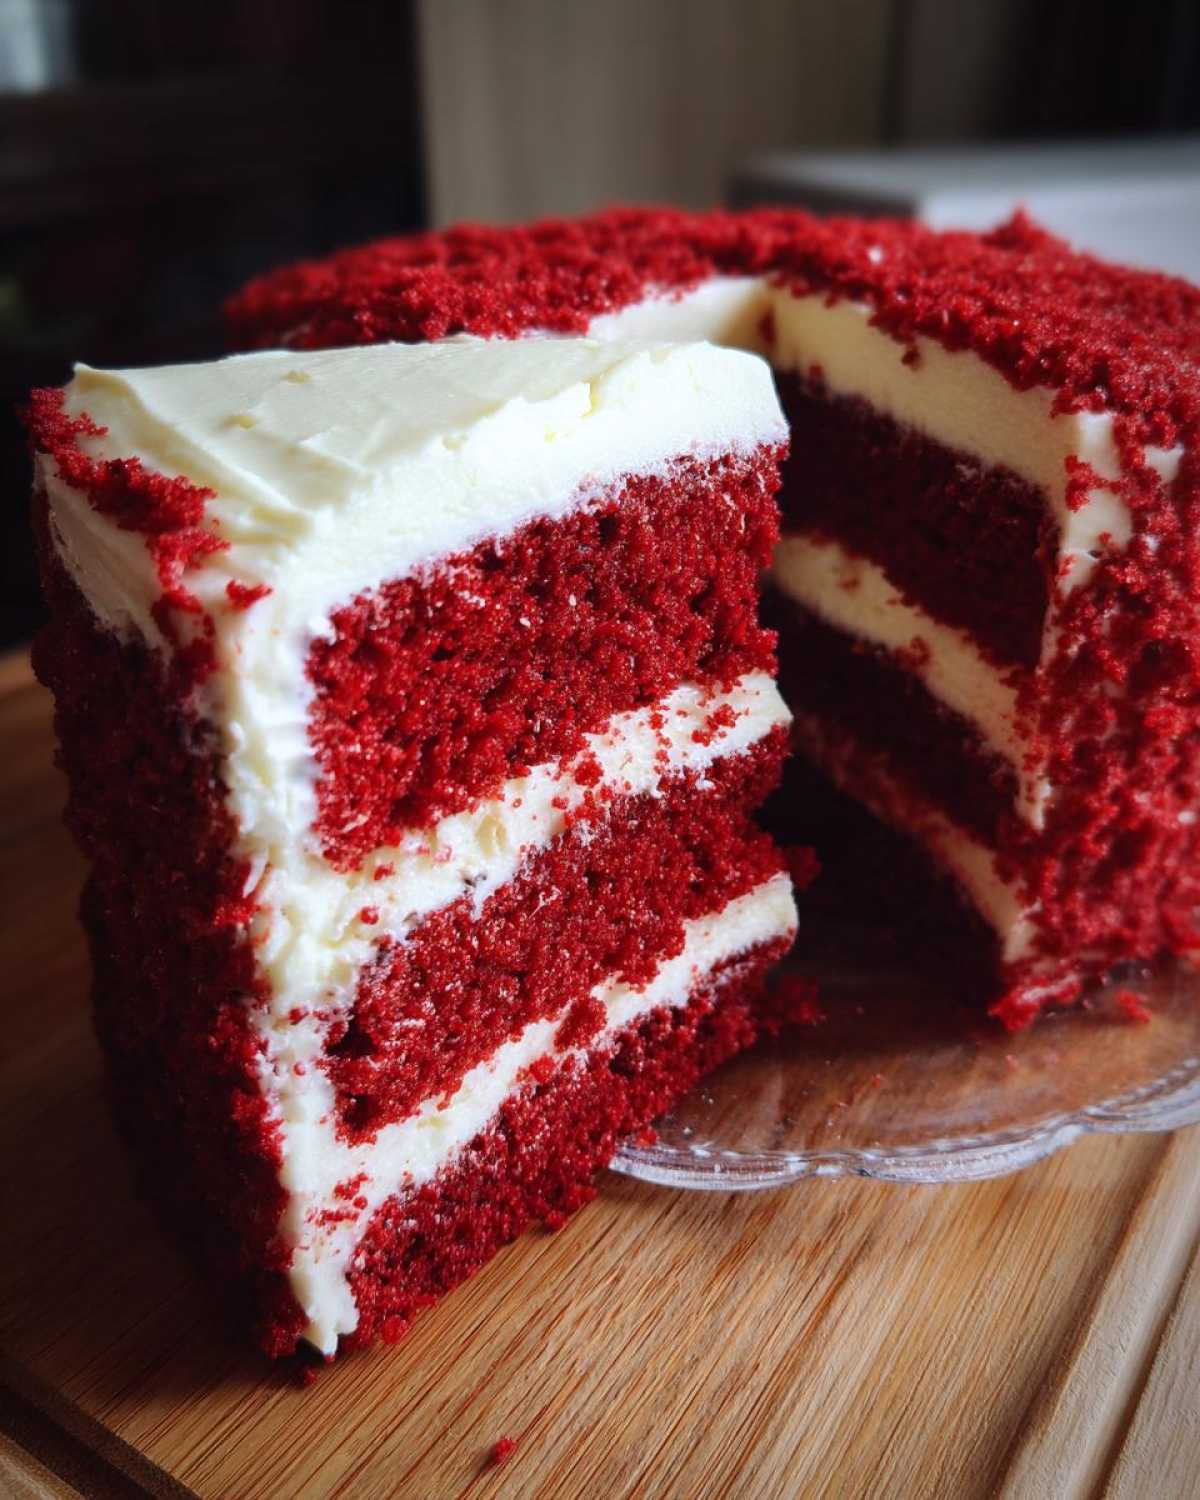
Oh, honey, if there’s one thing that screams ‘celebration’ in the South, it’s a towering, perfectly crimson cake dripping with tangy frosting! We are talking about truly iconic desserts that demand a place on your holiday table or birthday spread. Today, Sasha is absolutely beaming because we are sharing her absolute favorite red velvet cake recipe—we call it The Best Southern Style Moist Red Velvet Cake from Scratch with Classic Cream Cheese Frosting. Forget those dry, dull attempts you might have had; this one is unbelievably moist and has that deep, authentic background note of cocoa. Sasha pours her entire heart into making showstopping desserts, and trust me, this one will stop traffic! If you want to hear more about how we all cooked up this blog, you can check out our unlikely friendship story.
Why This Moist Red Velvet Cake Recipe is a Keeper
You need a recipe you can trust when you’re trying to pull off a showstopper, right? This cake isn’t just pretty; it delivers every single time in terms of texture and flavor. It’s genuinely one of the easiest cakes you’ll ever whip up from scratch, but it tastes like it took three days!
- It’s incredibly moist—no dry edges allowed in my kitchen!
- It uses simple, pantry-staple ingredients, making it an easy baking recipe.
- The texture is exceptionally soft, never tough or crumbly.
- We rely on the authentic Southern trick of using buttermilk and vinegar to react with the baking soda for that classic lift and tang.
Achieving the Perfect Fluffy Red Velvet Cake Texture
That fluffy result isn’t just magic; it’s science, my friend! We keep the oil high and the flour low, which keeps things tender. Plus, the leavening is totally controlled by that buttermilk/vinegar combo we mentioned. It creates tiny bubbles that burst softly in the oven, giving you that melt-in-your-mouth crumb without needing tons of complex steps.
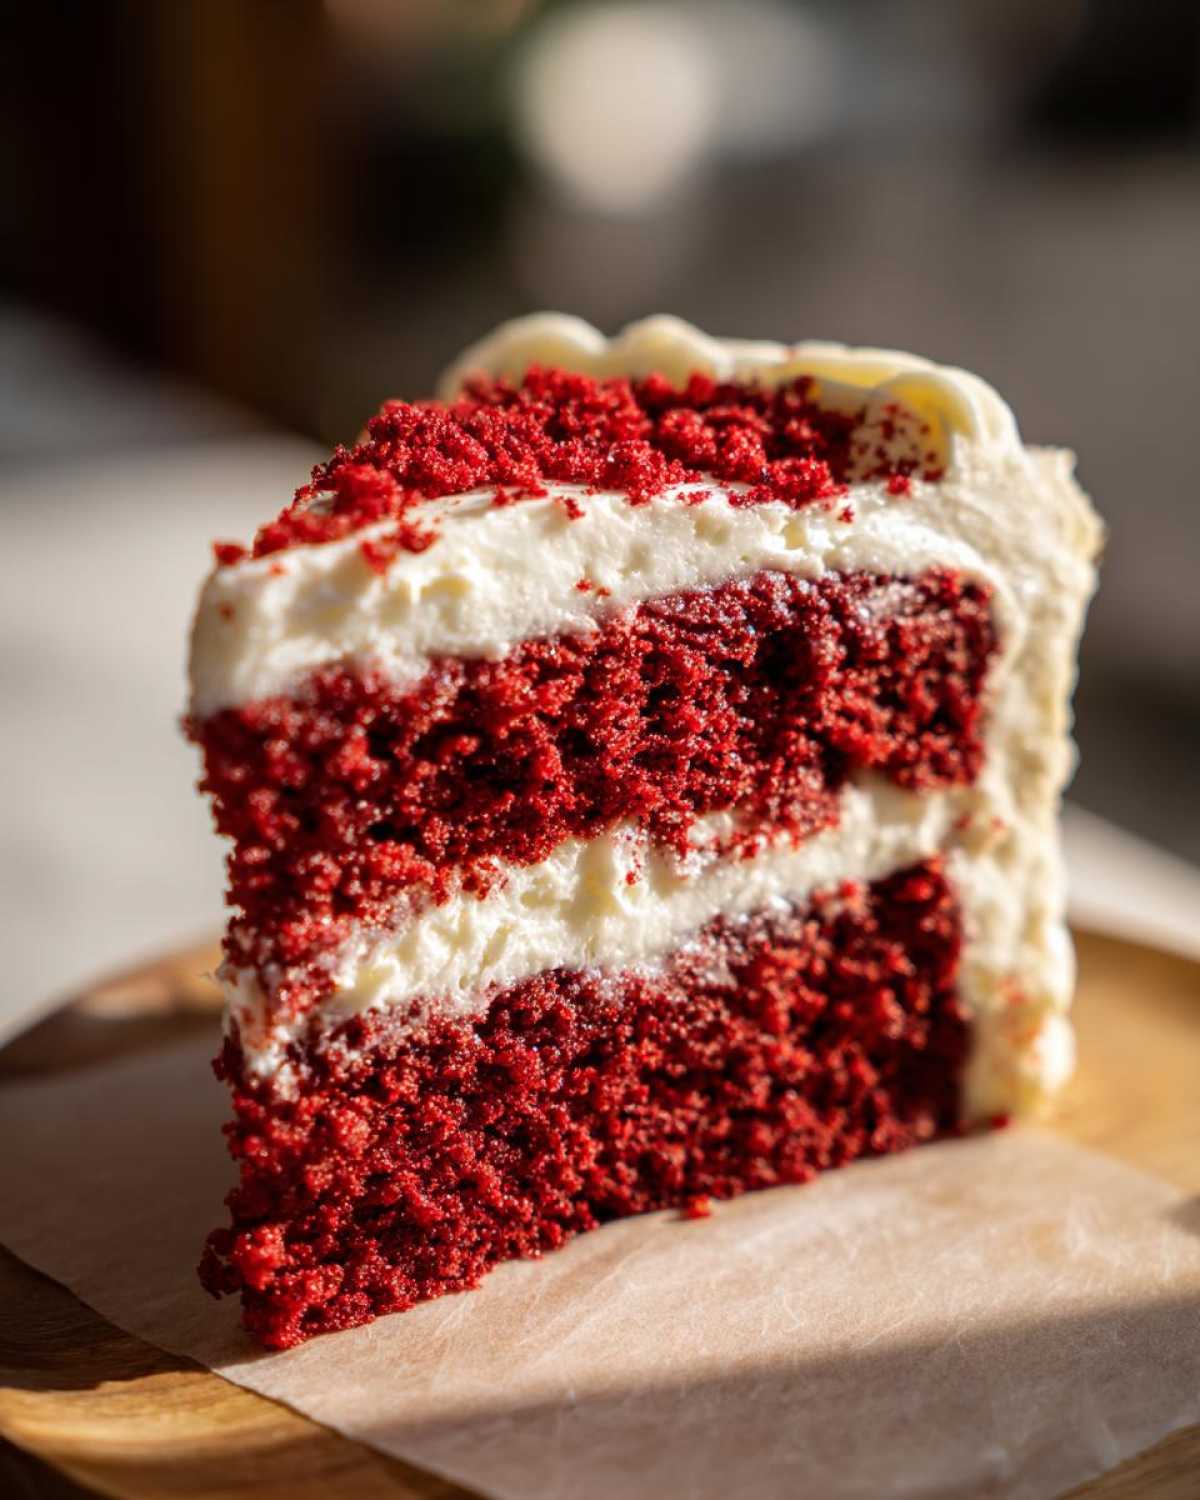
Essential Ingredients for Authentic Red Velvet Cake from Scratch
Okay, let’s get serious about what goes into this dream cake. Since we’re making this red velvet cake from scratch, the ingredients matter—especially if we want that signature Southern flavor profile. I’ve organized everything here so you can easily check your pantry. If you’re ever curious about other creamy, dreamy bakes, check out my thoughts on making moist coffee cake swirl!
For the Red Velvet Cake Batter
Remember, we are aiming for a soft homemade cake here, so don’t substitute the buttermilk!
- 2 1/2 cups all-purpose flour
- 1 1/2 cups granulated sugar
- 1 teaspoon baking soda
- 1 teaspoon cocoa powder (just a little bit for that authentic flavor, not chocolate!)
- 1 teaspoon salt
- 1 cup vegetable oil
- 1 cup real buttermilk
- 2 large eggs
- 1 teaspoon white vinegar
- 1 teaspoon vanilla extract
- 1 to 2 tablespoons red food coloring (Use gel coloring if you want that truly vibrant red velvet cake color we all dream about.)
For the Best Cream Cheese Frosting Recipe
This frosting is everything! The secret here is temperature. Make sure your dairy—that’s the cream cheese and butter—is high-quality and fully, truly softened. Squishy, but not melted! That’s how you avoid lumps in your best cream cheese frosting recipe.
- 8 ounces cream cheese, softened
- 1/2 cup unsalted butter, softened
- 4 cups powdered sugar, sifted (Sifting is non-negotiable, trust me on this one!)
- 1 teaspoon vanilla extract
Step-by-Step: How to Make Your Red Velvet Layer Cake
Alright, let’s get baking! Seeing this cake come together is actually so satisfying. It’s one of those easy baking recipes that just looks incredibly professional when you’re done. We follow the exact order for combining ingredients, and trust me, it matters for texture!
Mixing the Red Velvet Cake Batter
First things first: get that oven humming! Preheat it to 350°F (175°C) and get your two 9-inch pans greased and floured. In your big bowl, whisk together all the dry stuff—flour, sugar, baking soda, cocoa, salt. Keep it light and airy!
Now for the wet crew. In a separate bowl, combine the oil, buttermilk, eggs, vinegar, and vanilla. This is where you dump in that red coloring. I always use a little more than I think I need if I want that truly vibrant red velvet cake hue—go for deep crimson!
Pour the wet mixture into the dry. Mix it on low speed, and this is the golden rule Sasha insists on: stop mixing the second you don’t see any more streaks of flour. Seriously! Overmixing is the enemy of a soft homemade cake.
Baking and Cooling the Red Velvet Cake Layers
Divide that gorgeous batter evenly between your pans. Pop those beauties into the preheated oven for about 30 to 35 minutes. You know they’re done when a wooden pick slides in the center and comes out clean—not slimy, just clean crumbs clinging to it.
Once they’re out, let them chill in the pans for about 10 minutes. Patience! If you try to flip them out immediately, they might crumble. After that short rest, flip them gently onto a wire rack. And this is important: they must be stone cold before you even *think* about frosting them. Hot cake equals melted, soupy disaster, and we don’t want that!
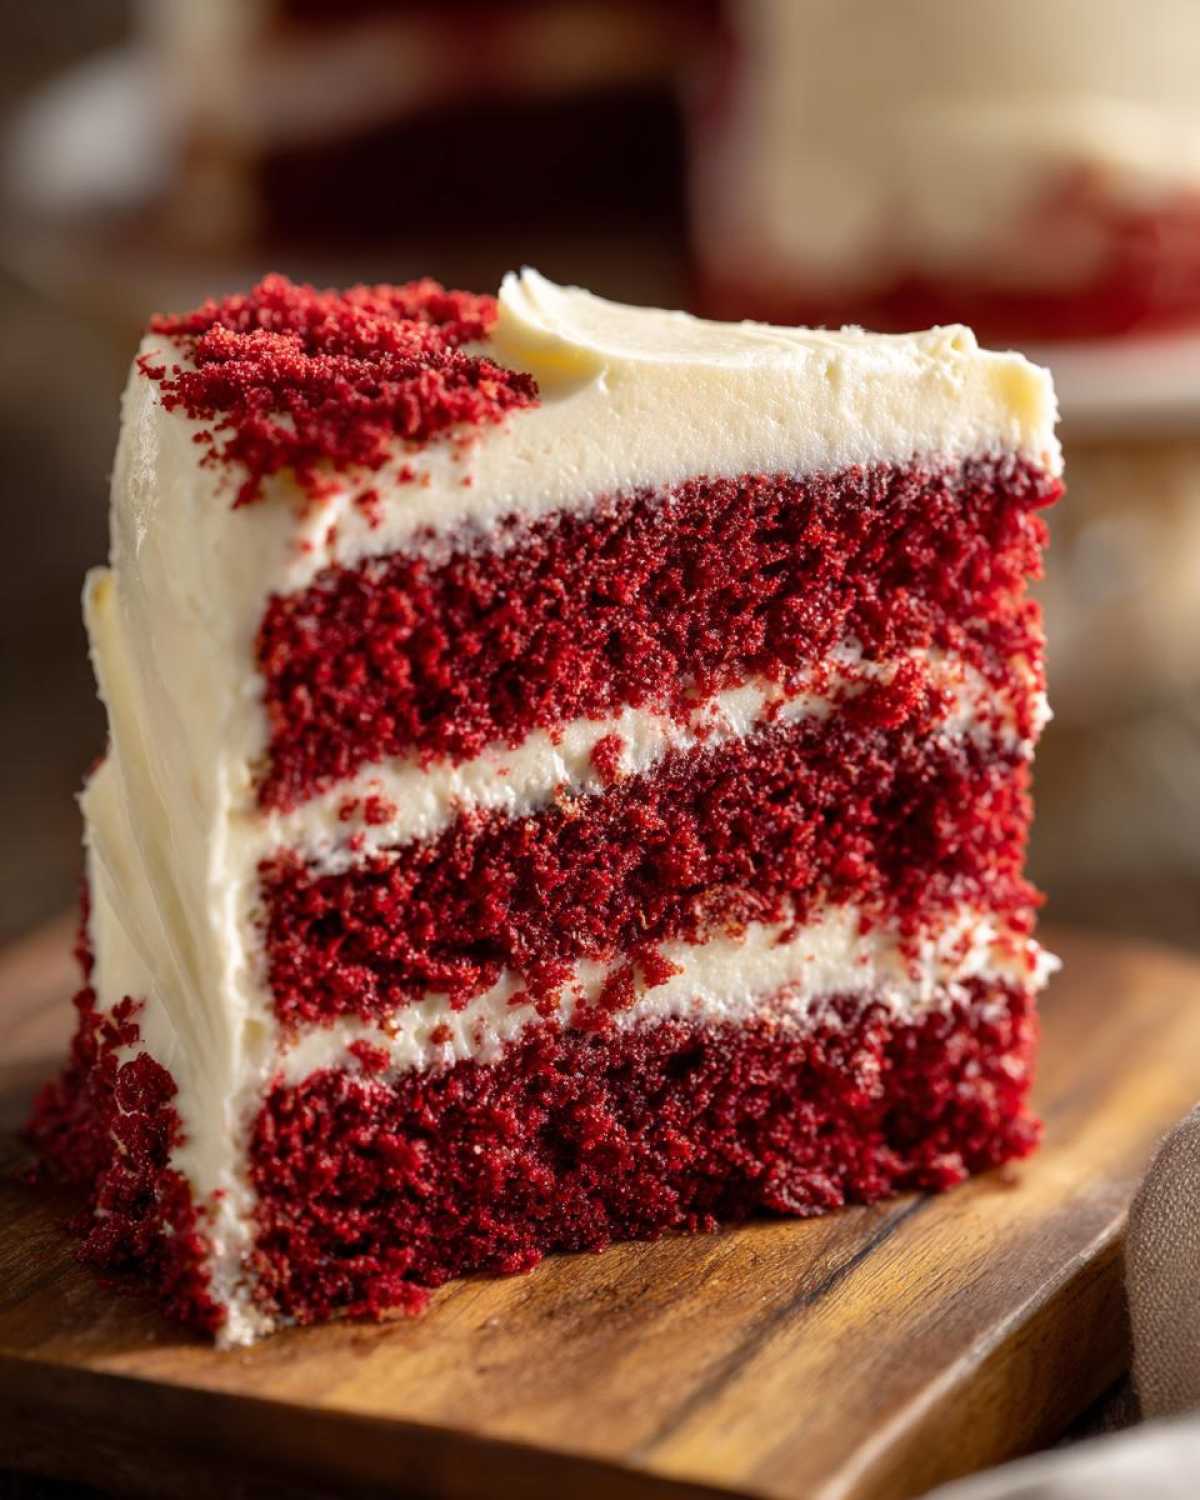
Crafting the Best Cream Cheese Frosting Recipe
Now we move onto the moment we’ve all been waiting for: the decadent, tangy topping! Honestly, a red velvet cake just isn’t complete without that classic cream cheese swirl. You can make a rich loaf cake or a stunning layer cake, but the frosting ties the whole Southern experience together.
The single most important rule for making your best cream cheese frosting recipe smooth is simple: make sure your butter and cream cheese are at the *perfect* room temperature. I mean it! If they are even slightly cold, you’ll get lumps you just cannot beat out. You want them soft enough that they barely resist your finger, but not greasy or melted at all. Room temperature dairy is the secret weapon for a perfectly smooth, lump-free finish.
In your stand mixer (or using a hand mixer, if you’re feeling the burn!), beat those two softened ingredients—8 ounces of cream cheese and 1/2 cup of butter—together until they are truly smooth and creamy. This might take a few minutes. You’re building the base texture here, so be patient while the machine works its magic!
Once that base is looking unbelievably luxurious, start adding your 4 cups of sifted powdered sugar, one cup at a time. Beat well after each addition. Keep beating it on medium-high speed until the whole thing lightens up; we want this frosting airy and fluffy, not dense!
Finally, stir in that teaspoon of vanilla. If you feel like it’s too stiff to spread nicely onto your cooled layers, just add a drizzle—a tiny splash!—of milk or heavy cream until it hits that perfect consistency. If you’re looking for some other amazing recipes involving rich flavors and moist textures, you have to try my notes on chocolate chip zucchini bread. It uses similar principles for keeping things soft!
Assembling Your Showstopping Red Velvet Layer Cake
The hard part is over! The layers are baked perfectly, and your best cream cheese frosting recipe is light and fluffy and ready to go. Now we transform these two beautiful rounds into a true centerpiece, maybe even one of those amazing birthday cake ideas people talk about for weeks!
First, place your first cooled cake layer down on whatever you plan to serve it on—a platter, a cake stand, whatever holds your favorite desserts! It’s wise to put a tiny dollop of frosting down first, just in the center, to act like glue so the bottom layer doesn’t slide around. Trust me, you don’t want a sliding cake.
Take about a third of your frosting and spread it evenly across the top of that first layer. Use an offset spatula if you have one; it really helps create a smooth surface. Then, gently lift that second layer and carefully place it right on top. Try to line up the edges as best you can!
Now, it’s time for the crumb coat, which is essential if you want that ultra-smooth finish. Take a very thin layer of frosting and cover the entire outside—top and sides. This seals in any loose crumbs. Pop the whole thing into the fridge for about 15 minutes to let that thin coat firm up. You want it cool, not hard!
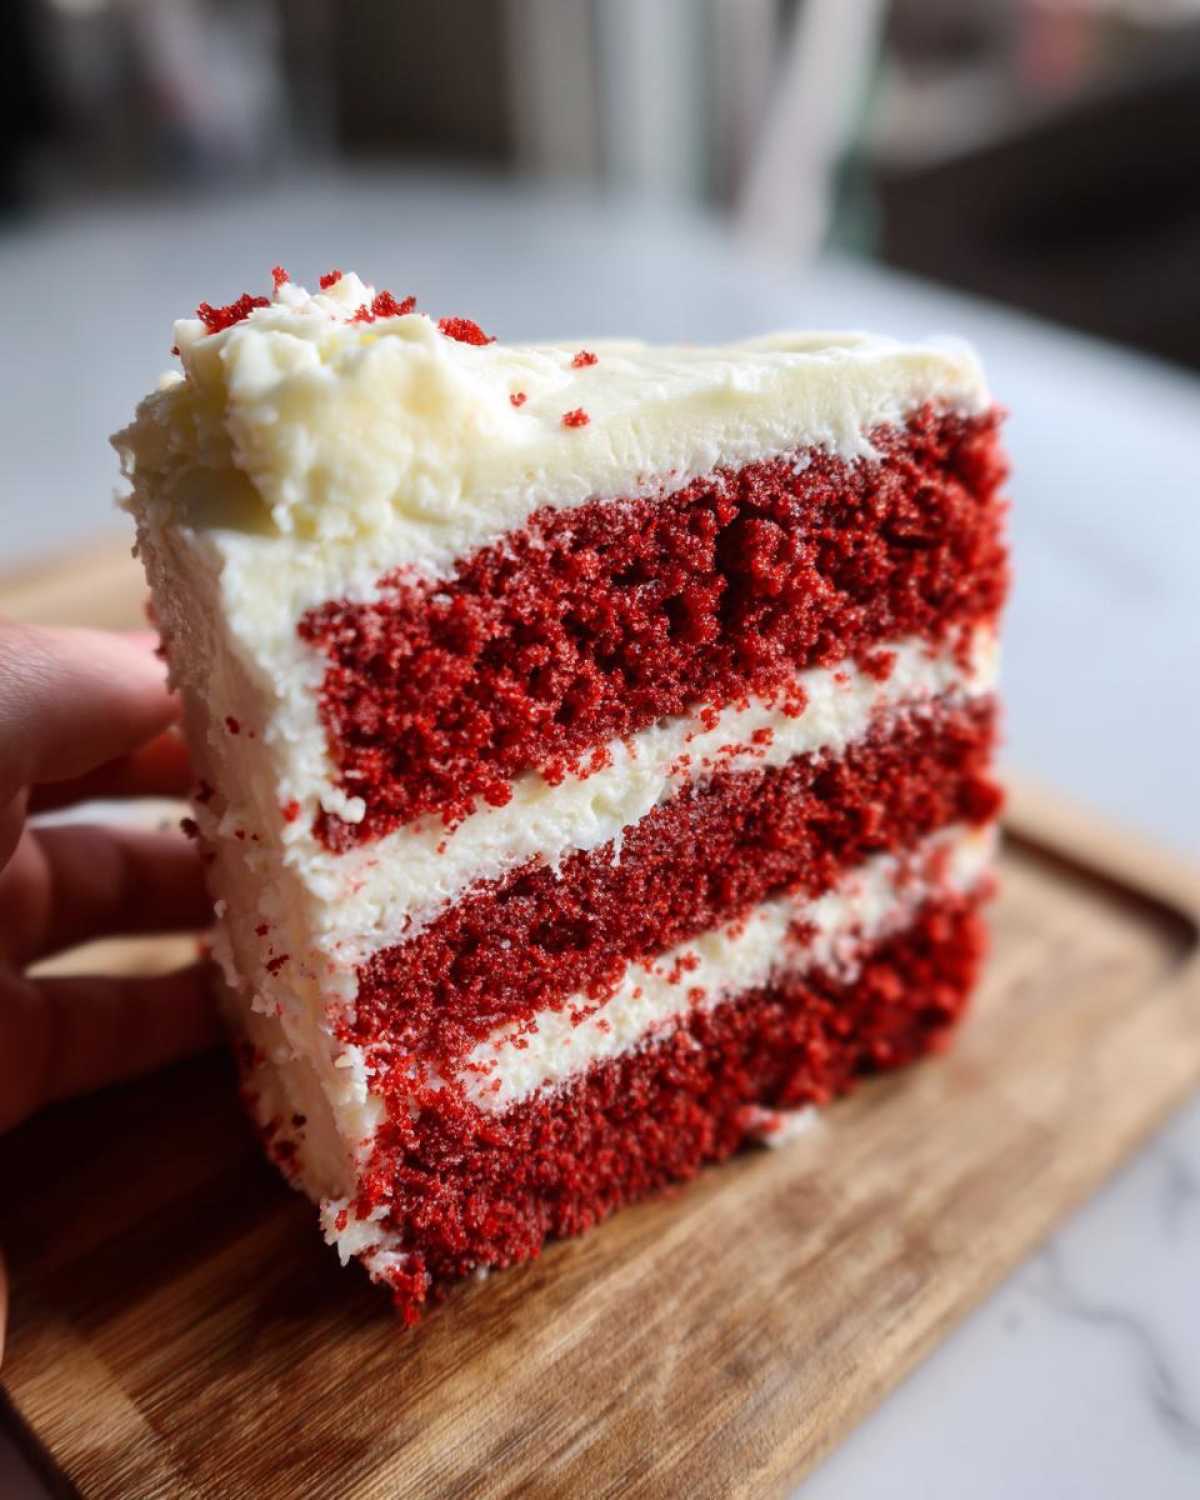
Finally, bring back the remaining frosting and give it the grand finale! Cover the top and sides generously. Don’t feel pressured to make it perfectly smooth; rustic swirls look lovely too, especially if you’re adding little chocolate shavings or chopped pecans around the base. This is your moment to make it beautiful!
If you’re looking for other great ways to use up those moist cake scraps or want a different kind of deliciousness, check out my tips for super moist zucchini muffins—they are incredible!
Tips for a Truly Vibrant Red Velvet Cake Tutorial
Listen, the color is half the fun of a red velvet cake, right? If you want that deep, gorgeous, unmistakable crimson that proves you’re making an authentic southern red velvet and not just some weak chocolate cake, you need to pay attention to two things: the cocoa and the dropper!
First, don’t reach for dark cocoa powder. A traditional recipe uses just a touch of natural or regular cocoa powder—too much, and it kills that vibrant red color we are trying so hard to achieve. The color comes from the chemistry between the acids (buttermilk/vinegar) and the dye, not the cocoa.
Second, use gel food coloring, not the liquid stuff in the little plastic bottle. Gel is concentrated, so you use less, but you get way more punch. I usually add it right into the wet ingredients and whisk until my batter looks slightly intimidatingly red! It might dull down just a tiny bit while baking, but you’ll still have a stunning result.
For more baking wisdom and general kitchen chaos, come hang out with us on the main blog page!
Storage and Reheating Instructions for Your Homemade Cake
Now that you’ve finished this glorious, showstopping red velvet cake, the biggest question is: how do I keep it looking and tasting this amazing until the last crumb is gone?
This is where having that best cream cheese frosting recipe comes into play for storage, because cream cheese frosting isn’t like buttercream. It needs a little chill time, but too much time and it can dry out your beautiful cake or get a little waxy.
For short-term storage—if you plan on eating this glorious thing within two or three days—keep it covered loosely at cool room temperature. A cake dome is perfect for this. However, if your kitchen is super warm, or if you used a lot of fresh fruit decoration (though we didn’t in this version!), you should definitely move it to the fridge. Make sure it’s in an airtight container or very well-covered with plastic wrap to prevent the lovely cake from sucking up any weird fridge odors.
When it comes out of the fridge, remember that the cold can slightly firm up the frosting and the cake layers, making it feel less soft. Pull it out about 30 to 45 minutes before you plan on serving it again. That little bit of time lets the butter in the frosting soften up just enough to be creamy again, and it brings back that fantastic, delicate structure to your moist red velvet cake.
Reheating? Honestly, just room temperature resting is the best “reheat” for this beauty! If you’re worried about moisture (which you shouldn’t be, because we made this recipe perfectly moist!), you can wrap an individual slice tightly in foil and warm it *very* gently in a low oven—say, 250°F for maybe 5 minutes—but usually, just letting it sit out for half an hour does the trick better than any heat!
Frequently Asked Questions About Red Velvet Cake
I know you guys are going to have questions once you dive into this incredible recipe. That’s what family is for, right? We troubleshoot together! Here are some of the things I always get asked about making sure this whole process of creating a red velvet cake from scratch goes perfectly for you.
Can I skip the vinegar in this easy red velvet cake?
Oh, please don’t! Seriously, that bit of white vinegar is key to making this an easy red velvet cake. It reacts with the baking soda, creating the carbon dioxide that gives you that signature tender crumb. Without it, the buttermilk won’t activate properly, and your cake might end up a bit dense instead of fluffy. It doesn’t make the cake taste vinegary, promise!
Why isn’t my red velvet cake red enough?
This is the most common heartbreak! If you used standard liquid food coloring, you might need a whole bottle just to get a decent pink. For a truly vibrant red velvet cake tutorial success, you absolutely must use gel food coloring. It’s concentrated, so a little goes a long way, reaching that iconic deep red hue without thinning out your batter. Look for ‘Super Red’ gel!
Is this really a moist red velvet cake recipe if I use oil instead of butter for the cake?
Yes! That’s one of the secrets for a super moist red velvet cake recipe and why it’s considered authentic Southern style. Oil stays liquid at room temperature, which keeps the cake feeling soft and velvety long after it cools down. Butter is fantastic for flavor, but oil is the moisture champion here. Don’t worry, we still use plenty of butter in that amazing frosting!
Can I use milk instead of buttermilk?
You can, but you have to make a quick substitute because, like the vinegar, milk won’t give you the right reaction. Just mix one cup of regular milk with one tablespoon of white vinegar or lemon juice and let it sit for five minutes. It curdles slightly, and boom—you’ve got your own buttermilk ready for your buttermilk cake recipes!
If you’re looking for more straightforward advice on beginner home baking, check out all my go-to easy baking recipes!
Share Your Red Velvet Cake Creations
Now that you’ve gone through the steps and hopefully pulled that heavenly, deeply colored moist red velvet cake recipe out of your oven, I just *have* to know how it turned out! Seriously, seeing your creations is the absolute best part of doing this blog. When Sasha sees people making our recipes, she gets that huge, excited grin.
Please, please don’t be shy! If you made this cake for Valentine’s or a birthday, snap a picture and tell us what you thought. Did you manage to get that super vibrant red?
- Did the best cream cheese frosting recipe turn out smooth for you?
- What tricks did you use to keep your layers soft?
- How did you decorate your final masterpiece?
Hop down to the comments below and leave us a rating—five stars if it blew your socks off! Hearing your feedback makes all the whisking worth it. If you end up posting pictures on social media, tag us! We love seeing our kitchen traditions travel all over!
If you loved this cake and want to share your kitchen wins (or fails, we’re honest here!) with us directly, you can always reach out via our contact page. And hey, if you need another highly-saved dessert recipe inspiration, you should really go check out how this recipe was rated over at The Recipe Source while you’re waiting for your cake to cool!
PrintThe Best Southern Style Moist Red Velvet Cake from Scratch
You can make this authentic Southern Red Velvet Cake from scratch. It is incredibly moist, soft, and features the perfect hint of cocoa, topped with a classic, tangy cream cheese frosting. This recipe is perfect for birthdays or any special occasion.
- Prep Time: 25 min
- Cook Time: 35 min
- Total Time: 60 min
- Yield: 12 servings
- Category: Dessert
- Method: Baking
- Cuisine: American
- Diet: Vegetarian
Ingredients
- 2 1/2 cups all-purpose flour
- 1 1/2 cups granulated sugar
- 1 teaspoon baking soda
- 1 teaspoon cocoa powder
- 1 teaspoon salt
- 1 cup vegetable oil
- 1 cup buttermilk
- 2 large eggs
- 1 teaspoon white vinegar
- 1 teaspoon vanilla extract
- 1 to 2 tablespoons red food coloring (for vibrant red velvet cake)
- 8 ounces cream cheese, softened
- 1/2 cup unsalted butter, softened
- 4 cups powdered sugar, sifted
- 1 teaspoon vanilla extract
Instructions
- Preheat your oven to 350°F (175°C). Grease and flour two 9-inch round cake pans.
- In a large bowl, whisk together the flour, sugar, baking soda, cocoa powder, and salt.
- In a separate medium bowl, whisk together the oil, buttermilk, eggs, vinegar, and vanilla extract. Add the red food coloring until you achieve a vibrant red velvet cake color.
- Pour the wet ingredients into the dry ingredients and mix on low speed until just combined. Do not overmix the batter.
- Divide the batter evenly between the prepared cake pans.
- Bake for 30 to 35 minutes, or until a wooden pick inserted into the center comes out clean. Let the cakes cool in the pans for 10 minutes before inverting them onto a wire rack to cool completely.
- While the cakes cool, prepare the cream cheese frosting. In a large bowl, beat the softened cream cheese and butter together until smooth and creamy.
- Gradually add the powdered sugar, beating until fully incorporated. Mix in the vanilla extract until the frosting is light and fluffy.
- Once the cakes are completely cool, place one layer on a serving plate. Spread about one-third of the frosting evenly over the top. Place the second layer on top and frost the top and sides of the entire cake.
- For a showstopping dessert, decorate as desired. Slice and serve your homemade cake.
Notes
- For the most authentic Southern red velvet flavor, use real buttermilk. The combination of buttermilk, vinegar, and baking soda creates the cake’s signature tender crumb.
- If you want an extra moist red velvet cake, you can lightly brush the cooled layers with a simple sugar syrup before frosting.
- When mixing the batter, stop as soon as the streaks of flour disappear. Overmixing develops gluten, which results in a tougher cake texture.
Nutrition
- Serving Size: 1 slice
- Calories: 450
- Sugar: 55g
- Sodium: 300mg
- Fat: 24g
- Saturated Fat: 12g
- Unsaturated Fat: 12g
- Trans Fat: 0g
- Carbohydrates: 58g
- Fiber: 1g
- Protein: 4g
- Cholesterol: 60mg
