

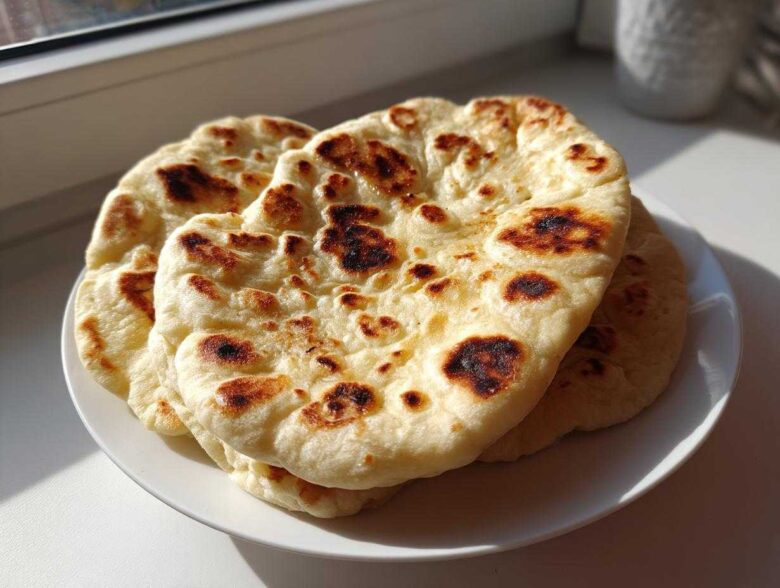
You know that moment when you’re halfway through a steaming bowl of butter chicken, but you realize you’re out of something to scoop up every last drop? That’s when the craving hits hard! Forget ordering takeout just for the bread; I’ve finally cracked the code on the absolute best naan bread recipe you can make right in your own kitchen. Seriously, forget the scary assumption that you need a massive, fiery tandoor oven. This is an easy, soft, fluffy, and wonderfully chewy naan bread recipe made entirely on the stovetop, using just your regular old skillet. After years of testing, I finally mastered the heat technique that brings those perfect, puffy air pockets to life. In fact, this naan is so good it deserves its own amazing Tikka Masala dipping sauce! Trust me, once you try this texture, you’ll never go back!
Why This Is the Best Naan Bread Recipe for Home Cooks
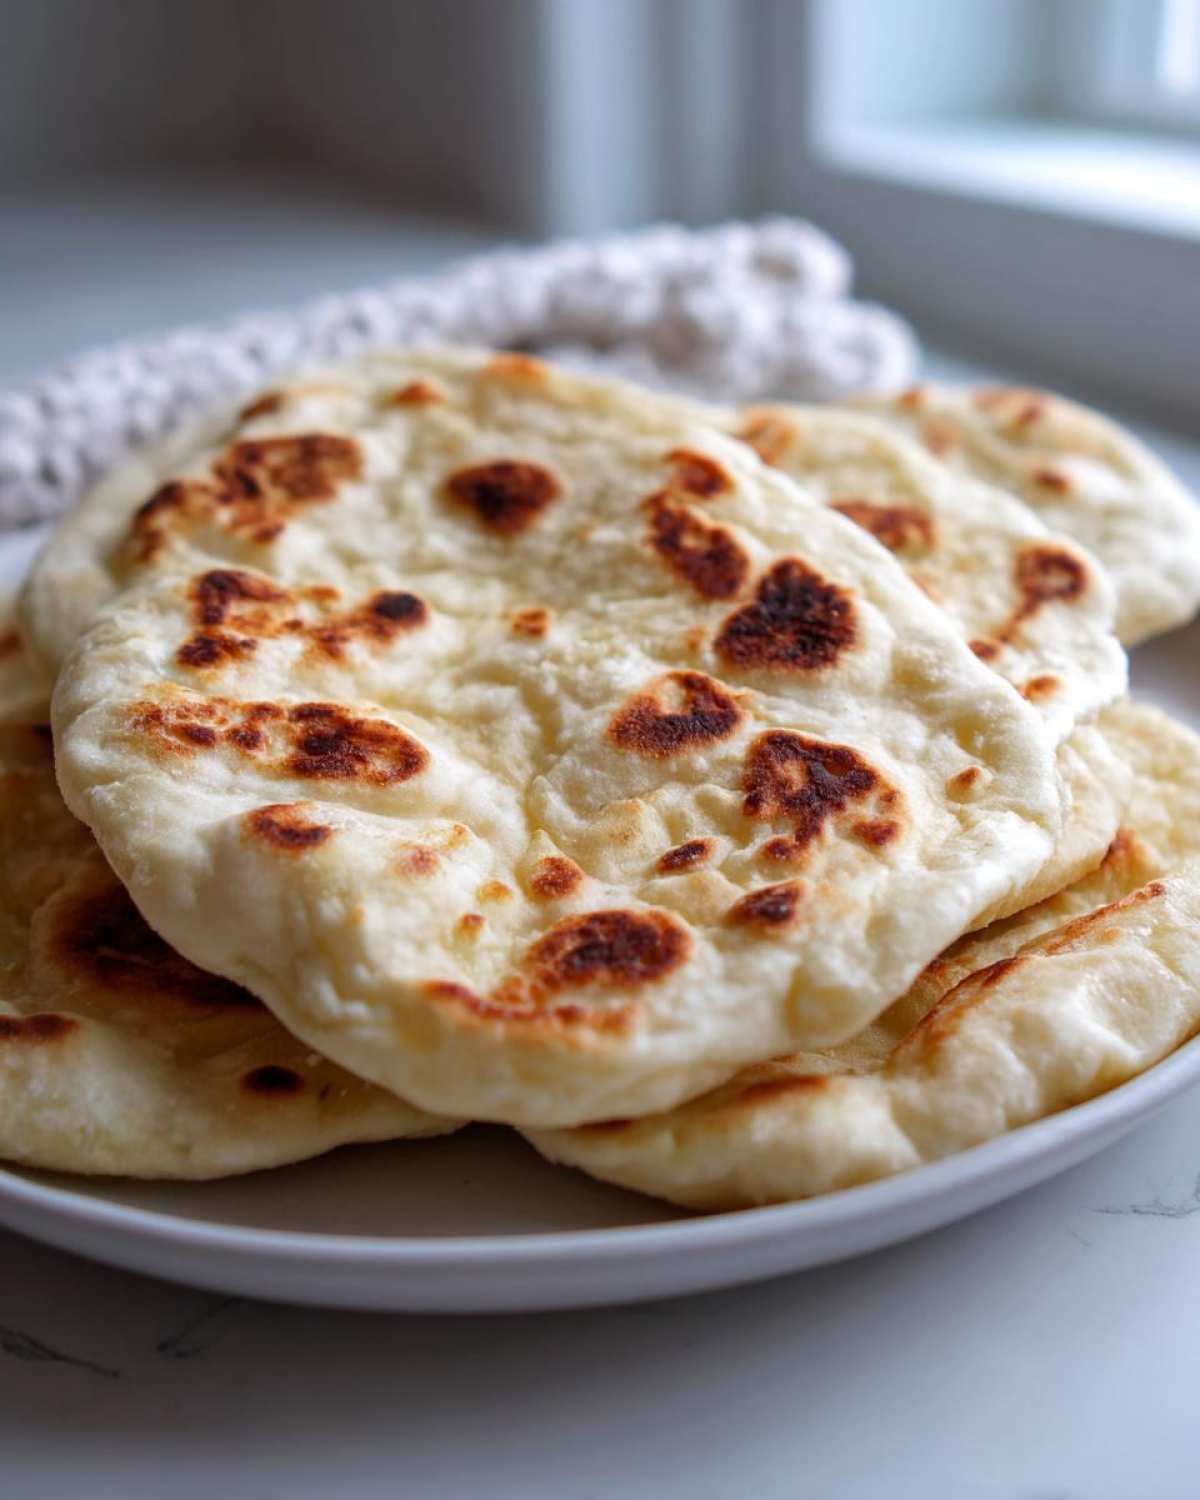
I know what you’re looking for: that pillowy, slightly charred bread that tastes like it just came from a fancy Indian restaurant. Well, stop scrolling, because this naan bread recipe delivers that exact texture! We’re aiming for seriously soft and fluffy naan that’s still chewy—not dry pita bread, trust me. The yogurt in the dough is my secret weapon here; it really tenderizes the gluten, making the final product wonderfully soft. This skillet naan recipe completely knocks the socks off flatbreads made without yeast.
Achieving Restaurant-Style Soft and Fluffy Naan
The softness doesn’t happen by accident! It’s all about waking up that yeast properly until it foams up like an angry little cloud. Seriously, don’t skip that five-minute check. Then, you need to knead it just long enough—about seven minutes by hand—to make it elastic. After a good, patient rise, that dough is primed to stretch out beautifully. That resting period is when the magic happens, creating those internal pockets that puff up high when they hit the heat.
Mastering the Stovetop Naan Bread Recipe
The absolute best part of this entire naan bread recipe is that you don’t need a brick oven! You just need your heaviest skillet—cast iron is my absolute favorite for this job. You preheat it until it’s screaming hot, then you cook the rolled-out dough quickly. That intense, dry heat is what forces the dough to steam itself from the inside out, creating those signature bubbles. This simple stovetop naan bread method is foolproof once you get the temperature right!
Essential Ingredients for Your Naan Bread Recipe
When you’re looking at a proper naan bread recipe, sometimes the ingredient list looks intimidating, but I promise, this list is super straightforward. We rely on basic pantry staples, which is why I love sharing this as an easy bread for beginners! First up, we need warm water—aim for that sweet spot, about 105 to 115 degrees F; it should feel warm, not scalding, on your wrist. That activates our active dry yeast, coupled with a teaspoon of sugar to give it a little boost.
For the body of the bread, it’s flour, salt, and baking powder for extra lift. The two ingredients that truly make this dough special are the plain yogurt—full fat is best for texture, honestly—and the olive oil. The yogurt is key for tenderness. Finally, keep extra flour handy for dusting, and make sure you have melted butter ready right by the stove for brushing on the hot naan as soon as it comes off the pan!
Step-by-Step Instructions for the Perfect Naan Bread Recipe
Okay, let’s get our hands dirty! Making the dough is the most hands-on part, but it flies by once you get into the rhythm. The key to this whole naan bread recipe is doing things in the right order, especially when it comes to mixing up that shaggy dough. If you’ve ever struggled with making a yeasted bread, follow these steps exactly, and you’ll have soft, pliable dough ready for its nap. This process feels similar to my whole wheat bread, but naan comes together quicker!
Activating Yeast and Mixing the Naan Dough
First things first: check your yeast! Mix the warm water, sugar, and yeast in a bowl and wait about five to ten minutes. When it looks foamy, you know the yeast is alive and ready to work its magic. Once you confirm that foam, whisk your flour, salt, and baking powder together. Then, dump the foamy mixture, olive oil, and the yogurt right into your dry stuff. Stir it up with a spoon until everything clumps together into what I call a ‘shaggy dough.’ It won’t look nice yet, so don’t panic!
Kneading and Rising: Building Structure in Your Naan Bread Recipe
Time to roll up those sleeves! Turn that shaggy mess out onto a floured counter. You need to knead this beautifully for a good five to seven minutes until the dough feels smooth and elastic—it should spring back lightly when you poke it. Now, oil your bowl, pop the dough in, cover it, and leave it alone! It needs a long rest in a warm spot for about an hour to an hour and a half, or until it’s doubled in size. That rise is what guarantees you a great homemade naan recipe.
Cooking the Naan Without a Tandoor
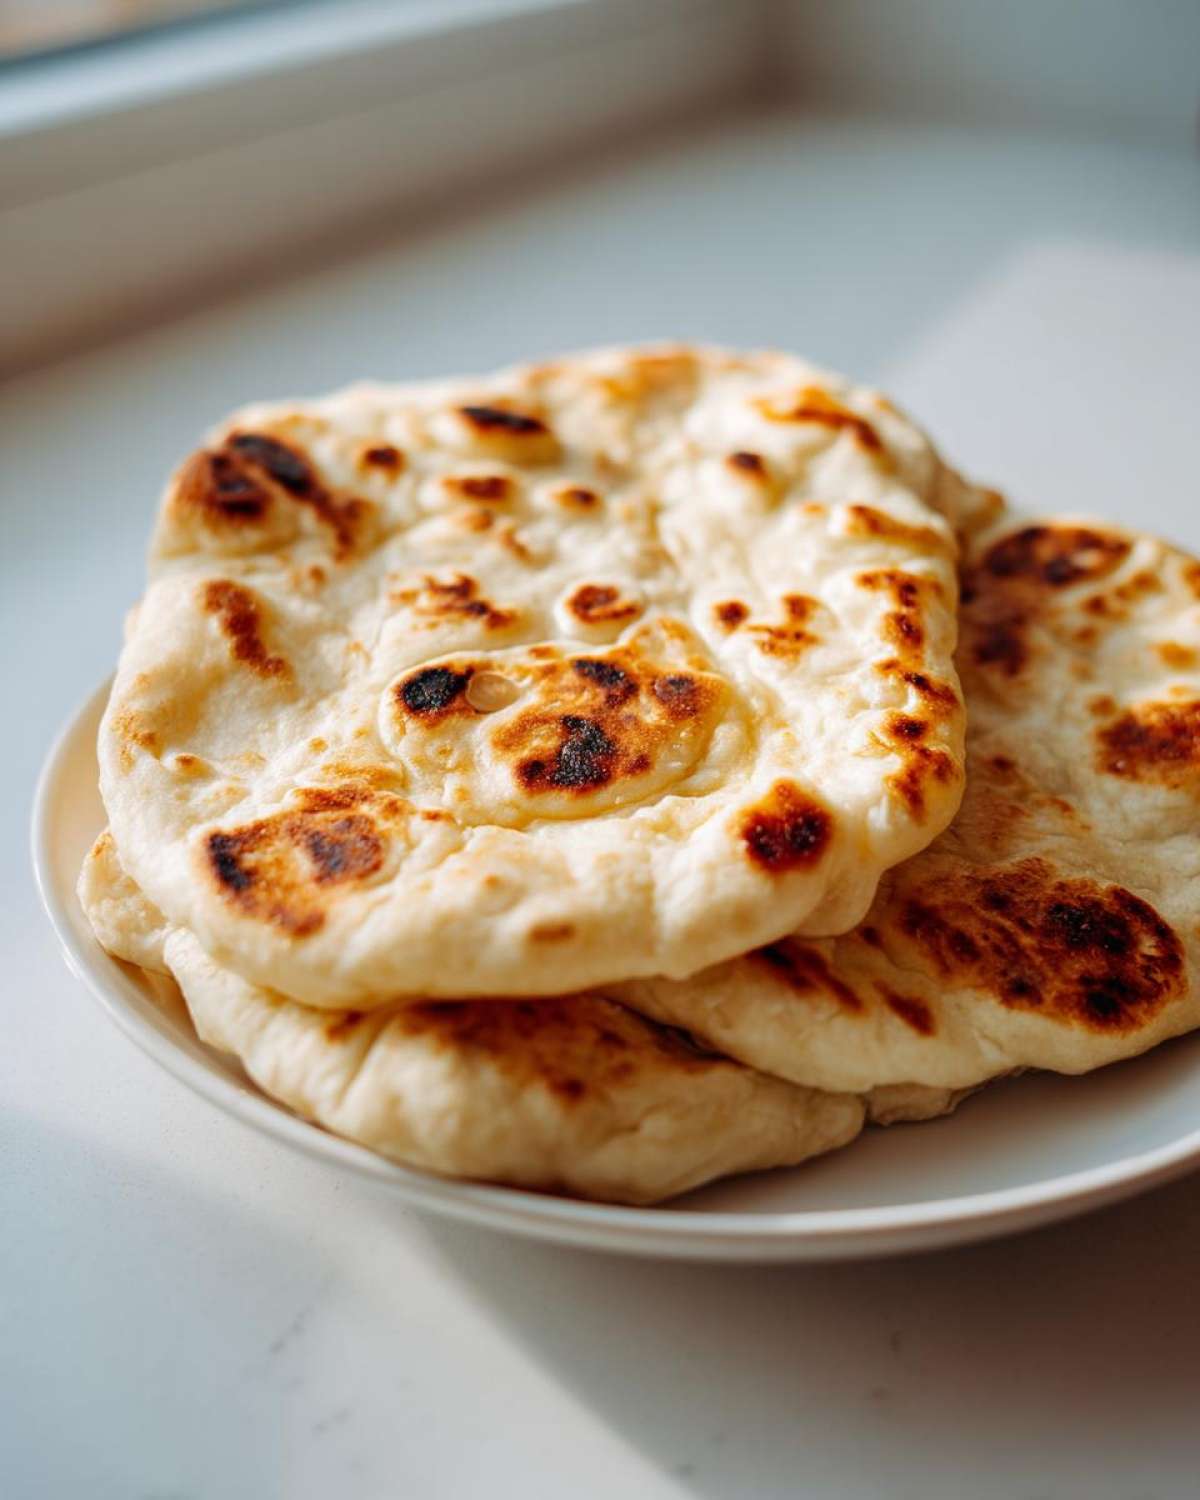
This is where the cooking gets exciting! Crank your skillet—cast iron is non-negotiable for the best results—to medium-high until it’s smoking hot. Remember, we cook this naan without a tandoor using dry heat! Roll one of your rested dough balls into a thin oval, maybe about 1/8 inch thick. Slap it onto that dry, hot pan. In about a minute, big bubbles should pop up; that’s your cue to flip! Cook the other side until you see those lovely golden spots. For extra charring, carefully use tongs to hold the cooked side briefly over an open gas flame if you have one—wow factor unlocked!
Tips for the Best Skillet Naan Recipe Results
Even with the best instructions, working with dough can be tricky, right? So, I want to give you a couple of pointers to ensure this skillet naan recipe works perfectly every time for you. My biggest piece of advice concerns thickness. You absolutely must roll the dough out thin—I mean about 1/8 of an inch. If it’s too thick, you end up with giant fluffy clouds, which are fine, but they won’t be that classic chewy naan texture we’re after.
If your dough is fighting you and sticking relentlessly to the counter while you roll it, don’t panic or automatically dump in tons of flour! Just dust your hands and the rolling pin lightly. Too much extra flour incorporated at this stage will make the final naan tough. If it gets really sticky, cover it up and let the relaxed dough balls rest for an extra five minutes before trying again. Be brave, get that skillet screaming hot, and brush that melted butter on immediately; it traps the steam inside and keeps everything soft!
Delicious Variations on the Classic Naan Bread Recipe
Once you’ve mastered this basic naan bread recipe, you can totally customize it! Honestly, the easiest and most popular thing you can do is turn it into savory bread. Everyone loves that buttery, aromatic flavor of a restaurant-style bread, right? That’s why I always have minced garlic ready to go.
This is how you make fantastic garlic naan recipe bread: right after you take the piping hot naan off the skillet, you don’t just brush it with plain melted butter. Instead, mix two tablespoons of melted butter with one clove of fresh garlic, minced super fine. Brush that garlicky goodness all over the surface immediately.

The heat melts the garlic into the butter and the naan absorbs all that incredible flavor. It’s seriously addictive, especially when paired with a rich curry, like the one you can find in my cheesy breadsticks guide. It adds such a wonderful depth without making the initial dough more complicated!
Serving Suggestions for Your Homemade Naan Recipe
So you’ve got a beautiful stack of perfectly puffed, buttery bread. Now what? This indian bread recipe is famous for a reason—it’s the ultimate vehicle for flavor! Obviously, this naan is designed to be the perfect sidekick for any hearty curry or slow-cooked dal you can dream up. You need it to sop up every last bit of sauce, which is why the chewy texture of this naan for curry works so well.
But don’t stop there! I often make extra just for dipping. It’s seriously divine when used aggressively to scoop up thick hummus or a cool, herby yogurt dip. My favorite combination right now is dipping it straight into my creamy coconut curry hummus. Honestly, you can even use it instead of tortillas for a quick wrap. Just remember, the softer your naan is, the better it is for dipping—so reheat what you need just before serving to keep that springiness!
Storage and Reheating Instructions for Naan Bread
I always prefer eating this naan immediately, fresh off the skillet, but sometimes you make too much! To keep your naan soft, stack the warm pieces right away and wrap the whole stack tightly in a clean kitchen towel, then place that bundle inside an airtight container. Seriously, don’t let it cool uncovered or it gets tough fast! For reheating, skip the microwave. Toss the naan back into that dry, hot skillet for just 30 seconds per side. It puffs right back up and gets beautifully chewy again!
Frequently Asked Questions About This Naan Bread Recipe
I always get tons of questions when people first try making their own bread at home, especially when it comes to yeast, so let’s clear up a few things about this naan bread recipe. Don’t worry if you’re nervous about working with yeast; once you see that foam, you’ll have confidence in your dough! Knowing these little tricks really helps you get that perfect result for your next curry night.
Can I make a no yeast naan recipe using baking soda instead?
You totally can try a no yeast naan recipe, but I have to warn you: the texture changes! If you skip the yeast, you’ll be relying only on baking powder, which means the bread will puff up more like a pita or a regular biscuit. It won’t have that satisfying, stretchy chew that comes from using actual yeast, which I think is the best part of real naan.
How can I make this naan bread recipe quicker?
If you are in a huge rush making this quick naan bread, make sure your water is definitely warm—that 105F to 115F range is crucial for speeding up yeast activation. However, please don’t try to rush the rise time by putting the dough in a super-hot oven! A fast rise usually means less flavor development. I always recommend sticking to the full 90 minutes for the best, most chewy flatbread texture, even if you’re desperate!
If you want to dive deeper into bread recipes that skip the yeast entirely, check out what I came up with over here on my no yeast naan bread recipe post!
Nutritional Snapshot of This Naan Bread Recipe
I know some of you are tracking macros, so here’s a quick look at what’s in one piece of this heavenly naan bread recipe. Remember, these numbers are just estimates based on the ingredients I used—your exact measurements and brand choices will make them shift a bit! This recipe is a wonderful addition to any meal, especially when you’re serving up big bowls of curry, like those amazing side dishes we talked about!

- Serving Size: 1 piece
- Calories: 220
- Fat: 5g
- Carbohydrates: 40g
- Protein: 6g
This is just an overview, of course. If you’re looking for healthier variations, you might want to check out my thoughts on making this a low-carb or gluten-free alternative, but this classic recipe definitely hits the spot!
PrintEasy Homemade Soft Naan Bread Recipe (Skillet Method)

Make soft, fluffy, and chewy naan bread at home using only a skillet, no tandoor required. This simple recipe is perfect for serving with your favorite curries.
- Prep Time: 20 min
- Cook Time: 15 min
- Total Time: 1 hour 45 min
- Yield: 8 servings
- Category: Side Dish
- Method: Stovetop
- Cuisine: Indian
- Diet: Vegetarian
Ingredients
- 1 1/2 cups warm water (about 105-115F)
- 1 tablespoon active dry yeast
- 1 teaspoon sugar
- 3 cups all-purpose flour, plus more for dusting
- 2 teaspoons baking powder
- 1 teaspoon salt
- 1/4 cup plain yogurt (full fat recommended)
- 2 tablespoons olive oil, plus more for brushing
- 2 tablespoons melted butter, for brushing
Instructions
- Combine the warm water, yeast, and sugar in a small bowl. Let stand for 5 to 10 minutes until foamy. This shows the yeast is active.
- In a large bowl, whisk together the flour, baking powder, and salt.
- Add the foamy yeast mixture, yogurt, and 2 tablespoons of olive oil to the dry ingredients. Mix with a spoon until a shaggy dough forms.
- Turn the dough out onto a lightly floured surface. Knead for 5 to 7 minutes until the dough is smooth and elastic.
- Place the dough in a lightly oiled bowl, turning to coat. Cover the bowl with plastic wrap or a damp towel and let it rise in a warm place for 1 to 1.5 hours, or until doubled in size.
- Punch the dough down gently. Divide the dough into 8 equal pieces and roll each piece into a ball. Let the balls rest for 10 minutes.
- Heat a heavy-bottomed skillet (cast iron works best) over medium-high heat until very hot. Do not add oil to the skillet.
- Working with one ball at a time, roll the dough into an oval or teardrop shape, about 1/8 inch thick.
- Place one piece of rolled dough onto the hot, dry skillet. Cook for 1 to 2 minutes until large bubbles form on the surface and the underside is lightly browned.
- Flip the naan and cook the second side for about 1 minute until golden spots appear. If you want more charring, briefly hold the cooked side over an open gas flame using tongs (optional).
- Remove the cooked naan from the skillet. Immediately brush the top generously with melted butter.
- Repeat with the remaining dough pieces, stacking the cooked naan and covering them with a clean kitchen towel to keep them warm and soft.
Notes
- For Garlic Naan, mix 2 tablespoons of melted butter with 1 clove of minced garlic and brush this mixture onto the naan immediately after cooking instead of plain butter.
- If your dough is too sticky to handle, add flour one tablespoon at a time while kneading.
- You can substitute whole wheat flour for up to half of the all-purpose flour for a slightly nuttier flavor.
Nutrition
- Serving Size: 1 piece
- Calories: 220
- Sugar: 2
- Sodium: 350
- Fat: 5
- Saturated Fat: 2
- Unsaturated Fat: 3
- Trans Fat: 0
- Carbohydrates: 40
- Fiber: 2
- Protein: 6
- Cholesterol: 5
