

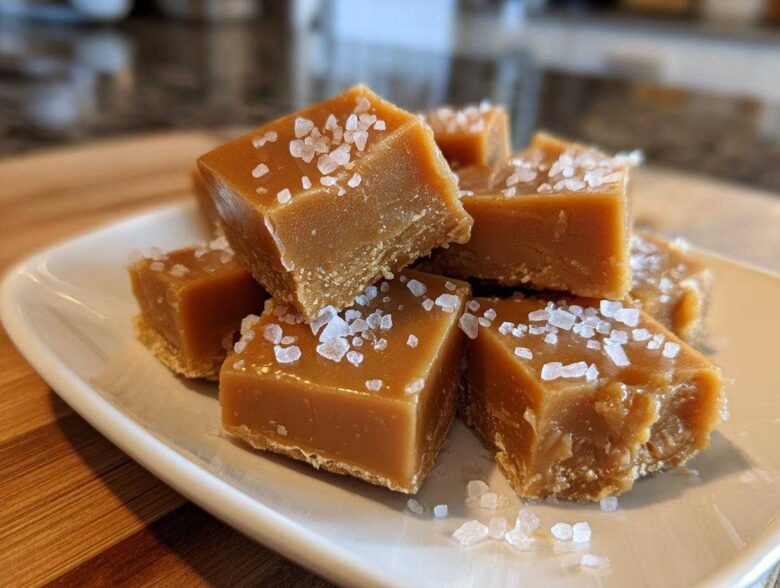
If you think making truly divine, thick, chewy fudge from scratch is hours of finicky work, I’m here to tell you to grab your candy thermometer and forget everything you thought you knew! Seriously, this is the recipe that finally got me that perfect, buttery, melt-in-your-mouth texture every single time. I’m talking about the ultimate salted caramel fudge here—it’s rich, decadent, and that little sprinkle of flaky salt on top? *Perfection*. We’re skipping the shortcuts because candy making requires respect, and using the tried-and-true stovetop method ensures we get that signature gooey chewiness that store-bought stuff just can’t touch. If you’re looking for other decadent treats, you absolutely have to check out my recipe for a fudge swirl brownie trifle!
Trust me on this one; once you nail this technique, you’ll be whipping up batches for every holiday and emergency sweet craving. Don’t sweat the temperature; I’ll walk you through exactly what to look for!
Why This is the Best Homemade Fudge: Achieving Perfect Salted Caramel Fudge
What makes this particular batch of salted caramel fudge my absolute gold standard? It comes down to precision, friends! We aren’t guessing when we pull this off the heat. That reliability is what builds trust in a recipe, right? This stovetop method guarantees you get that dreamy texture we all chase when making candy. Forget those recipes that promise the world but end up grainy or crumbly. We aim for luxurious here.
This recipe truly shines because it hits those key notes you’re looking for: it’s intensely flavorful, perfectly chewy, and has that wonderful balance that keeps you coming back for just one more bite.
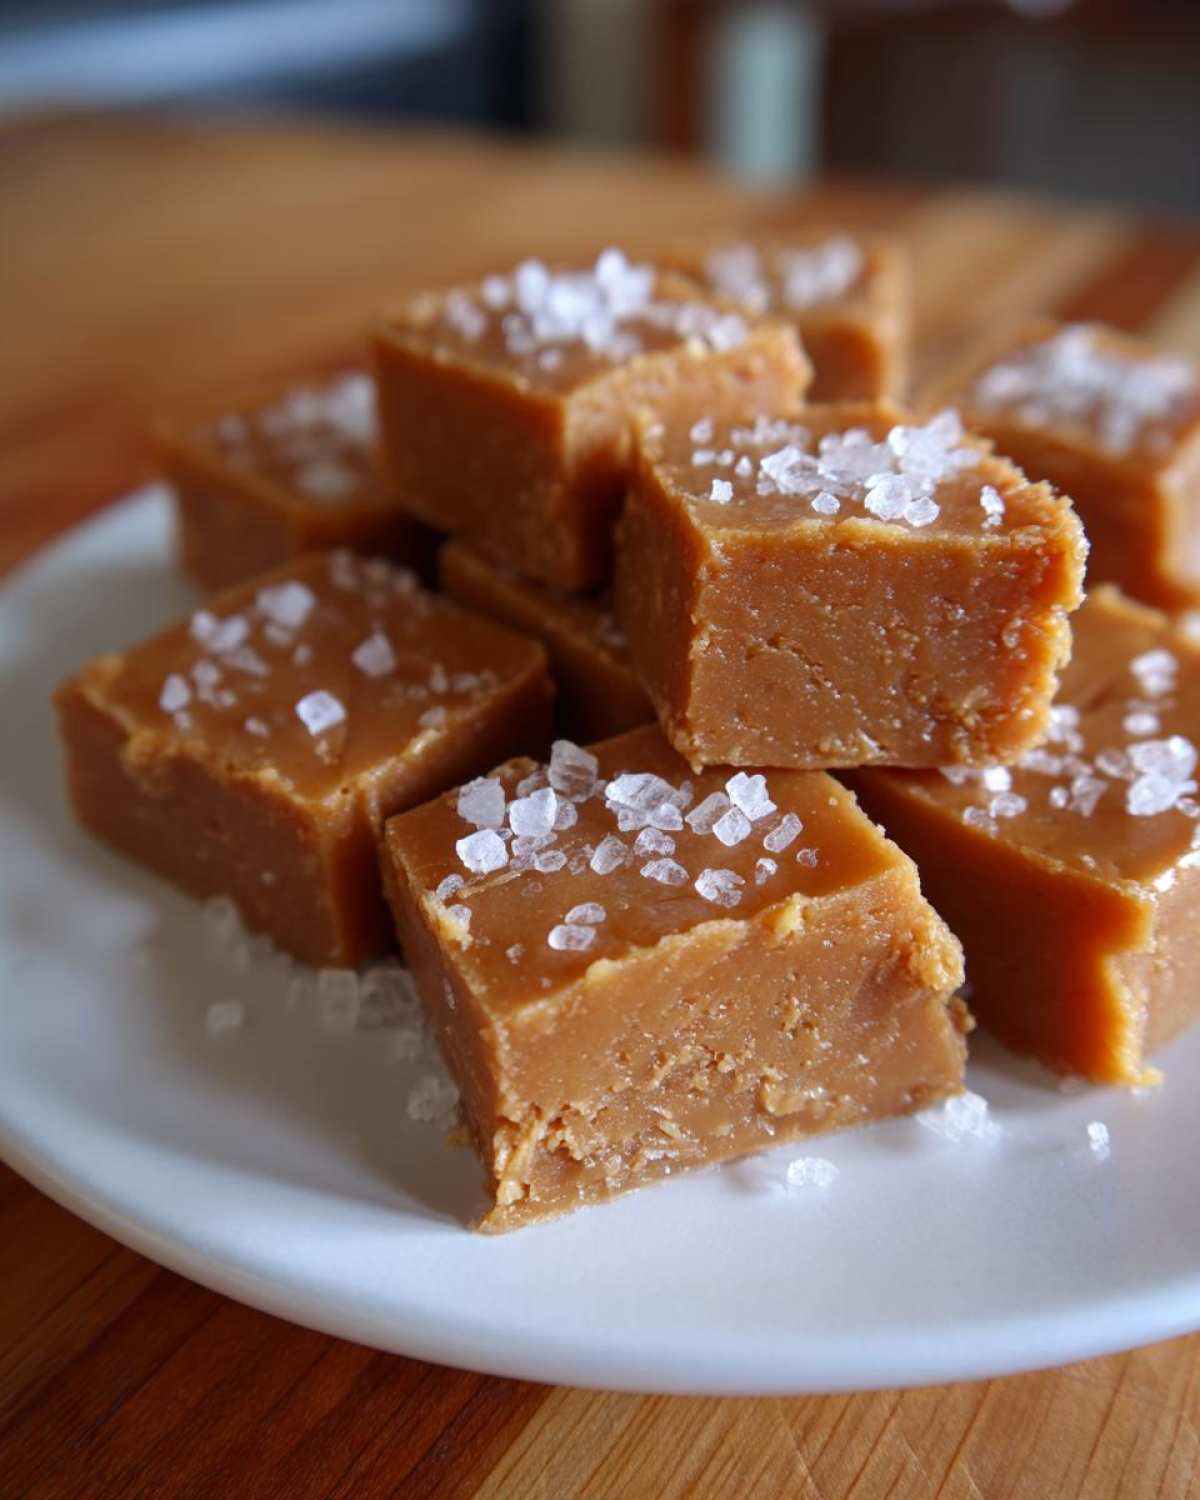
Texture Focus: Getting Rich and Creamy Fudge
When I talk about texture, I mean that unbelievable ‘melt in your mouth fudge’ experience. Nobody wants their homemade confection to be hard as a rock! The secret sauce for that luxurious, soft center is hitting the Soft-Ball Stage precisely at 234 degrees Fahrenheit. If you nail that temperature—and I mean *nail it*—you guarantee a fudgy, wonderfully smooth result every time. Even my tips on fudge texture tips hinge on temperature control!
The Sweet and Salty Candy Balance in Salted Caramel Fudge
Oh, the salt! It’s what separates a good caramel from a *great* caramel treat. We use fine sea salt right in the cooking base; that gets totally incorporated into the sweet, creamy foundation. But the *real* flavor pop comes when we finish it with coarse salt sprinkled on top just before it sets. That textural crunch and burst of salinity cuts through the richness perfectly. It’s the ultimate sweet and salty candy combination, and I share more ways to achieve amazing flavor profiles in my guide to classic fudge making.
Ingredients for Your Ultimate Salted Caramel Fudge
Okay, now for the fun part! Gathering your ingredients. Since this is a stovetop recipe that relies on chemistry (fun chemistry!), using good quality items makes a huge difference in achieving that rich and creamy fudge we talked about. Don’t skimp on that butter—it makes the final texture so much better, I promise! For inspiration on other nutty caramel delights, check out my recipe for salted cashew caramel clusters.
Here is exactly what you need to make a magnificent 8×8 pan of this sweetness:
- 1 (14 ounce) can sweetened condensed milk (don’t confuse this with evaporated milk—big difference!)
- 2 cups granulated sugar
- 1 cup (that’s two full sticks!) unsalted butter
- 1 cup heavy cream
- 1 teaspoon vanilla extract (use the real stuff, please!)
- 1/2 teaspoon fine sea salt, plus extra coarse salt for sprinkling on top
- 1 cup caramel bits or soft caramel candies (this is optional, but it adds an extra layer of chewiness that I absolutely love if you want maximum gooey factor)
That’s the list! It looks simple, but every single ingredient plays a major role in getting us to chewy perfection.
Step-by-Step Instructions for Perfect Salted Caramel Fudge
This is where the magic happens! Making great candy isn’t hard, but it requires you to follow the steps exactly, especially around the temperature part. We need patience in this stage, but the payoff—that creamy, rich texture—is worth every second of stirring. Before you even turn on the stove, grab a friend and whisk up a batch of my caramel brown sugar latte; you’ll need the caffeine for this concentration!
Preparation and Initial Cooking of the Salted Caramel Fudge Base
First things first: you must prepare your 8×8 inch pan. Line it with parchment paper and make sure you leave an overhang on two sides. This is your handle later, so don’t skip it! Lightly grease that paper so nothing sticks. Next, toss your condensed milk, sugar, butter, and heavy cream into a heavy-bottomed saucepan—using a heavy pan helps evenly distribute the heat, which prevents frustrating scorching later on. Heat this mixture over medium heat, stirring gently until everything is fully melted and the sugar is dissolved. Don’t let it boil rapidly yet; we are just building our base!
Reaching the Soft-Ball Stage for Chewy Salted Caramel Fudge
Now, attach your candy thermometer securely to the side. This is non-negotiable if you want that chewy result! Turn the heat up to medium-high and bring the mixture to a proper rolling boil. Keep stirring occasionally while it heats up. You must let it climb all the way to 234 degrees Fahrenheit—that’s the magic Soft-Ball Stage for this recipe. If you pull it off early, it won’t set right. If you cook it too long, you risk crystallization and a crumbly texture instead of that beautiful creamy fudge.
Finishing and Setting the Salted Caramel Fudge
The *instant* you hit 234°F, yank that pan off the heat! Stir in your vanilla and that 1/2 teaspoon of fine sea salt right away. If you are adding those optional caramel bits for extra chew, stir them in quickly now. Now, pour the whole wonderful mess into your prepped pan. My biggest expert tip? Don’t try to smooth the top too much with a spatula—just gently spread it out. Then, sprinkle that extra coarse sea salt generously over the top. Leave it alone! You absolutely cannot refrigerate fudge to speed this up, or you risk changing that perfect texture. Let it cool completely at room temperature for at least four hours until it’s solid before you cut it into squares.
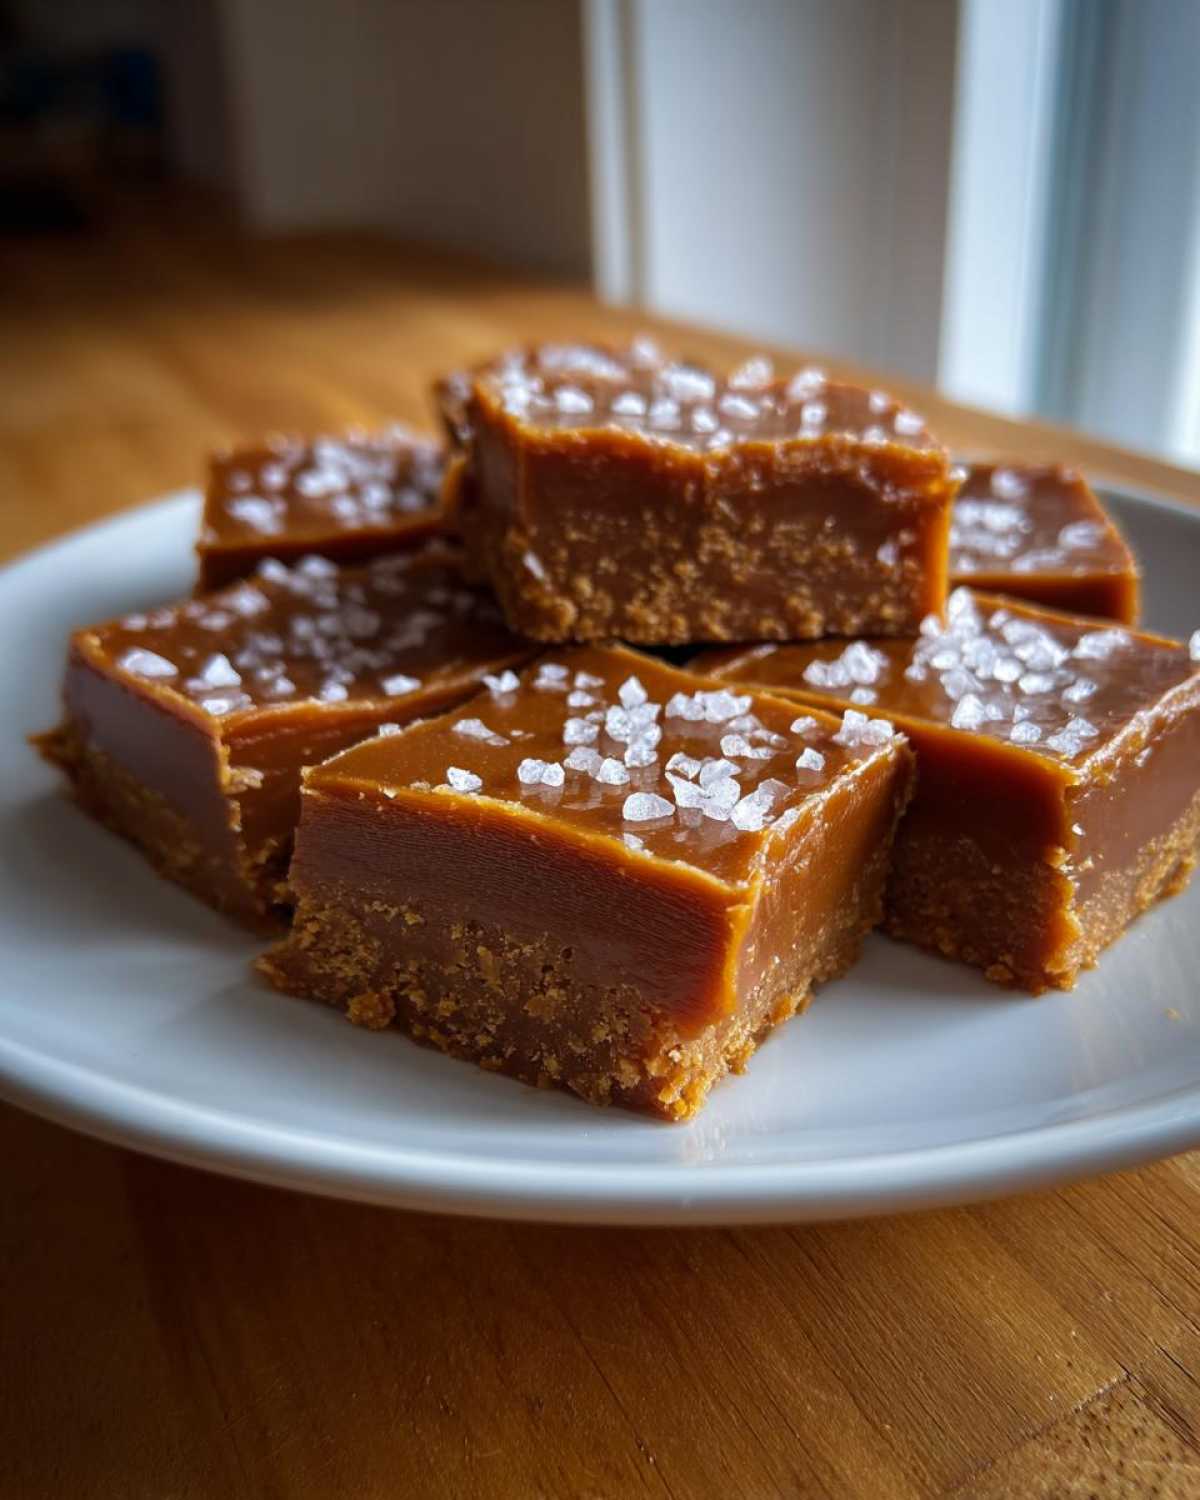
Tips for Success When Making Salted Caramel Fudge
Even though this recipe for rich caramel candy is pretty straightforward, I’ve learned a few quirks over the years that save you from a total baking disaster. Cooking sugar is serious business, friends! You need to treat this mixture with respect, almost like coaxing secrets out of it. My best advice always revolves around temperature control and what you use to manage your pan.
First, let’s talk about that heavy-bottomed saucepan I mentioned in the instructions. If you try to rush this on a thin pan, you’re going to get hot spots, and trust me, burnt sugar on the bottom of your beautiful batch tastes awful. A heavy pan distributes that heat evenly, which is the absolute best defense against crystallization—that gritty texture we mentioned earlier? It usually comes from uneven heating or stirring too vigorously near the end.
If you are making this for a large crowd or maybe you like your candy a bit firmer—maybe you need it to hold up better when wrapping it for gourmet caramel treats—you can nudge the temperature up slightly. I’ve found that cooking to 238°F (the upper end of the soft-ball stage) yields a marginally firmer piece. It’s still wonderfully chewy, not hard, but it handles differently than when it’s pulled at 234°F. Just watch it like a hawk if you go past 235°F!
And one final crucial bit of advice on setting: resist the urge to refrigerate it! This is a classic mistake people make when they want quick results. Cooling candy slowly at room temperature allows the sugar crystals to settle into that smooth, creamy structure we want. Placing it in a cold fridge too fast can shock the mixture and ruin that lovely texture you worked so hard to achieve.
Variations for Your Salted Caramel Fudge Recipe
While I truly believe this basic, pure recipe for salted caramel fudge is the best way to experience the unadulterated flavor, sometimes you just need to shake things up, right? Maybe you’re making a huge batch for a holiday platter and want something visually different, or maybe you just want to sneak in a few extra textures. I love experimenting subtly—nothing that messes with the physics of the set, of course, but adding flavor elements is always fun!
When I’m feeling extra indulgent, I love doubling down on the caramel flavor by adding those extra hard caramel bits like I mentioned in the ingredient list. But if you want to dive deeper, here are a few easy twists you can try once the fudge is off the heat and you’re adding the vanilla and salt base. And if you love those caramel flavors but want something baked, you absolutely must try my recipe for salted caramel apple pie!
Here are my go-to variations for making this candy truly your own:
- Nutty Crunch: Stir in 1 cup of toasted pecans or walnuts right before pouring the mixture into the pan. Toasting the nuts first really deepens their flavor and makes them perfectly crisp against the soft fudge.
- Chocolate Swirl Magic: Melt about 4 ounces of good quality chocolate chips (milk or dark work well) separately. Pour your fudge, then drizzle the melted chocolate lightly over the top. Use a butter knife to gently drag through the chocolate and the caramel mixture just once or twice. Don’t blend it completely; you want ribbons of dark chocolate weaving through your caramel candy!
- Extract Boost: Vanilla is classic, but try swapping it out for just 1/2 teaspoon of pure almond extract or a quarter teaspoon of maple extract stirred in with the vanilla. The maple pairs *beautifully* with the salty caramel notes.
- Espresso Kick: For a sophisticated adult treat, dissolve a teaspoon of instant espresso powder into a tiny splash (maybe a half teaspoon) of hot water, then stir that concentrated goodness right in with the vanilla. This creates a subtle coffee undertone that complements the sweetness wonderfully.
Remember, the key to keeping these variations successful is adding them *after* the temperature stage is complete. We don’t want anything interfering with the sugar cooking process!
Serving Suggestions for Decadent Caramel Dessert
Okay, you’ve waited those four long hours, the fudge is perfectly firm, and you’ve cut the squares. Now, how do you serve this gorgeous, rich caramel confection? Presentation is half the fun, isn’t it? Suddenly that simple homemade candy feels incredibly gourmet, and you want to treat it like the special dessert it is!
These treats are absolutely fantastic on their own—just a little square sitting on a tiny white plate lets that beautiful salty crunch shine. But if you’re looking to elevate the experience, especially during the holidays when you are putting together platters or just looking for a decadent, after-dinner bite, I have a few favorite ways to serve these rich squares. Honestly, having a perfectly balanced sweet treat next to a warm drink is my idea of heaven!
When I serve these, I almost always pair them with something that contrasts the texture or cuts the intense sweetness slightly. You should definitely try them alongside something equally cozy, like a warm caramel brown sugar latte. The slight bitterness of the coffee or espresso helps balance out the decadent sugar and butter in the candy.
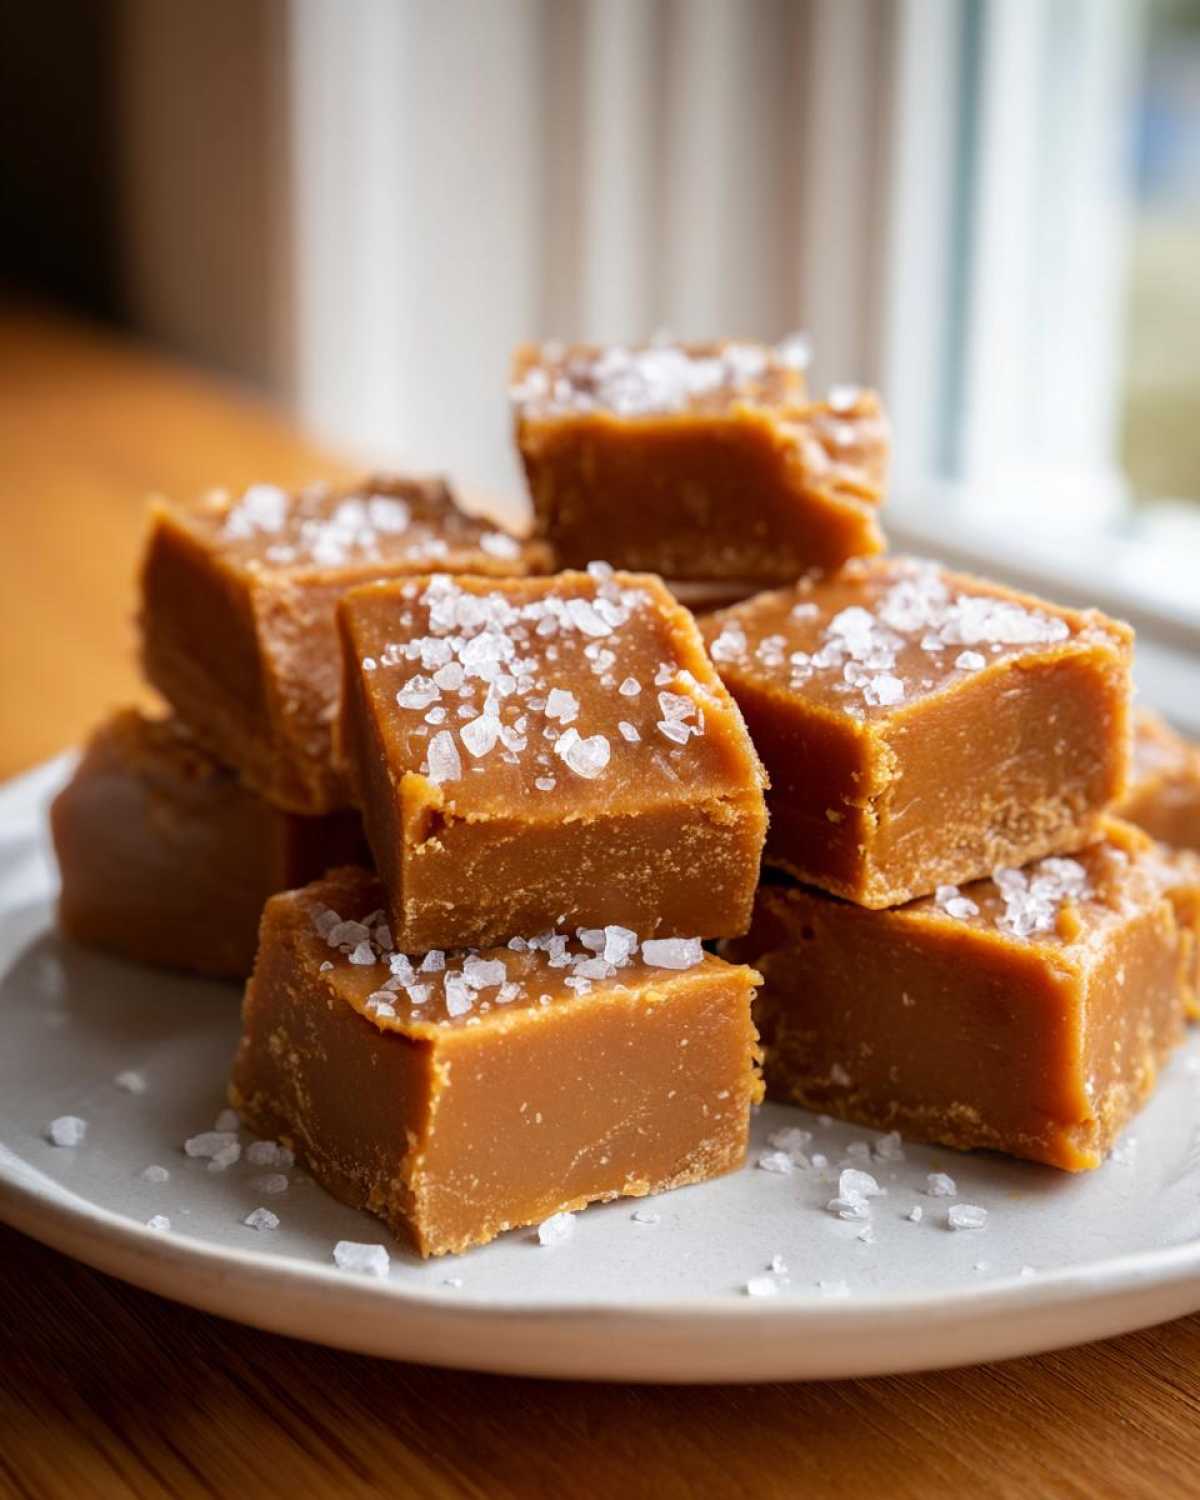
Here are a few ways I love to present this decadent caramel dessert:
- The Coffee Hour Treat: Serve one small square alongside a hot, unsweetened beverage like black coffee or even just a mug of hot herbal tea. It’s the perfect little indulgence to finish a meal.
- Holiday Platter Star: If you’re assembling a big platter of homemade candy, place these squares nestled between bright red raspberries or dark chocolate truffles. The contrast in color makes the pale caramel pop!
- Garnish with a Twist: For a fancy touch, you can soften the squares slightly (don’t melt them!) and dip half of each square into melted high-quality dark chocolate. Let the chocolate set completely before serving. That combination of rich caramel, salt, and dark chocolate is just killer.
- Ice Cream Companion: If you let a square sit on the counter for about thirty minutes until it’s slightly softer than room temperature, it develops this incredible, almost gooey layer. Pop that slightly softened square right on top of vanilla bean ice cream as a spectacular, instant topping. Trust me, it’s amazing!
No matter how you serve it, just make sure you have plenty on hand, because people will devour these quickly!
Storage and Reheating Instructions for Salted Caramel Fudge
Alright, you’ve got a masterpiece of salted caramel fudge, and now you need to know how to keep that gorgeous, chewy texture intact until you’re ready to devour it all—or, you know, until you’ve successfully rationed it out until next week. Storing candy is different from storing a cake because we are dealing with sugar crystallization, and we *do not* want that!
I want to be perfectly clear: the absolute best way to store this fudge and keep it tasting exactly like it just came off the stove is at room temperature. If you try to rush it into the fridge too soon, or store it cold long-term, you risk tightening up those beautiful creamy fats and potentially making the sugar structure harder than we want. That’s why I always tell people it’s best to wait until it’s fully set at room temp before you even think about cutting it!
For short-term storage, which is usually all I manage before this batch disappears, airtight is your best friend. Wrap the whole piece (before cutting) tightly in plastic wrap, or place your cut squares snugly in an airtight container. If you’re stacking layers of fudge, use parchment paper or waxed paper between each layer to stop them from sticking together. Stored this way, it should stay perfect at room temperature for at least a week—sometimes longer, because that high sugar content acts as its own lovely little preservative!
Now, what about the freezer? If you somehow end up with more than you can possibly eat within about ten days, freezing is totally fine, especially if you’re planning ahead for holiday fudge recipes!
When freezing, make sure you wrap those squares individually first—really tight so no freezer air gets in. Then, place those wrapped pieces into a freezer-safe bag or container. It keeps beautifully for up to three months. When you are ready to eat it, just pull out one or two pieces and let them thaw slowly on the counter, still wrapped, for about an hour. Allowing it to come back to room temperature naturally is key to keeping that fantastic chewiness. Never try to zap it in the microwave if you want that melt-in-your-mouth fudge texture back; you’ll just end up with a gooey mess!
Frequently Asked Questions About Making Salted Caramel Fudge
I get so many questions about this recipe—which totally makes sense because candy making seems spooky sometimes! But I promise, once you understand the temperature aspect, you’ll realize this is one of the easiest, most rewarding things you can make. It’s so satisfying knowing you made this decadent confection completely from scratch. If you’re interested in something a little simpler than stovetop fudge that still delivers that great caramel flavor, you should definitely look at my guide for easy caramel candy recipes!
Can I make this salted caramel fudge without a candy thermometer?
Oh my goodness, I wish I could say yes, but the short answer is: please don’t! For the absolute best, no-fail results—especially the intended rich and creamy fudge texture—a reliable candy thermometer is your best friend. Cooking sugar to 234°F is a precision science, and if you’re even five degrees off, you change the entire structure of the final candy. If you’re an ancient, seasoned candy maker who truly knows the ‘cold water test,’ you can try that method: drop a tiny bit of the boiling syrup into an ice-cold glass of water. If it forms a soft, pliable ball that dents easily when pressed, you’ve hit the soft-ball stage. But for everyone else, spend the $10 on a thermometer; it’s worth saving the batch!
Why did my homemade fudge turn grainy instead of rich and creamy fudge?
Dealing with grainy fudge is the ultimate heartbreak! When we talk about texture, graininess usually means that the sugar you dissolved in the initial step started to re-crystallize as the mixture cooled down too slowly or was disturbed incorrectly. This happens for two main reasons: either you didn’t completely dissolve the sugar before it started boiling rapidly, or—and this is a big one—you stirred the mixture too vigorously *after* you took it off the heat and started adding the vanilla/salt. Once it hits that temperature, you want to gently stir just enough to combine things, then leave it alone to set. Be gentle at the end, and you’ll keep that smooth, incredible texture!
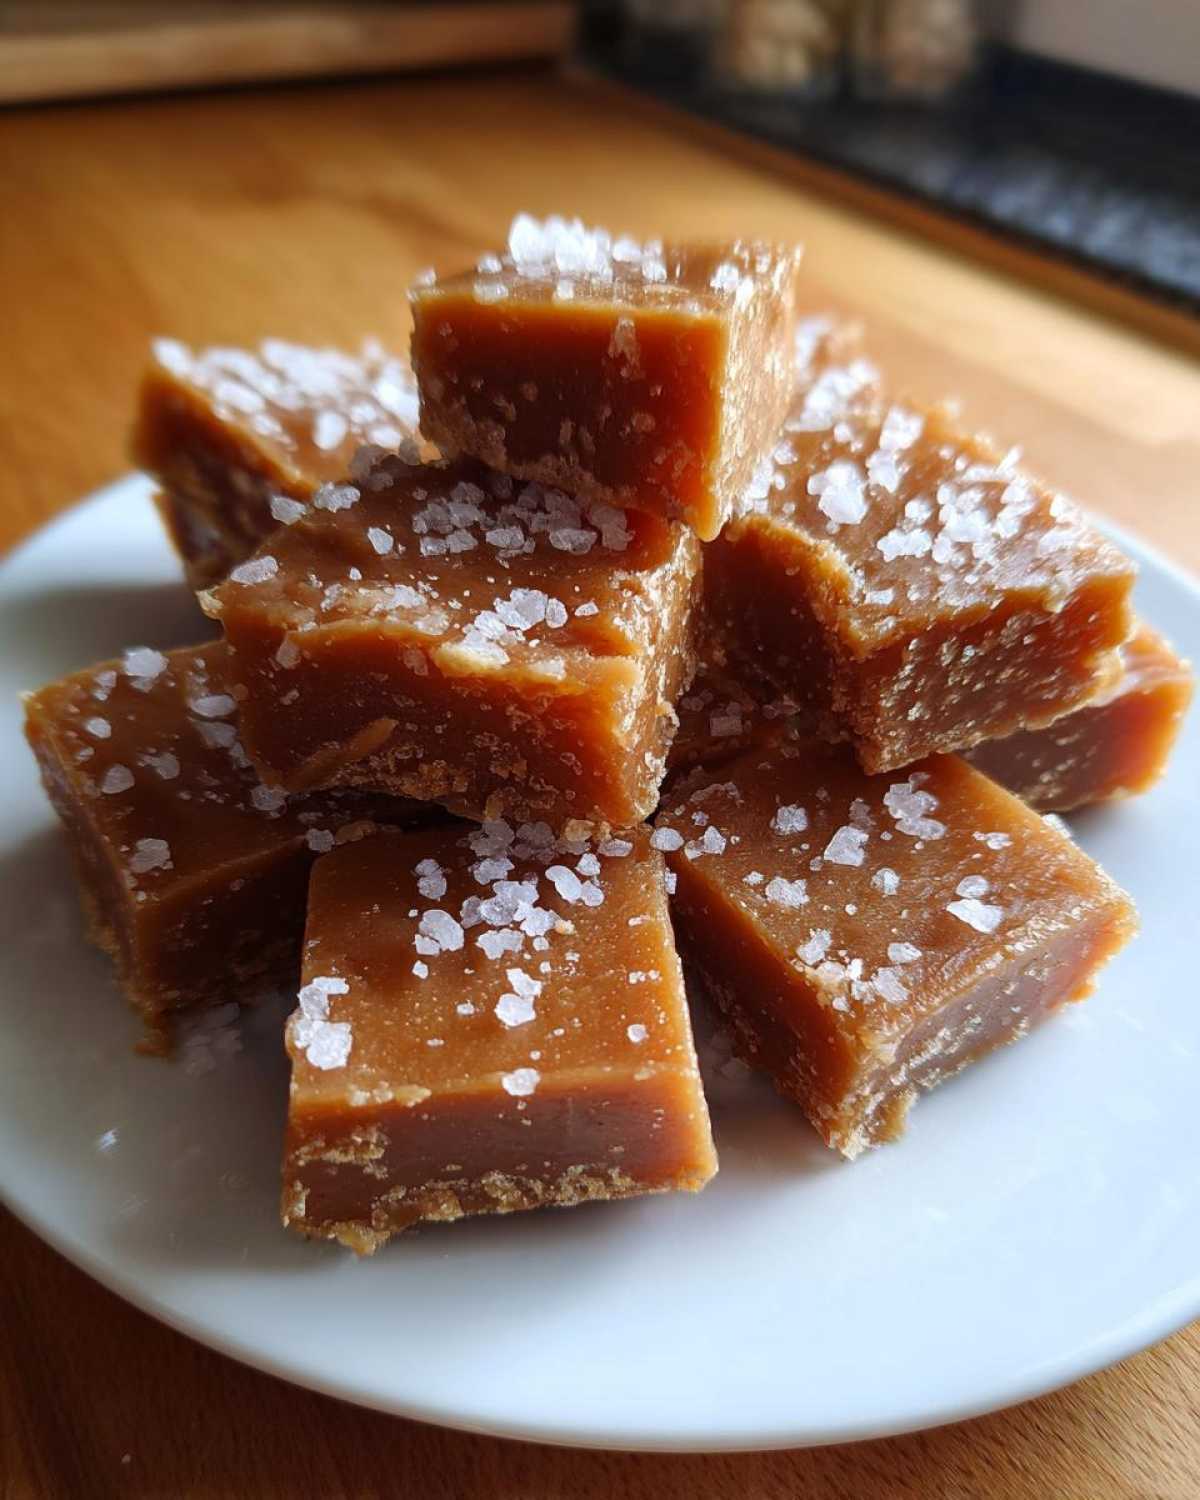
Nutritional Estimates for This Decadent Caramel Dessert
Look, I’m not going to lie to you. This rich, chewy, melt-in-your-mouth goodness is pure indulgence. It’s made with butter, cream, and sugar—it’s candy, after all! So, you probably aren’t making this for your diet plan, but the sheer joy it brings makes it totally worth it. I always feel a little guilty looking at the numbers, but I also feel a lot of happiness eating it!
Below you’ll find the approximate nutritional breakdown based on the recipe yielding about 64 small squares. Please take this as a fun guide, not a strict lab report, because how much salt you sprinkle on top can really change things!
Also, please remember that these figures are educated estimates based on the standard ingredients listed. If you used lighter cream or less sugar, your results will vary, naturally. For my official thoughts on recipes and measurements, you can always check out the specifics on my site disclaimer page.
- Serving Size: 1 square (about 1/64th of the pan)
- Calories: 150
- Sugar: 20g (Yes, it’s high, but it’s delicious!)
- Sodium: 85mg (This is where that finishing salt really shines!)
- Fat: 8g
- Saturated Fat: 5g
- Unsaturated Fat: 3g
- Trans Fat: 0g (Hooray for using real butter!)
- Carbohydrates: 20g
- Fiber: 0g
- Protein: 2g
- Cholesterol: 20mg
There you have it! A truly decadent caramel dessert, tracked for your enjoyment. Now go hide them before someone eats the whole batch!
PrintThe Ultimate Rich & Chewy Salted Caramel Fudge
Make rich, chewy salted caramel fudge from scratch. This recipe delivers a perfect melt-in-your-mouth texture with a balanced sweet and salty flavor.
- Prep Time: 10 min
- Cook Time: 15 min
- Total Time: 4 hours 25 min
- Yield: About 64 pieces
- Category: Dessert
- Method: Stovetop Cooking
- Cuisine: American
- Diet: Vegetarian
Ingredients
- 1 (14 ounce) can sweetened condensed milk
- 2 cups granulated sugar
- 1 cup (2 sticks) unsalted butter
- 1 cup heavy cream
- 1 teaspoon vanilla extract
- 1/2 teaspoon fine sea salt, plus extra for topping
- 1 cup caramel bits or soft caramel candies (optional, for extra chew)
Instructions
- Line an 8×8 inch baking pan with parchment paper, leaving an overhang on two sides for easy removal. Lightly grease the paper.
- In a heavy-bottomed saucepan, combine the sweetened condensed milk, sugar, butter, and heavy cream.
- Stir constantly over medium heat until the butter melts and the sugar dissolves completely. Do not let the mixture boil rapidly at this stage.
- Attach a candy thermometer to the side of the pan, ensuring the tip is submerged but not touching the bottom.
- Increase the heat to medium-high and bring the mixture to a rolling boil. Continue to cook, stirring occasionally to prevent scorching, until the mixture reaches 234 degrees Fahrenheit (Soft-Ball Stage). This usually takes 10 to 15 minutes after the boil starts.
- Immediately remove the pan from the heat. Stir in the vanilla extract and 1/2 teaspoon of sea salt. If using, stir in the caramel bits until just combined.
- Do not overmix. Pour the fudge mixture into the prepared pan.
- Sprinkle the top evenly with extra coarse sea salt.
- Let the fudge cool completely at room temperature for at least 4 hours, or until firm. Do not refrigerate during this time, as it can affect the texture.
- Once firm, use the parchment overhang to lift the fudge from the pan. Cut into 1-inch squares.
Notes
- For the best texture, use a heavy-bottomed pan to distribute heat evenly.
- Stirring constantly when the mixture is near the target temperature helps prevent crystallization.
- If you prefer a firmer fudge, cook the mixture to 238 degrees Fahrenheit instead of 234 degrees Fahrenheit.
Nutrition
- Serving Size: 1 square
- Calories: 150
- Sugar: 20g
- Sodium: 85mg
- Fat: 8g
- Saturated Fat: 5g
- Unsaturated Fat: 3g
- Trans Fat: 0g
- Carbohydrates: 20g
- Fiber: 0g
- Protein: 2g
- Cholesterol: 20mg
