

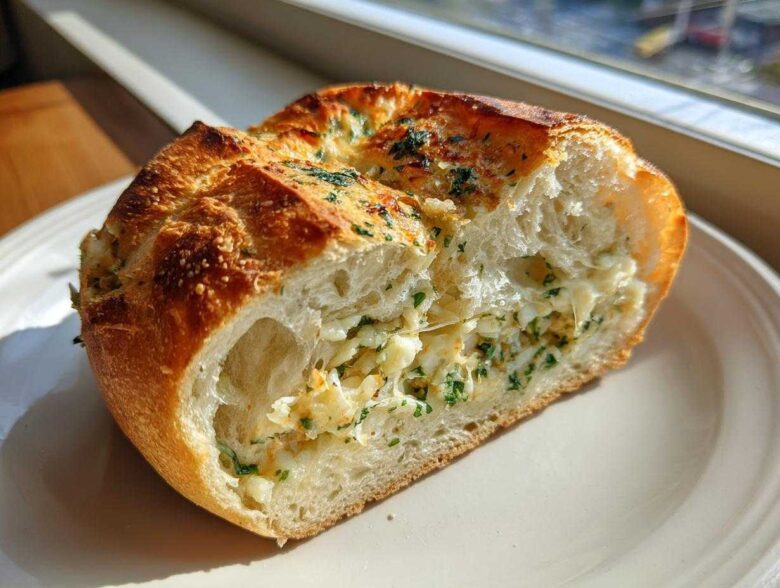
Oh my gosh, if you’re looking for a bread that just screams ‘look what I made!’ but tastes even better than it looks, you have to stop what you’re doing and try this one. Seriously. There’s nothing quite like pulling a loaf of homemade bread out of the oven, and this specific recipe? It’s pure magic. I even have a recipe for a fantastic Italian herb and cheese bread if you want another flavor, but this one takes the prize.
When I first started trying to get that bakery-quality look at home, I struggled with the swirl—it always ended up looking flat or patchy. But I finally cracked the code on the perfect layering technique, and now I’m obsessed with my **Swirled Garlic Herb and Cheese Bread: Artisan Bread for Blissful Baking**. This isn’t just bread; it’s chewy, incredibly soft inside, and bursting with sharp cheddar, aromatic garlic, and garden herbs. Trust me, this impressive homemade bread recipe is going to become your new weekend project!
Why This Swirled Garlic Herb and Cheese Bread: Artisan Bread for Blissful Baking Delivers
You’re going to love this loaf because it’s truly the complete package—it looks gorgeous, it tastes like it came straight from a professional bakery, and it’s surprisingly simple once you nail the rolling technique. This recipe is my go-to when I need to impress people! I even have some other great ideas for rolls if you’re looking for something smaller, like these soft garlic herb dinner rolls.
- We get that perfect structure needed for an artisan loaf because we put serious effort into the kneading stage early on.
- The filling is rich! It’s not just a dusting; it’s a thick layer of flavor that stays put during the bake. For more savory ideas, check out my savory cheese and herb crackers!
Achieving the Perfect Artisan Crumb and Crust
The secret to that beautiful, substantial crumb usually found in bakery bread is just putting in the time during kneading. Working that dough for a solid 8 to 10 minutes develops the gluten structure just right. That structure supports the heavy cheese filling and gives you that satisfying chew when you bite into the finished loaf. It’s all about building strength early on!
Intense Garlic, Herb, and Cheese Flavor Profile
Forget bland cheese bread! We are using sharp cheddar here—it melts beautifully but still has a real punch. Pairing that with freshly minced garlic and a trio of bright herbs like parsley, chives, and oregano means every single slice is savory and aromatic. It’s intense without being overpowering, which is exactly what you want in a centerpiece loaf.
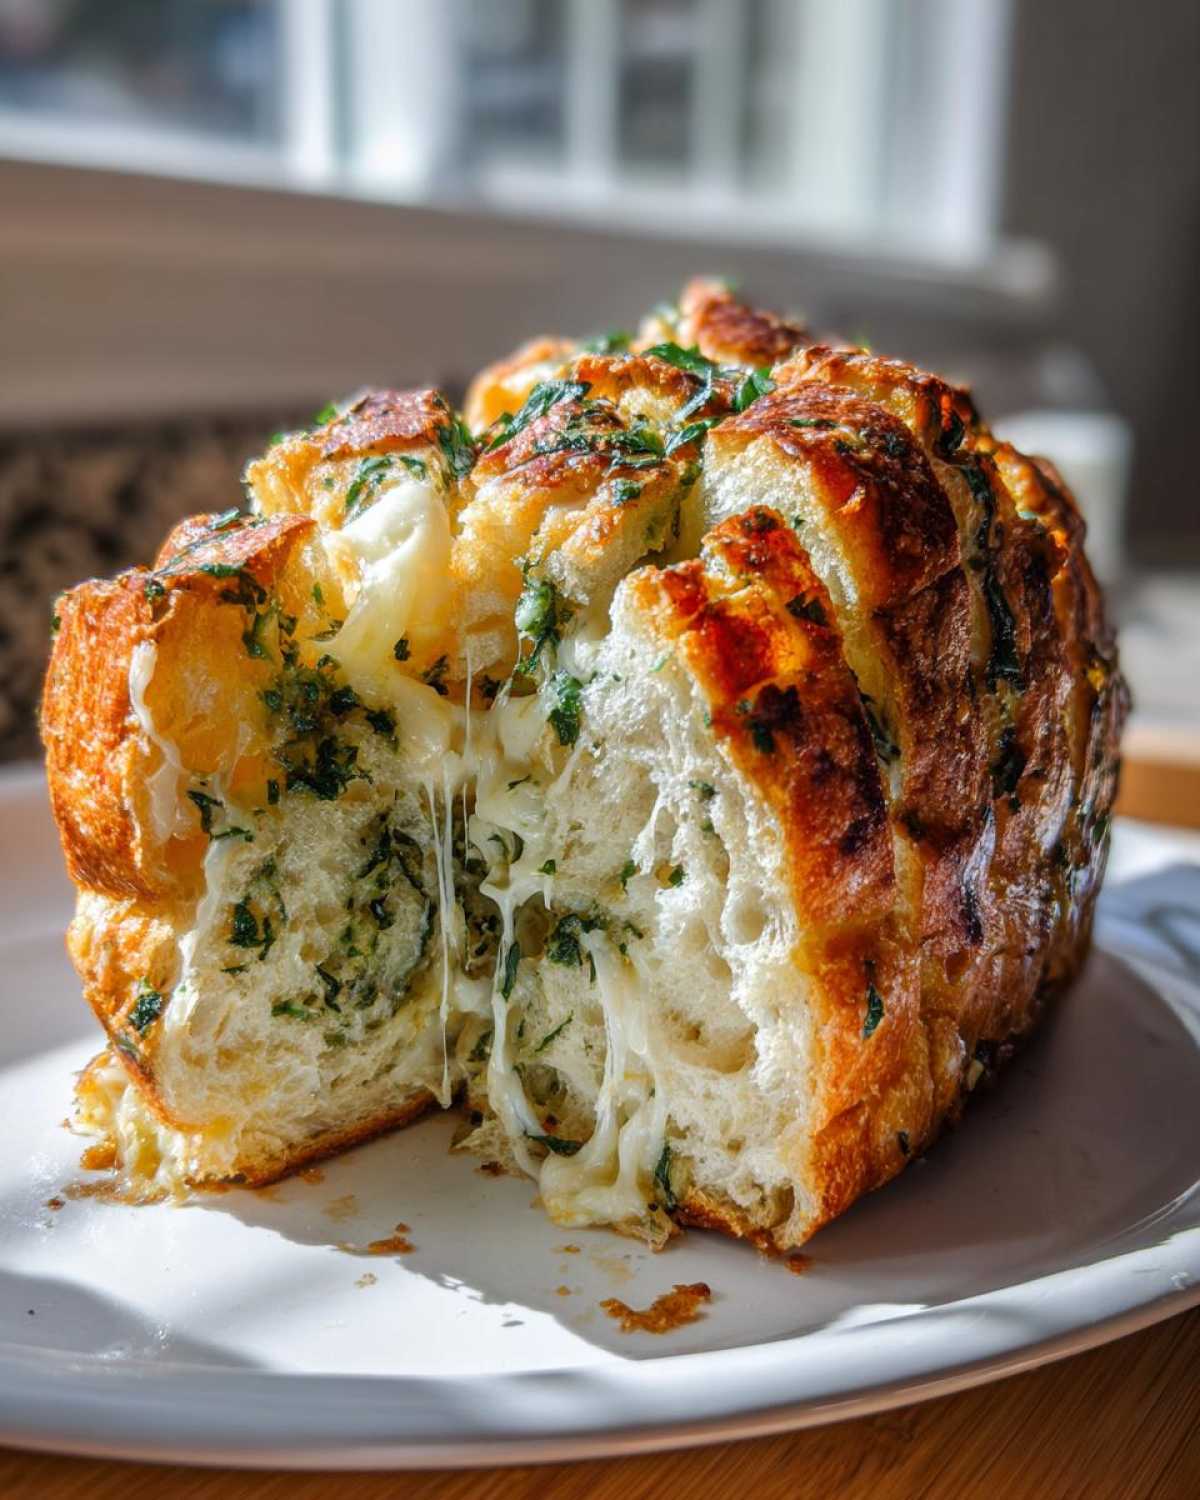
Gathering Ingredients for Your Swirled Garlic Herb and Cheese Bread
Okay, getting the ingredients ready is half the fun! This recipe keeps things pretty straightforward, but pay close attention to those temperatures because they really matter, especially the water. If your water is too hot, you’ll kill your yeast, and then we’re left with sad, flat dough, and trust me, we want this to be a successful weekend bread baking project!
You’ll need:
- Three cups of good quality bread flour—this helps give us that artisan structure.
- One teaspoon of instant dry yeast and one-and-a-half teaspoons of salt.
- Crucially, one cup of warm water, which needs to be between 105 and 115°F. Stick a thermometer in there if you’re nervous!
- Two tablespoons of olive oil.
- For the filling, grab half a cup of shredded sharp cheddar, a quarter cup of grated Parmesan, four cloves of garlic that you need to mince super finely, two tablespoons of chopped fresh parsley, one tablespoon of snipped fresh chives, and one teaspoon of dried oregano.
- Finally, two tablespoons of unsalted butter, melted, for brushing the dough before rolling. If you’re looking for other ways to use those yummy flavors, check out my garlic herb butter roast chicken recipe!
Mastering the Swirled Bread Tutorial for Artisan Results
This is where the show starts! Getting that gorgeous pattern you see in bakeries isn’t hard, but you have to be methodical with the rolling and filling. This part separates an okay cheese bread from a truly artisan masterpiece. You’ll feel like a professional baker when you nail that perfect spiral that makes this easy Italian bread recipe look small in comparison!
Dough Mixing and First Rise for Swirled Garlic Herb and Cheese Bread
First things first: we mix! Get your flour, yeast, and salt together, then pour in that just-right warm water and olive oil. Mix it until it looks like a shaggy mess—don’t worry, that’s just how it starts. Then, you get to work! You’ve got to knead it on a lightly floured counter for a good 8 to 10 minutes until it’s smooth and stretchy. After that, let it chill out in an oiled bowl until it’s doubled up—usually about an hour and a half. You want that nice, elastic structure!
The Stuffed Swirl Bread Technique
Once the dough is beautifully proofed, gently punch it down. Now, roll it out onto a floured surface into a big rectangle, aiming for about 10 by 16 inches. This size is intentional! Next, brush it generously with that lovely melted butter. Sprinkle your cheese and herb mix right over the top—but here’s the absolute secret: leave a clean 1-inch border on one of the long sides. When you roll it up tightly starting from the opposite side, that bare edge acts like a seal when you pinch it shut, locking all that cheesy goodness inside instead of letting it ooze everywhere!
Shaping and Final Proofing for Your Swirled Bread Loaf
After you pinch that seam tight, you can gently stretch the log a bit and then carefully twist it into a loose spiral or shape it to fit your parchment-lined 9×5 loaf pan. Don’t mash it down; we want to keep those air bubbles! Cover it loosely and let it rest again for about 30 to 45 minutes until it looks puffy. Right before it finishes resting, fire up that oven to 375°F so it’s perfectly hot when you’re ready to bake.
Baking Your Swirled Garlic Herb and Cheese Bread: Artisan Bread for Blissful Baking
Now for the best part—the aroma is about to take over your entire house! Slide that beautifully shaped loaf into your preheated 375°F oven. It’s going to need about 30 to 35 minutes in there until that crust is that perfect, deep golden brown color we’re looking for in a true artisan bread. Honestly, relying just on time can be tricky, so here’s my secret tip for getting that soft artisan cheese bread just right:
Use an instant-read thermometer! You want the internal temperature to hit 200°F (93°C). That guarantees it’s cooked all the way through without drying out the inside. Don’t peek too much during the first 25 minutes, or it might deflate. Once it hits that temperature, pull it out! If you want to see another fantastic bake that uses the oven perfectly, check out my easy homemade French bread recipe.
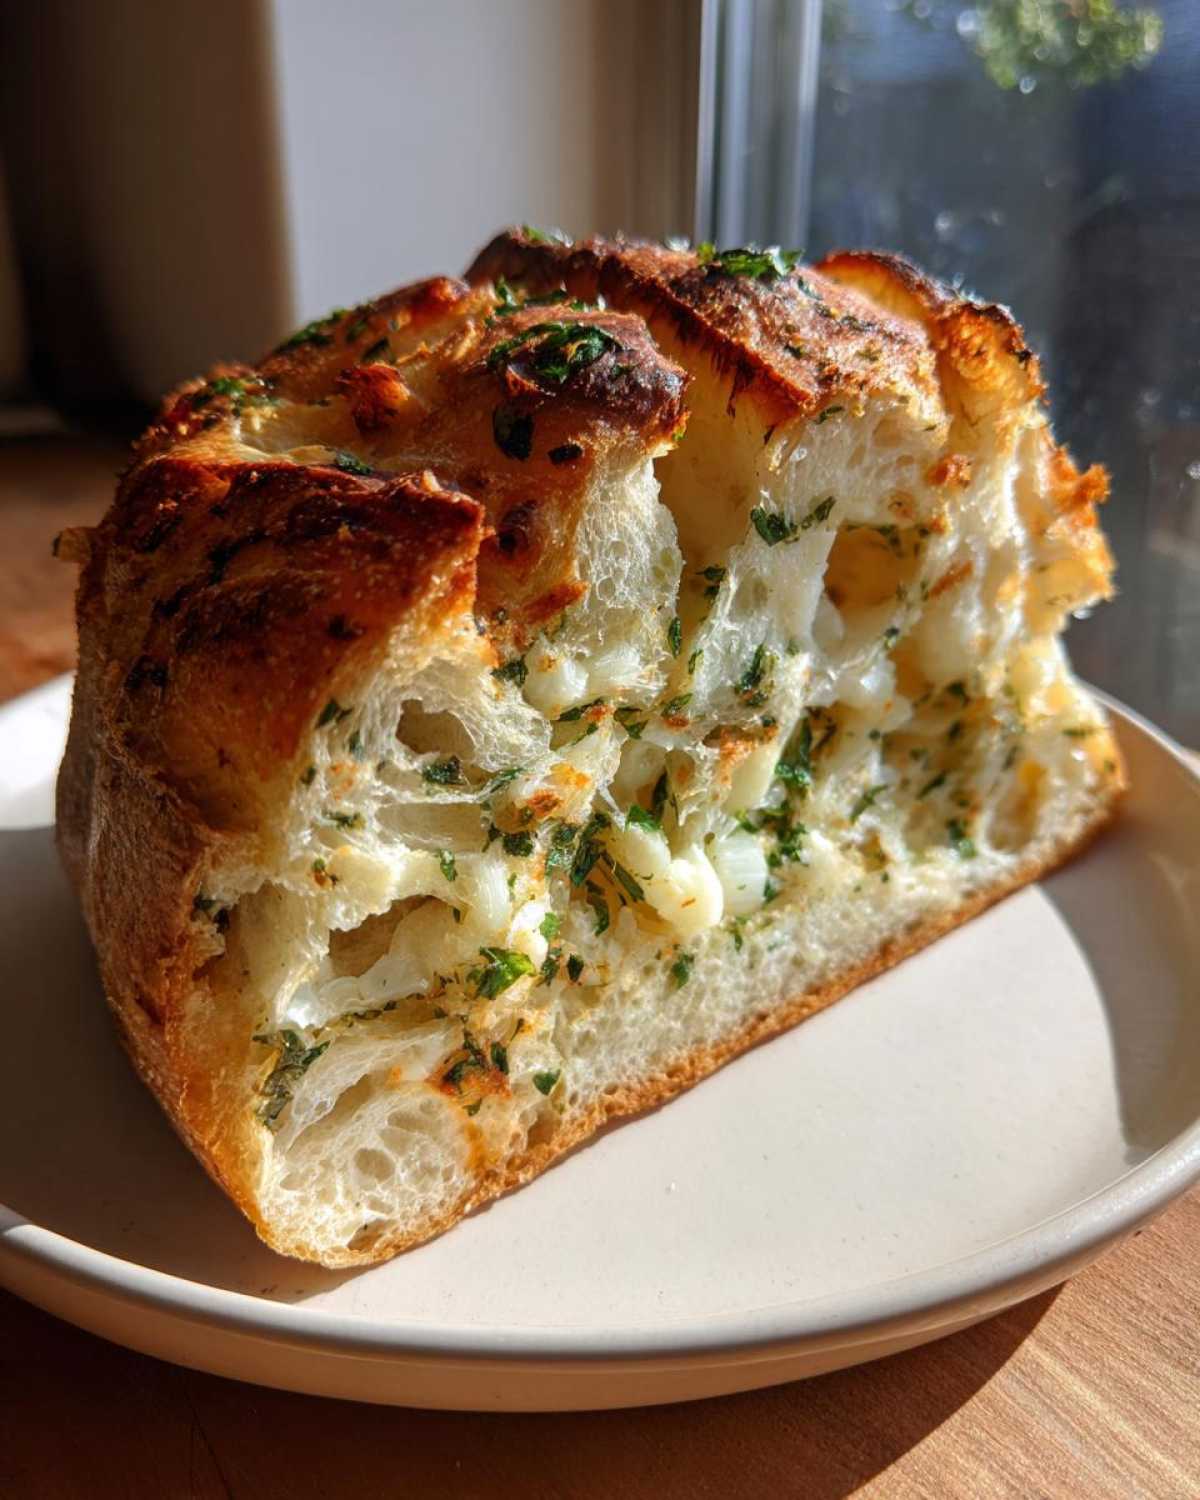
Tips for Success with Your Best Garlic Herb Cheese Bread
Even though this is such a forgiving recipe, I want your results to be absolutely stellar! You know me, I never want you to have cheese oozing everywhere that burns onto your pan—that’s just a cleanup nightmare. So, here are a few things I learned the hard way, which are captured right in the ‘Notes’ section.
First, for that fantastic crackly crust we associate with real artisan loaves, toss a shallow pan of water on the bottom rack while the oven preheats. That little bit of steam helps the crust set slowly. Also, if you want a softer top immediately after it comes out, just brush a tiny bit of melted butter over the crust while it’s still piping hot.
If you’re worried about the cheese running out during the bake, try chilling that twisted log in the pan for about 15 minutes in the fridge right before it goes into the oven. A cold filling is less likely to melt and run out too fast! And hey, if you can’t find fresh herbs, I often swap them out for one-and-a-half teaspoons of my favorite Italian seasoning blend. It works perfectly, just like in these pull apart cheesy garlic breadsticks!
Storage and Reheating for Your Soft Artisan Cheese Bread
Don’t you dare try to slice this bread while it’s hot! You have to pull it out of the pan right away and let it cool completely on a wire rack. That’s essential so the bottom doesn’t get soggy. Once it’s totally cool, wrap that gorgeous loaf up tightly in plastic wrap and then toss it into an airtight container. It’ll stay soft for about three days.
When you want to reheat it—and you will want to reheat it—I have the best trick. Wrap the slice or the whole loaf loosely in aluminum foil and stick it in a 300°F oven for about 10 minutes. That steam trapped in the foil warms the inside perfectly while refreshing that amazing, slightly crusty artisan exterior. It tastes brand new! For another cheesy treat, try my easy garlic breadsticks recipe.
Serving Suggestions for Swirled Garlic Herb and Cheese Bread
Now that you have this incredible loaf, what are you going to eat it with? Honestly, this bread is amazing all by itself; I grab a warm heel when I walk by the counter! But it truly shines next to something hearty. It’s the perfect sidekick for a big bowl of my creamy tomato basil soup—the cheesy swirl mixing with the tomato flavor? Divine.
It’s also fantastic for dipping into hearty stews or chili on a cold night. You don’t even need butter because you have so much flavor baked right in. Or, just slice it thick and serve it alongside your weeknight roast chicken for an easy, impressive dinner side!
Frequently Asked Questions About Bread Baking for Blissful Results
Baking bread, especially when you’re aiming for that artisan look, always brings up a few questions. Don’t sweat it! I’ve been there, and I’m happy to share what I’ve learned to keep your baking blissful and frustration-free. If you’re interested in skipping the kneading part altogether, I have a whole guide on no knead artisan bread with cheese that you might want to check out later!
Can I use dried herbs instead of fresh herbs in this **Swirled Bread Tutorial**?
Yes, totally! I love using fresh herbs when I have them because the flavor is so bright, but dried herbs absolutely work in a pinch. The rule of thumb is that dried herbs are much more concentrated. So, for that teaspoon of oregano the recipe calls for, you’d only need about one-third to one-half of a teaspoon if you’re using the dried version. If you substitute all the fresh ones, stick to about one-and-a-half teaspoons total of your favorite Italian blend.
What cheese works best for an **Easy Cheese Swirl Bread**?
Cheddar and Parmesan provide great flavor and structure, but feel free to experiment! If you want an even gooier melt, try swapping the cheddar for Monterey Jack or Gruyère. Gruyère adds a slightly nutty sweetness that plays really nicely with the garlic, and it melts like a dream. Just make sure whatever cheese you use is shredded fresh; pre-shredded cheese often has additives that keep it from melting as smoothly in your swirl.
How can I make this a **Cheesy Herb Bread Loaf** without kneading?
That’s a great question since kneading takes up time! You can definitely adapt this to a sort of no-knead style, but you need to adjust the rising time drastically. Mix the wet and dry ingredients like normal and let it sit in the oiled bowl, but instead of an hour and a half, let it ferment slowly in the fridge overnight, say 12 to 18 hours. This cold fermentation builds structure slowly, which mimics the gluten development from kneading, giving you that soft artisan cheese bread texture.
Nutritional Estimate for Your Swirled Garlic Herb and Cheese Bread
Now, I always tell folks not to worry about the numbers when you’re baking something this amazing—it’s honestly worth every delicious calorie! You deserve this blissful baking moment. But for all you detail-oriented bakers out there who like to keep track, here is the general breakdown for one slice of this incredible bread, based on the ingredients we used.
Keep in mind that portion size matters, especially when dealing with rich ingredients like cheddar cheese! Since we bake ours in a loaf pan, one slice is usually a good, satisfying portion.
- Serving Size: 1 slice
- Calories: 220
- Fat: 9g
- Saturated Fat: 5g
- Carbohydrates: 30g
- Protein: 8g
- Sugar: 1.5g
- Sodium: 350mg (This is why we watch the added salt in the dough if you’re using salty cheeses!)
Please remember, these nutrition stats are just my best estimate. If you use a low-fat cheese or swap out the butter for something else, those numbers will change, of course! If you have any questions about the recipe or want to share how your loaf turned out, please don’t hesitate to reach out via the contact page. Happy baking!
PrintSwirled Garlic Herb and Cheese Artisan Bread
Follow this recipe to bake a soft, flavorful artisan loaf featuring a distinct swirl of garlic, herbs, and cheese.
- Prep Time: 25 min
- Cook Time: 35 min
- Total Time: 165 min
- Yield: 1 loaf
- Category: Breads
- Method: Baking
- Cuisine: American
- Diet: Vegetarian
Ingredients
- 3 cups bread flour
- 1 teaspoon instant dry yeast
- 1.5 teaspoons salt
- 1 cup warm water (about 105-115°F)
- 2 tablespoons olive oil
- 1/2 cup shredded sharp cheddar cheese
- 1/4 cup grated Parmesan cheese
- 4 cloves garlic, minced
- 2 tablespoons fresh parsley, chopped
- 1 tablespoon fresh chives, snipped
- 1 teaspoon dried oregano
- 2 tablespoons unsalted butter, melted
Instructions
- Combine flour, yeast, and salt in a large bowl. Add warm water and olive oil. Mix until a shaggy dough forms.
- Turn the dough onto a lightly floured surface and knead for 8 to 10 minutes until smooth and elastic.
- Place the dough in a lightly oiled bowl, turning to coat. Cover and let rise in a warm place for 1 to 1.5 hours, or until doubled in size.
- While the dough rises, prepare the filling: Mix the shredded cheddar, Parmesan, minced garlic, parsley, chives, and oregano in a small bowl.
- Gently punch down the risen dough. Turn it out onto a lightly floured surface and roll or pat it into a large rectangle, about 10 by 16 inches.
- Brush the melted butter evenly over the surface of the dough. Sprinkle the cheese and herb mixture over the buttered surface, leaving a 1-inch border along one long edge bare.
- Starting from the long edge opposite the bare border, tightly roll the dough into a log. Pinch the seam closed firmly.
- Gently stretch the log slightly and then carefully twist it into a loose spiral or shape it into a loaf to fit a standard 9×5 inch loaf pan lined with parchment paper.
- Cover the loaf pan loosely and let it proof for 30 to 45 minutes, or until puffy. Preheat your oven to 375°F (190°C) during the last 15 minutes of proofing.
- Bake for 30 to 35 minutes, or until the crust is golden brown and the internal temperature reaches 200°F (93°C).
- Remove the bread from the pan immediately and cool on a wire rack before slicing.
Notes
- For a better crust, place a shallow pan of water on the bottom rack of the oven while baking.
- If you prefer a softer crust, brush the top of the loaf with a little extra melted butter immediately after removing it from the oven.
- You can substitute the fresh herbs with 1.5 teaspoons of your favorite dried Italian seasoning blend.
Nutrition
- Serving Size: 1 slice
- Calories: 220
- Sugar: 1.5
- Sodium: 350
- Fat: 9
- Saturated Fat: 5
- Unsaturated Fat: 4
- Trans Fat: 0.1
- Carbohydrates: 30
- Fiber: 2
- Protein: 8
- Cholesterol: 25
